• Feed RSS
Showing posts with label WordPress Themes. Show all posts

How to Include JavaScript and CSS in Your WordPress Themes and Plugins

"Knowing the proper way to include JavaScript and CSS files in your WordPress themes and plugins is very important for designers and developers. If you don’t adhere to best practices, you run the risk of conflicting with other themes and plugins, and potentially creating problems that could have been easily avoided. This article is intended as a reference for playing nicely with others.


Best Practices Make Everyone Happy

If you’ve ever developed a theme or plugin for WordPress, or worked with one that someone else has created, you’ve probably come across several different methods for including JavaScript and CSS. While there are several methods that may appear to work in a specific set of circumstances, there is one primary method recommended in the WordPress Codex. This preferred way will ensure your theme or plugin works in all cases, assuming others also code the correct way.
There’s also some misunderstanding about what exactly the Codex says about this, which I will help clarify.

What’s in the Box?

When you download WordPress, a selection of common JavaScript libraries are already included that you can use for your JavaScript development. A list of included libraries can be found in the WordPress Codex wp_enqueue_script article.
All those libraries are included, but by default WordPress only loads the ones it needs to, and only when it needs them in the admin. If you write JavaScript that utilises one of these libraries, you need to tell WordPress that your script needs the library loaded first.

Telling WordPress About Your Script and What It Needs

Some of the things to think about when you’re coding JavaScript for WordPress are:
  • Is there an included library I can use?
  • Can I use the version that’s included?
  • Do I need to load my script in the front-end and in the admin?
  • Which front-end and admin pages do I need to load my script on?
Answering these questions helps you know what you need to do to register and load your script. This is done using a WordPress function called wp_register_script, and here is its usage according to the WordPress Codex:
wp_register_script( $handle, $src, $deps, $ver, $in_footer );
So what are these variables and do we need them every time? (This is covered on the Codex page, so I’ll be brief and use plain English)
  • $handle – what you’ll use to refer to this particular script wherever you might need to enqueue it, and you have to include this variable at the very least
  • $src – the path to the source file within your plugin or theme
  • $deps – an array containing the $handle for any other scripts your script needs to run (i.e. a dependency)
  • $ver – the version number for your script, which can be used for cache-busting. By default, WordPress will use its own version number as the version number for your script
  • $in_footer – do you want your script to load in the footer? Set this to true or false. It is false by default, so it loads in the header where wp_head() is, and if you specify true it will load where wp_footer() appears in the theme

What Is “Cache-Busting”?

Browsers remember what scripts and stylesheets they’ve downloaded for a particular site based on the URL of the script and stylesheet. If you change the URL, even just by adding a querystring, the browser assumes it’s a new file and downloads it.

Ok, So Let’s Try Some Examples

Here is the most basic example for loading a custom script:
function wptuts_scripts_basic()
{
 // Register the script like this for a plugin:
 wp_register_script( 'custom-script', plugins_url( '/js/custom-script.js', __FILE__ ) );
 // or
 // Register the script like this for a theme:
 wp_register_script( 'custom-script', get_template_directory_uri() . '/js/custom-script.js' );

 // For either a plugin or a theme, you can then enqueue the script:
 wp_enqueue_script( 'custom-script' );
}
add_action( 'wp_enqueue_scripts', 'wptuts_scripts_basic' );
First, we register the script, so WordPress knows what we’re talking about. The way to find the path for our JavaScript file is different whether we’re coding a plugin or a theme, so I’ve included examples of both above. Then we queue it up to be added into the HTML for the page when it’s generated, by default in the <head> where the wp_head() is in the theme.
The output we get from that basic example is:
<script type="text/javascript" src="http://yourdomain.com/wp-content/plugins/yourplugin/js/custom-script.js?ver=3.3.1"></script>
Now if your script relies on one of the libraries included with WordPress, like jQuery, you can make a very simple change to the code:
function wptuts_scripts_with_jquery()
{
 // Register the script like this for a plugin:
 wp_register_script( 'custom-script', plugins_url( '/js/custom-script.js', __FILE__ ), array( 'jquery' ) );
 // or
 // Register the script like this for a theme:
 wp_register_script( 'custom-script', get_template_directory_uri() . '/js/custom-script.js', array( 'jquery' ) );

 // For either a plugin or a theme, you can then enqueue the script:
 wp_enqueue_script( 'custom-script' );
}
add_action( 'wp_enqueue_scripts', 'wptuts_scripts_with_jquery' );
Note: By default, jQuery is loaded with noConflict to prevent clashes with other libraries (such as Prototype). See the noConflict section of the Codex if you don’t know how to deal with that.
See what I did there? You just add an array with the ‘jquery’ handle as a dependency. It uses an array here, because your script could have multiple dependencies. If your script uses jQuery and jQuery UI, you’d add jQuery UI to your dependency array, like array( 'jquery', 'jquery-ui-core' )
So now the output has changed, and we can see that jQuery has also been added into the <head> of the page:
<script type='text/javascript' src='http://yourdomain.com/wp-includes/js/jquery/jquery.js?ver=1.7.1'></script>
<script type='text/javascript' src='http://yourdomain.com/wp-content/plugins/yourplugin/js/custom-script.js?ver=3.3.1'></script>
Let’s try an example with all the bells and whistles:
function wptuts_scripts_with_the_lot()
{
 // Register the script like this for a plugin:
 wp_register_script( 'custom-script', plugins_url( '/js/custom-script.js', __FILE__ ), array( 'jquery', 'jquery-ui-core' ), '20120208', true );
 // or
 // Register the script like this for a theme:
 wp_register_script( 'custom-script', get_template_directory_uri() . '/js/custom-script.js', array( 'jquery', 'jquery-ui-core' ), '20120208', true );

 // For either a plugin or a theme, you can then enqueue the script:
 wp_enqueue_script( 'custom-script' );
}
add_action( 'wp_enqueue_scripts', 'wptuts_scripts_with_the_lot' );
Ok, so I’ve now added a version and specified that this script needs to be loaded in the footer. For the version number, I’ve chosen to use today’s date because it’s easy to keep track of, but you can use any version numbering you like. The output for this one is slightly different too, jQuery is output in the <head> and our script along with jQuery UI is output just before </body>, like this:
<head>
...
<script type='text/javascript' src='http://yourdomain.com/wp-includes/js/jquery/jquery.js?ver=1.7.1'></script>
...
</head>
<body>
...
<script type='text/javascript' src='http://yourdomain.com/wp-includes/js/jquery/ui/jquery.ui.core.min.js?ver=1.8.16'></script>
<script type='text/javascript' src='http://yourdomain.com/wp-content/plugins/yourplugin/js/custom-script.js?ver=20120208'></script>
</body>

Getting Your Priorities Straight

Some people may prefer not to use the proper enqueuing methods because they feel they have less control over the order in which scripts are loaded. For example, in a theme that uses modernizr, the theme author might want to make sure modernizr is loaded early on.
Something I haven’t mentioned earlier is more detail on how the add_action function works, as this is where we can exercise a little influence over the order of things. Here’s the usage of the function according to the WordPress Codex page:
add_action( $tag, $function_to_add, $priority, $accepted_args );
Note that often, and up until now in this article, only the $tag and $function_to_add parameters are used. The $priority parameter defaults to 10, and the $accepted_args parameter defaults to 1. If we want our scripts or styles to be enqueued earlier, we simply lower the value for $priority from the default. For example:
function wptuts_scripts_important()
{
 // Register the script like this for a plugin:
 wp_register_script( 'custom-script', plugins_url( '/js/custom-script.js', __FILE__ ) );
 // or
 // Register the script like this for a theme:
 wp_register_script( 'custom-script', get_template_directory_uri() . '/js/custom-script.js' );

 // For either a plugin or a theme, you can then enqueue the script:
 wp_enqueue_script( 'custom-script' );
}
add_action( 'wp_enqueue_scripts', 'wptuts_scripts_important', 5 );
The output will be the same as we’ve seen previously, but it will occur earlier in the HTML document.

Overriding Default Libraries and Using Content Delivery Networks

There may be times when you want to use a different version of a library that’s included with WordPress. Perhaps you want to use a cutting-edge version or you don’t want to wait for the next release of WordPress before using the latest stable version of jQuery. Another reason might be that you want to take advantage of Google’s CDN version of a library.
It’s important to note that this should only be done on plugins or themes used on sites that you will be personally maintaining. Any plugins or themes that you release for public use should use the libraries included with WordPress.
“Why?!”, I hear you ask. For the simple reason that you don’t control those sites. You don’t know what other plugins and themes might be used there, and you don’t know how often they will update your plugin or theme. Using the libraries packaged with WordPress is the safest option.
Having said that, if you are wanting to do this on a site you control, here’s how it’s done:
function wptuts_scripts_load_cdn()
{
 // Deregister the included library
 wp_deregister_script( 'jquery' );

 // Register the library again from Google's CDN
 wp_register_script( 'jquery', 'http://ajax.googleapis.com/ajax/libs/jquery/1.7.1/jquery.min.js', array(), null, false );

 // Register the script like this for a plugin:
 wp_register_script( 'custom-script', plugins_url( '/js/custom-script.js', __FILE__ ), array( 'jquery' ) );
 // or
 // Register the script like this for a theme:
 wp_register_script( 'custom-script', get_template_directory_uri() . '/js/custom-script.js', array( 'jquery' ) );

 // For either a plugin or a theme, you can then enqueue the script:
 wp_enqueue_script( 'custom-script' );
}
add_action( 'wp_enqueue_scripts', 'wptuts_scripts_load_cdn' );
So first of all, I deregister the included version of the library, otherwise conflicts between different versions could be introduced. Then register the alternate version, using the same handle, and I’ve chosen to specify null as the version (it’s already in the URL!) and specified not in the footer. The rest of our code is the same, because we were depending on whatever script used the ‘jquery’ handle. The output we get now looks like:
<script type='text/javascript' src='http://ajax.googleapis.com/ajax/libs/jquery/1.7.1/jquery.min.js'></script>
<script type='text/javascript' src='http://yourdomain.com/wp-content/plugins/yourplugin/js/custom-script.js?ver=3.3.1'></script>
Note: One of the reasons this is a bad idea to do in a plugin or theme for public release, is that all other plugins and themes used on this site will now have to use this version of jQuery. Also, the newly registered version of jQuery doesn’t have noConflict set, so if any other plugin or theme scripts use Prototype for example, this will break things.

Don’t Be Greedy

So far we haven’t mentioned anything about how to do all this in the admin, only on the front-end. The primary difference is what action to use. Instead of add_action( 'wp_enqueue_scripts', 'wptuts_scripts_basic' ); which we use for the front-end, the action for the admin is add_action( 'admin_enqueue_scripts', 'wptuts_scripts_basic' );
Something that’s important to do for both the front-end and admin is be selective about which pages you load your scripts on. If your plugin or theme has a script that only does something on one front-end or admin page, such as the theme’s options page, or maybe a page with a specific widget, you only need to load your script on that page. No point clogging things up and loading scripts on pages where they’re not being used!
There’s a great example in the WordPress Codex on how to load scripts only on plugin pages. Because plugins and themes can vary a lot in how they’re written, I won’t go into specifics here on how to be choosy about which pages you load scripts on, but it was important to mention so you’re aware of it when you’re coding.

That’s Scripts, Now Styles

The process for styles is almost exactly the same as the process for scripts. It is done using a WordPress function called wp_register_style, and here is its usage according to the WordPress Codex:
wp_register_style( $handle, $src, $deps, $ver, $media );
Note that the only difference there between wp_register_script and wp_register_style is that instead of an $in_footer parameter, we have a $media parameter. This parameter can be set to any of the following: 'all', 'screen', 'handheld', and 'print', or any other W3C recognised media type.
So an example of how you might enqueue a style would be:
function wptuts_styles_with_the_lot()
{
 // Register the style like this for a plugin:
 wp_register_style( 'custom-style', plugins_url( '/css/custom-style.css', __FILE__ ), array(), '20120208', 'all' );
 // or
 // Register the style like this for a theme:
 wp_register_style( 'custom-style', get_template_directory_uri() . '/css/custom-style.css', array(), '20120208', 'all' );

 // For either a plugin or a theme, you can then enqueue the style:
 wp_enqueue_style( 'custom-style' );
}
add_action( 'wp_enqueue_scripts', 'wptuts_styles_with_the_lot' );
This is a fairly comprehensive example, utilising most of the parameters, and the output it produces looks like:
<link rel='stylesheet' id='custom-style-css'  href='http://yourdomain.com/wp-content/plugins/yourplugin/css/custom-style.css?ver=20120208' type='text/css' media='all' />

So, Why Doesn’t Everyone Already Do Things This Way?

Good question, and the other question I guess you might ask is, “What makes you think this is the ‘right’ way and not just your preference?”. Essentially the answer is that this is the approach recommended by WordPress. It ensures that any combination of plugins and themes should be able to work together happily and without doubling up.
I’ve seen a few themes and frameworks around the place that use <script></script> and <link /> tags in their header.php, and even footer.php, files to load the scripts and styles for the theme itself. There’s really no reason to do things this way. As I’ve demonstrated above, it’s perfectly possible to prioritise scripts and styles and nominate whether they load in the header or footer from the comfort and safety of your functions.php. The benefit being that your theme / framework will work with a wider range of other plugins / child themes.
One example was loading jQuery using the <script></script> tags, which might appear to work nicely, but this can actually cause jQuery to be loaded twice! Loading jQuery in this way will not stop WordPress from loading its version of jQuery for other plugins, as WordPress’ version is in noConflict mode by default, and a plugin may specify it as a dependancy. So now you’ll have jQuery working for both noConflict mode and $, and also probably break any plugin that uses the Prototype library.

Conclusion

WordPress is a fantastic system, and it has been developed with a lot of thought. If there’s a mechanism made available to do something, it’s often a good idea to use it. When developing your plugins and themes, try to remember to code thoughtfully and for playing nicely with others.
What do you think about the use of wp_enqueue_script and its associated functions and actions? Do you know of any examples where it’s being done incorrectly? Do you know of any reason not to follow the advice above?"
read more

The WordPress Theme Files Execution Hierarchy

"This article will show the WordPress theme file execution hierarchy. In short, we’ll look at which files get served up when you load a page in WordPress. You might already know that detail post is served by single.php and detail page is served by page.php, but WordPress will search for different files depending on a variety of factors, so we’ll be looking at how this works!

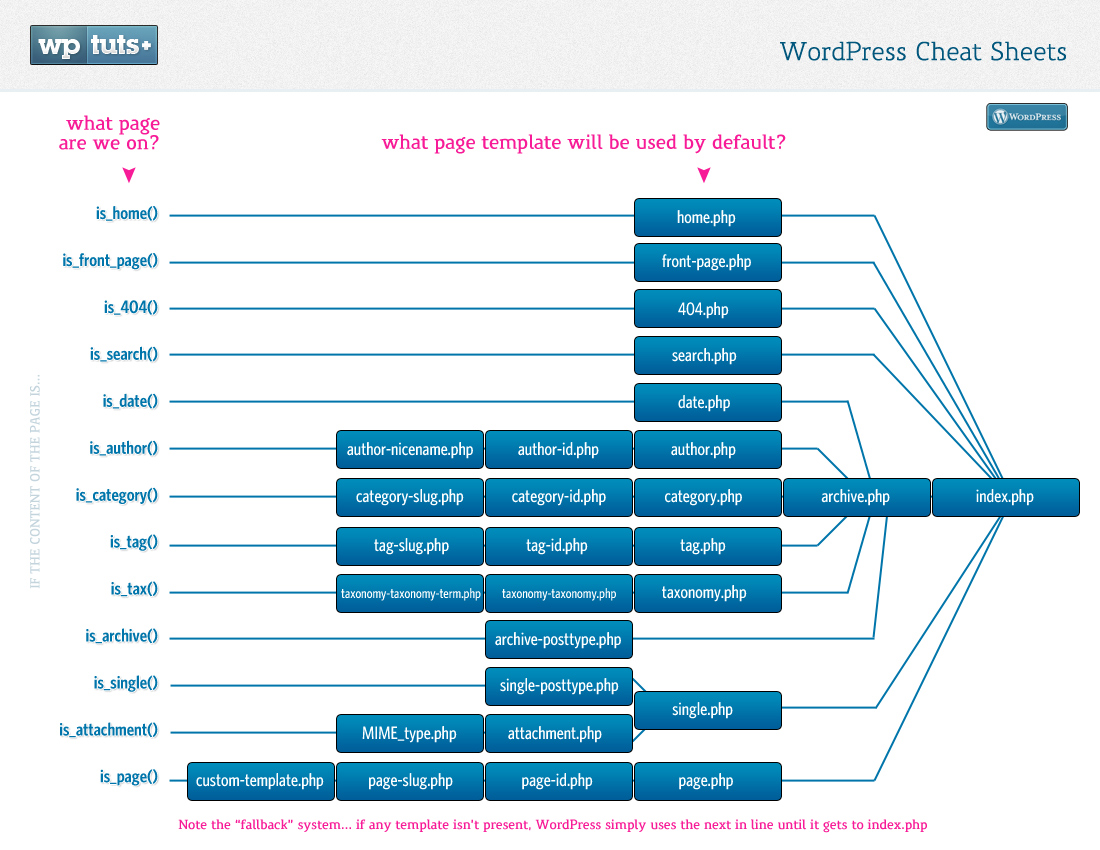
First thing we should establish is this: without index.php and style.css your theme is no longer a valid WordPress theme… so it stands to reason that if all you have is those two files, each page will you try to load will be served up by index.php. Take a quick peek at this “cheatsheet” to see what I’m referring to:
Notice that the flow for each page types will end up with the index.php. That is the reason why index.php is required file for the WordPress theme. If we are missing any other files in WordPress theme (for instance, if there is no “search.php” file included in the theme), then index.php will be served instead.
Now let’s look at some details about the execution order. I am going to show you the flow in which WordPress will search for files in your active theme folder. I hope this will be useful when you create a WordPress theme from now on:
I will go through each type of files one by one and will show the execution hierarchy for the same.

Home Page

This is the first and most important page of any website. So WordPress has provided the scope to customize the page. Let’s have a look at the file hierarchy for the home page.
  1. front-page.php
  2. home.php
  3. index.php
While serving the home page, WordPress will search for front-page.php. If that is not found, it will use home.php. If home.php exists, it’ll use that. If not, it will simply default to using index.php.

WordPress Post Detail

  1. single-[post-type].php
  2. single.php
  3. index.php
WordPress can have as many post types as we need. So this will be easier to get different design for all/some post types. By default ‘post’ is the main and default post type of the WordPress.
So for example, if your custom post type is product then it will be single-product.php
To know more how to add new post types in WordPress you can refer to this link.

WordPress Page Detail

  1. [custom-template].php
  2. page-[slug].php
  3. page-[id].php
  4. page.php
  5. index.php
Just the same as with post types, we can have a different page layout using the custom page template. So WordPress first searches for the files of the selected Page template (if it exists).
If none are found, it will search for the file with the slug of the current page. Basically, if the slug is aboutus, then it will search for the file page-aboutus.php in active theme folder.
WordPress will search for the files with the ID just like searching for the files with slug.

Category Page

  1. category-[slug].php
  2. category-[id].php
  3. category.php
  4. archive.php
  5. index.php
From the above flow, you can understand that how you can have different templates used for the category page. For instance, you could have a custom page based on slug and id, and then use a default “category.php” file for the rest of your categories..

Tag Page

  1. tag-[slug].php
  2. tag-[id].php
  3. tag.php
  4. archive.php
  5. index.php
This will be same case as the category. You can have different pages for tag slug and tag id also.

Taxonomy Page

  1. taxonomy-[tax]-[term].php
  2. taxonomy-[tax].php
  3. taxonomy.php
  4. archive.php
  5. index.php
Here goes the different file hierarchy for the taxonomy Pages.

Author Page

  1. author-[author-nicname].php
  2. author-[author-id].php
  3. author.php
  4. archive.php
  5. index.php
Here you come to know that you can have different designs based on users also. Same as category and tags we can have different files based on slug and ID of the user.

Attachment Page

  1. [mime-type].php
  2. attachment.php
  3. single.php
  4. index.php
Here you can see that you can have different page layout for different types of attachment. These can be differentiate from the mime type of the attached file.

Date Page

  1. date.php
  2. archive.php
  3. index.php
For the date specific layout we can create date.php in theme folder. Then the flow goes to archive.php and then at last index.php.

Archive Page

  1. archive.php
  2. index.php
As we come downwards to the type of files, number of files are reduced in the hierarchy. So this are the basic or we can say most used files in any WordPress themes.

Search Page

  1. search.php
  2. index.php
You can customize your search result with the search.php first. If search.php is not available then index.php will be served.

404 Page

  1. 404.php
  2. index.php
In the case of page or post not found, WordPress will search for 404.php then if not found then it will serve index.php.

Conclusion

You can obviously use this information in a wide range of ways to load up custom templates for various pages… In many cases, even if you’re using an existing theme, you can get a custom solution without modifying the existing files. You will just need to create new file and give it a new name using the information above.
Share your thoughts and any additional file which can be included above hierarchy."
read more

Changing the Fonts of Your WordPress – Part 2: Theme Integration

"WordPress continually proves itself time, time, and again that it has very few limitations, and is rapidly pushing itself to being, if not the best, but certainly the most versatile CMS available. Out of the box it is certainly not perfect, but you can change it however you want. In the previous tutorial, we went over how to add fonts to your theme via a plugin. Now, we’ll integrate font options directly into the theme’s options.

Again, we will be using Google Web Fonts because it’s easy, fast and, most importantly, free. With Google Web Fonts there is no need to worry about using the proper font formats, everything is handled by Google.

Step 1 Add a Settings Page

First, make sure you have a theme options page. If you don’t know how to make one, I suggest reading Create a Settings Page by Jarkko Laine. In this tutorial, I’m going to assume that you know the basics and build from there. So let’s go into our functions.php file and add a simple typography settings page:
add_action( 'admin_menu', 'my_fonts' );
function my_fonts() {
   add_theme_page( 'Fonts', 'Fonts', 'edit_theme_options', 'fonts', 'fonts' );
}

Step 2 Add the Form

Now that we’ve added a settings page, we have to code the callback function we’re using to render the page itself, which would be typography. All we need is a basic form that shows a dropdown of all the fonts that users can choose from and allow them to change it.
function fonts() {
?>
   <div class="wrap">
       <div><br></div>
       <h2>Fonts</h2>

       <form method="post" action="options.php">
           <?php wp_nonce_field( 'update-fonts' ); ?>
           <?php settings_fields( 'fonts' ); ?>
           <?php do_settings_sections( 'fonts' ); ?>
           <?php submit_button(); ?>
       </form>
   </div>
<?php
}
Okay, we’ve added our fonts form to the page, just some basic settings_fields, but WordPress has no idea. Now we use the admin_init action to initialize our settings and add the callbacks:
add_action( 'admin_init', 'font_init' );
function font_init() {
   register_setting( 'fonts', 'fonts' );

   // Settings fields and sections
   add_settings_section( 'font_section', 'Typography Options', 'font_description', 'fonts' );
   add_settings_field( 'body-font', 'Body Font', 'body_font_field', 'fonts', 'font_section' );
}
All we’re doing here is creating a settings section for our fonts forms and the field for a single font, you can add more if you want, in this tutorial I’m only going over the body tag. Just add more by copying that field and replace body with something else like h1. We also now have a setting called fonts, where we will be storing our font data/options. Let’s go ahead and define the callback functions, font_description and body_font_field.
function font_description() {
   echo 'Use the form below to change fonts of your theme.';
}
function body_font_field() {
   $options = (array) get_option( 'fonts' );
   $fonts = get_fonts();

   if ( isset( $options['body-font'] ) )
       $current = $options['body-font'];
   else
    $current = 'arial';

   ?>
       <select name="fonts[body-font]">
       <?php foreach( $fonts as $key => $font ): ?>
           <option <?php if($key == $current) echo "SELECTED"; ?> value="<?php echo $key; ?>"><?php echo $font['name']; ?></option>
       <?php endforeach; ?>
       </select>
   <?php
}
We have to get the font options that we just made in the init action and the fonts we have available, get_fonts(). Set the current font in the form to whatever is in the options, otherwise it’ll default to Arial. Then, use a foreach loop to go through our array of available fonts. You can also add a description or make it a brief tutorial on how to use it.

Step 3 Getting the Fonts

As you noticed in the previous snippet of code, we need to define the get_fonts() function to retrieve the fonts we need. You can either include the Google Webfonts or just stick with the basic CSS fonts. We’ll just use an array to store all of the fonts, and then distinguish them by their font name. You can do this with any fonts, but for the purposes of this tutorial, we’ll just be using Arial, Ubuntu and Lobster.
function get_fonts() {
   $fonts = array(
       'arial' => array(
           'name' => 'Arial',
           'font' => '',
           'css' => "font-family: Arial, sans-serif;"
       ),
       'ubuntu' => array(
           'name' => 'Ubuntu',
           'font' => '@import url(http://fonts.googleapis.com/css?family=Ubuntu);',
           'css' => "font-family: 'Ubuntu', sans-serif;"
       ),
       'lobster' => array(
           'name' => 'Lobster',
           'font' => '@import url(http://fonts.googleapis.com/css?family=Lobster);',
           'css' => "font-family: 'Lobster', cursive;"
       )
   );

   return apply_filters( 'get_fonts', $fonts );
}
Note: You are not limited to only using Google Webfonts. If you want to use a custom font that is hosted on your FTP or on Amazon S3, then replace @import with @font-face and change the url to where your font file is hosted.

Step 4 Add the CSS

Before you apply any of fonts in your CSS, you should remove all instances of Google Webfonts of in your CSS files. This way when we make the import call to get the Ubuntu font, we’re not wasting an extra 100 ms getting the Lobster font too.
Now that we have all of our fonts set, we have to create a wp_head action that adds the styling to your WordPress. If you are using this script for multiple tags, simply duplicate the code, just changing “body” to whichever tag you’re editing.
add_action( 'wp_head', 'font_head' );
function font_head() {
   $options = (array) get_option( 'fonts' );
   $fonts = get_fonts();
   $body_key = 'arial';

   if ( isset( $options['body-font'] ) )
       $body_key = $options['body-font'];

   if ( isset( $fonts[ $body_key ] ) ) {
       $body_font = $fonts[ $body_key ];

       print_ '<style>';
       echo $body_font['font'];
       echo 'body { ' . $body_font['css'] . ' } ';
       echo '</style>';
   }
}
We start by checking if a font is chosen in our options, if not, then set the font to our default, Arial. Now we print out the style tag, the import statement and our CSS code.

What You Get in the End

This is what you should’ve ended up with:
The final font options page.

Full Source Code

For anyone who is having some trouble putting it all together. Here is the full source code, ready to just paste into the functions.php file:
<?
// Changing the Fonts of Your WordPress - Part 2: Theme Integration
// Tutorial on WP Tuts
// by Fouad Matin
// Please credit this tutorial, by putting a link back to http://wp.tutsplus.com/tutorials/changing-the-fonts-of-your-wordpress-site-part-2-theme-integration/
// Enjoy!
add_action( 'admin_menu', 'my_fonts' );
function my_fonts() {
   add_theme_page( 'Fonts', 'Fonts', 'edit_theme_options', 'fonts', 'fonts' );
}
function fonts() {
?>
   <div class="wrap">
       <div><br></div>
       <h2>Fonts</h2>

       <form method="post" action="options.php">
           <?php wp_nonce_field( 'update-fonts' ); ?>
           <?php settings_fields( 'fonts' ); ?>
           <?php do_settings_sections( 'fonts' ); ?>
           <?php submit_button(); ?>
           </form>
       <img style="float:right; border:0;" src="http://i.imgur.com/1qqJG.png" />
   </div>
<?php
}

add_action( 'admin_init', 'my_register_admin_settings' );
function my_register_admin_settings() {
   register_setting( 'fonts', 'fonts' );
   add_settings_section( 'font_section', 'Font Options', 'font_description', 'fonts' );
   add_settings_field( 'body-font', 'Body Font', 'body_font_field', 'fonts', 'font_section' );
   add_settings_field( 'h1-font', 'Header 1 Font', 'h1_font_field', 'fonts', 'font_section' );
}
function font_description() {
   echo 'Use the form below to change fonts of your theme.';
}
function get_fonts() {
   $fonts = array(
       'arial' => array(
           'name' => 'Arial',
           'font' => '',
           'css' => "font-family: Arial, sans-serif;"
       ),
       'ubuntu' => array(
           'name' => 'Ubuntu',
           'font' => '@import url(http://fonts.googleapis.com/css?family=Ubuntu);',
           'css' => "font-family: 'Ubuntu', sans-serif;"
       ),
       'lobster' => array(
           'name' => 'Lobster',
           'font' => '@import url(http://fonts.googleapis.com/css?family=Lobster);',
           'css' => "font-family: 'Lobster', cursive;"
       )
   );

   return apply_filters( 'get_fonts', $fonts );
}
function body_font_field() {
   $options = (array) get_option( 'fonts' );
   $fonts = get_fonts();
   $current = 'arial';

   if ( isset( $options['body-font'] ) )
       $current = $options['body-font'];
   ?>
       <select name="fonts[body-font]">
       <?php foreach( $fonts as $key => $font ): ?>
           <option <?php if($key == $current) echo "SELECTED"; ?> value="<?php echo $key; ?>"><?php echo $font['name']; ?></option>
       <?php endforeach; ?>
       </select>
   <?php
}
function h1_font_field() {
   $options = (array) get_option( 'fonts' );
   $fonts = get_fonts();
   $current = 'arial';

   if ( isset( $options['h1-font'] ) )
       $current = $options['h1-font'];

   ?>
       <select name="fonts[h1-font]">
       <?php foreach( $fonts as $key => $font ): ?>
           <option <?php if($key == $current) echo "SELECTED"; ?> value="<?php echo $key; ?>"><?php echo $font['name']; ?></option>
       <?php endforeach; ?>
       </select>
   <?php
}

add_action( 'wp_head', 'font_head' );
function font_head() {
   $options = (array) get_option( 'fonts' );
   $fonts = get_fonts();
   $body_key = 'arial';

   if ( isset( $options['body-font'] ) )
       $body_key = $options['body-font'];

   if ( isset( $fonts[ $body_key ] ) ) {
       $body_font = $fonts[ $body_key ];

       echo '<style>';
       echo $body_font['font'];
       echo 'body  { ' . $body_font['css'] . ' } ';
       echo '</style>';
   }

   $h1_key = 'arial';

   if ( isset( $options['h1-font'] ) )
       $h1_key = $options['h1-font'];

   if ( isset( $fonts[ $h1_key ] ) ) {
       $h1_key = $fonts[ $h1_key ];

       echo '<style>';
       echo $h1_key['font'];
       echo 'h1  { ' . $h1_key['css'] . ' } ';
       echo '</style>';
   }
}
?>

Conclusion

By now, you should know how to add a font settings page, get fonts from the Google Webfonts directory, and apply those fonts to the theme. If you have any additional suggestions or questions regarding custom typography, feel free to leave a comment!"
read more

5 Cardinal Sins of WordPress Theme Development

"We talk alot on this site about tips and tricks for getting what you want out of WordPress… but today we’re going to take a step back from the technical stuff to look at some practices, bad habits, and coding faux pas that would be better left in our past. So, forgive the heavy-handed post title (haha!), we’re about talk bring up 5 surprisingly common practices that are blemishes on the platform.
Two of the nicest things about working on WordPress Themes is that fact that we get to target in an incredibly flexible environment (that is, the web) and we have solid documentation to help guide us through the process (that is, the WordPress Codex).
After all, if the theme works, does clean, maintainable code matter?
But there’s a danger that exists in theme development, too: we can completely forgo best practices for working with the web and completely ignore the documentation. Specifically, there’s nothing that forces us to write clean, maintainable code. After all, if the theme works, does clean, maintainable code matter? Furthermore, why go through the effort of following WordPress best practices if the theme appears to work fine?
Weak arguments, right? I don’t know – the more I’ve worked in the WordPress space, the more I’ve been surprised which how much bad code actually exists. As such, I thought it would be fun to outline five cardinal sins of WordPress Theme Development.

Ignoring The WordPress Codex

As with most programming languages, frameworks, or libraries, WordPress includes a massive amount of documentation. The WordPress Codex is arguably the best resource that developers have for working with WordPress. After all, it provides documentation for the majority of the application.
But the WordPress Codex often goes above and beyond standard documentation – in addition to supplying function names and parameters, the Codex provides rich examples for how to use many of the API functions. After reading any given article, you’d be hard pressed not to find a clear example of how to the function in question.
In addition to the API, the Codex also features a variety of other articles related to development:
Whenever I’m working on a theme or a plugin and I hit a point where I think I need to write a custom function to achieve something, I’ll search the Codex first. The majority of the time, a function is already available that helps with what I need.
Every serious WordPress Developer should regularly use the Codex when working on any WordPress-related development project. Ignoring it can often lead to creative, but untested and unstable solutions that can cause more harm down the line than good.

Not Localizing Your Theme

A few years ago, if you were to ask me my thoughts on localizing a WordPress Theme, I would’ve said that it would depend on the marketing that you’re targeting. That is, if you think the audience is going to use a language other than your own, definitely do it; otherwise, there’s nothing wrong with leaving the theme translated in your own language.
Fast forward a few years and WordPress’ is powering millions of sites on the Internet. Sites all over the world are using the application to drive their site’s content. On top of that, it’s becoming increasingly common for developers to supplement their income or even make a living off of working with WordPress.
Because WordPress has been so widely adopted and because the Internet has made the world so flat, the market for any given theme is not limited to a single language. On top of that, WordPress makes it so incredibly easy to localize your theme and it requires so little extra effort, that I now argue that localizing your theme is no longer optional.
For the most part, you need to understand three things:
Other than that, there’s very little extra overhead that comes with localizing a theme; however, I do recommend that you take a look at the Translating WordPress article in the Codex. It outlines the three things above and goes more in-depth on each.

Theme File Disorganization

Developers talk a lot about code organization and maintainability. Personally, I think that it’s much easier to give lip service to those principles than actually follow through with them, but they are important.
The thing is, they look different for each project type. Some applications are written in a single language and run on a desktop, some applications use two languages and run on a mobile device, other projects – such as WordPress Themes – can use anywhere from three (HTML, CSS, and PHP) to four (through JavaScript) languages. Additionally, certain components of the theme run on the client side, some run on the server side, some community directly with WordPress, and others communicate directly with the database.
To say that there’s potential to sacrifice maintainability is an understatement.
But it doesn’t have to be problematic as there are certain standards that WordPress suggests for organizing your theme files. Specifically, the Codex details how to organize your PHP template files, your stylesheets, JavaScript sources, and images.
  • Template File Checklist provides a listing of the files that compose a basic a theme and details what each should include.
  • Template Hierarchy provides an explanation for how all of the theme files fit together and how WordPress renders each during its page lifecycle.
  • Stepping Into Templates also provides a detailed breakdown of templates and the WordPress page structure for each.
  • Theme Development is a massive article that encompasses everything surrounding theme development.
Sure, it takes a little extra effort organize your files rather than just doing enough to “get it working,” but the dividends payout over time as you begin working on the next version of your theme or as multiple developers begin to work on the same codebase.

Disregarding Coding Standards

Of course, file organization is only part of the development process that affects organization and maintainability. Next, we have to focus on how we actually write the code that resides in our files.
After all, not only should we want to provide well-organized files, but easy-to-follow, standard-compliant code as well. Again, the WordPress Codex provides standard set for the major languages that contribute to a theme’s codebase:
A lot to process, huh? The thing is, spending time familiarizing yourself with all of the above pays dividends over time. Applying these standards at the beginning of development is exponentially cheaper than having to refactor an existing theme or plugin.
Additionally, it results in contributing better code back to the community.

Not Testing Your Work

After a theme has been developed and is ready for release, you should do – at the very least – a single of testing. That is, you should verify that the various styles of post data are formatted correctly, that your theme isn’t using any deprecated functions, or that it’s using any functions incorrectly.
Luckily, the Codex provides a number of suggestions and tools to help make this process much easier.
  • Debug mode helps to iron out any PHP warnings and/or errors
  • The Theme Unit Test is a data file including pre-formatted post data for you to run against your local development environment
  • Theme Check is a plugin that will examine that codebase of your theme and provide notes on what needs to be addressed as well as recommendations for improving the codebase.
Of course, there’s also additional testing you can do such as cross-browser testing, HTML/CSS standards compliance, and so on. The Codex outlines even more testing suggestions in the Theme Testing Process article.

What Are Your Own Pet Peeves?

They say that you often learn from your mistakes and I’ll be the first to admit that during my time with WordPress, I’ve broken every one of these. But, like the rest of the development community, you learn and you begin building better projects with experience.
This is the first of this type of “WordPress culture” articles that we’ll be posting on the site… so share your own experiences below – or better yet, write about them at length and we’ll publish it if it’s great!
That said, this is certainly not the definitive list and I’m sure there’s more to add (we haven’t even touched hacking the core, harassing the database, or hard coding elements that should have options). Drop your own pet peeves in the comments!
What are some of the most annoying, harmful, or unsustainable practices that you’ve come across?"
read more

20+ Tumblr Style WordPress Themes for Efortless Microblogging

"Tumblr style WordPress themes are a great way to deliver short messages and various types of media with minimal effort. They are a huge time saver, making it much easier to do photo-based posts, smoothly embed audio and video. Tumblr style WordPress themes are for those, who are looking to create a fun and lively blog without spending too much time.


Casual (Free)

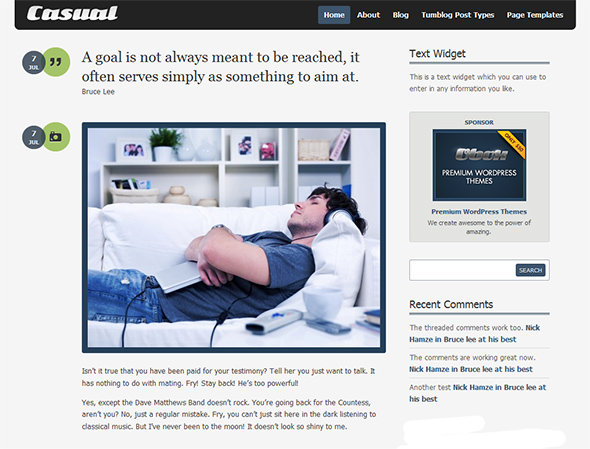
In one package you can get all the benefits of Tumblr wrapped in the extensiveness of WordPress and Obox functionality. Tumblog functionality allows you to publish images, videos, audio, text, links and quotes just as you do on Tumblr. When a visitor submits a comment to your blog there are no page reloads. That means they can watch a video and comment at the same time.

Casual Tumblr Style WordPress Theme
Express is an iPhone app built to quickly and effortlessly publish images/links/notes and short posts, on the go, to your Obox powered WordPress website. Tweet, Like or share a custom URL with our neat social sharing options for each post that you publish.

Cinch

Cinch is a feature-rich Tumblog theme built for WordPress. Incorporating advanced QuickPress functionality and nice jQuery awesomeness, Cinch is a first choice for microblogging. Posting a variety of multimedia elements is super-easy.

Cinch Tumblr Style WordPress Theme
The theme includes some jQuery wizardry all round and it makes scrolling & navigating so much fun. The theme has 2 widgetized areas in sidebar and also some extra Woo custom widgets (Flickr, Twitter, Adspace, Search). 11 delicious color schemes to choose from, and possible to change color of links and buttons in options panel.

Fast Blog

Fast blog was released last year, but it still remains very popular Tumblr style WordPress theme with tons of positive responses from its users. It’s perfect for quick and easy microblogging thanks to WooTumblog plugin. You can add posts quickly even from a mobile phone.

Fast Blog Tumblr Style Theme
Fast Blog features smooth Twitter and Flickr implementation with very important buffering system to avoid exceeding the requests limit and to speed up page loading. Custom widgets, social media icons, useful shortcodes, working AJAX contact form are all included out of the box.

Elefolio

Elefolio is here to combine Tumblog publishing and portolio feature into single, easy to use theme. Custom post type is used for portfolio and you can also stream images from your Dribbble account. Elefolio will impress any visitor with its simple yet detailed look.

Elefolio Tumblr Style WordPress Theme for Efortless Microblogging
The homepage displays a welcome message to greet your visitors and social media icons are next to it. You can customize the typography, add custom Woo widgets or choose one of the 9 alternative color styles. This theme support the Express App for iPhone, which lets you post images, notes, links and quotes while on the go!

DailyNotes

DailyNotes aka Notes of Life is a very unique WordPress theme that shines out with its magical simplicity. It’s the most elegant medium to share the moments of your daily life, the easy way. Minimal in design, trimmed down to the bare essentials, DailyNotes is for those, who are looking to create a fun and lively personal blog with a little effort.

DailyNotes WordPress Tumblr Theme
The theme is compatible with all the major browsers (Firefox, Opera, Chrome, IE6+ IE7+IE8, Netscape, Safari). It comes in four different color variations. If the default style isn’t to your liking, then try out the Stone, Wooden and Canvas variations. PSD files are included. Custom tumblr-style post types make it easy to share photos, videos, notes, quotes links and audio files at the click of a button.

Minblr

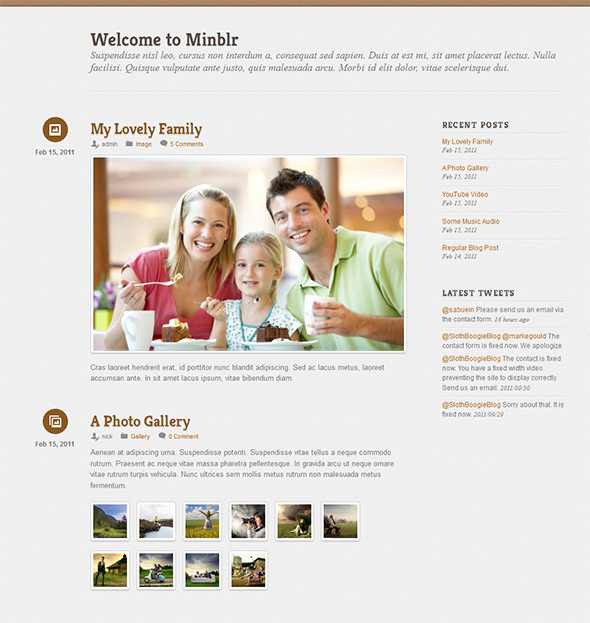
Minblr theme from Themify is another Tumblr style WordPress theme with a liquid and responsive layout that works well on desktop and mobile devices. It means that the layout flows nicely across any display resolution and is supported by all the major browsers.

Minblr WordPress Theme
Minblr theme has 3 different layout styles and 10 colorful skins. It utilizes WordPress 3.1 post formats, but there is also a fallback to the older versions. Custom homepage welcome message is perfect for intros, memorable quotes, personal thoughts.

Auld

Auld’s simplicity is perfect for lazy bloggers who need colorful and vibrant site for super quick publishing without too much effort in polishing their posts. Auld was created by James McDonald and it is being sold at WooThemes marketplace.

Auld WordPress Theme for Microblogging
Auld uses jQuery Masonry plugin to align the post blocks nicely below each other in a two column fashion. The theme has support for Google Fonts and there is a possibility to customize the typography to suit your taste. This theme supports the Express App for iPhone, which lets you post images, notes, links and quotes while on the go!

Abbreviate

Abbreviate theme uses the Wootumblog plugin that empowers your WordPress theme to act like a Tumblr site. 3 unique color schemes with every detail covered. Using TimThumb you never have to worry about resizing your pictures, it is all done automatically.

Abbreviate WordPress Theme for Microblogging
Abbreviate theme is pre-packed with OCMX Live that is an advanced WordPress framework turning your WordPress installation into even more powerful content management system. OCMX has been designed around the WordPress, meaning almost instant familiarity.

Roughprint

The best thing about WordPress post formats is that you are able to classify your posts into categories and that make the best bits of your content very easy to discover. Take advantage of the new WordPress post formats with this very unique tumblog-style child theme for Thesis or Genesis Framework.

Roughprint Tumblog WordPress Theme
This theme utilizes post formats feature in a Tumblog style way with custom presentations of the different formats. All of these formats work right “out of the box” with no need to touch any code. It’s even easy to edit the icons with the included PSD and separate icons folder. This theme utilizes custom fonts (via CSS) to really make the theme stand out.

Grido

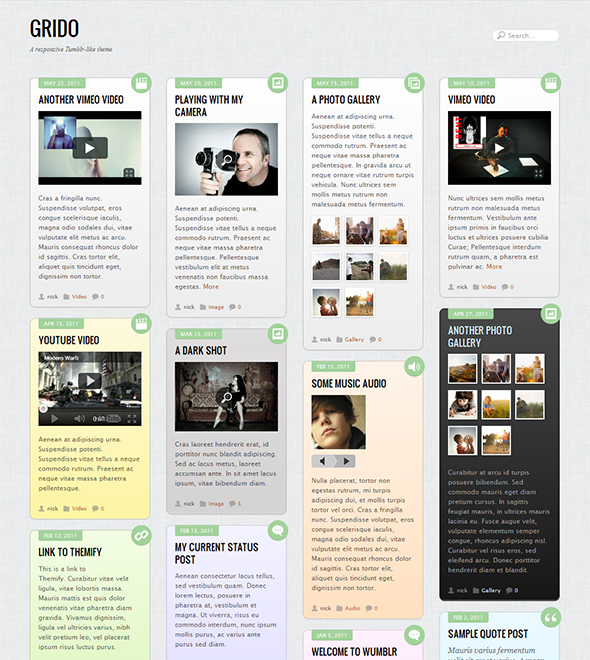
Grido is a trendy and responsive Tumblr-like theme that comes with 9 different gradient backgrounds to style the posts. When a browser window is resized the posts are re-stacked in a smooth animation. There is also a list view next to the grid view layout, optional RSS, search form and social network icons.

Grido Microblogging Theme
You can choose a color scheme to reflect the mood of the post or select a different color for each post to make your it look like a wall of sticky notes. There are up to 4 footer columns to include useful widgets.

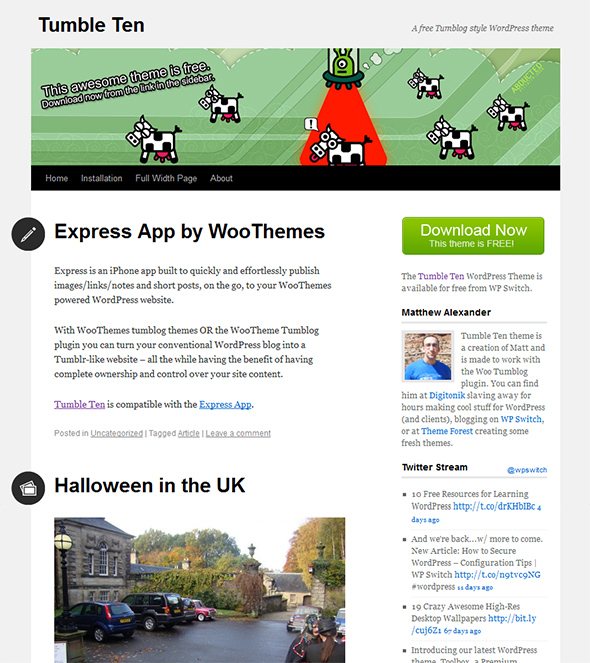
Tumble Ten (Free)

Tumble Ten is a modified version of the same default Twenty Ten theme with a more Tumblresque style. In order to use Tumble Ten, you must have the Woo Tumblog plugin installed for the Tumblog functions to work.

Tumble Ten Tumblt Style WordPress Theme
The Woo Tumblog plugin allows you to do Tumblr style posting next to the normal blogging. It becomes very easy to add links, quotes, pictures and videos directly from WordPress dashboard. Tumble Ten theme also comes with 3 custom widgets for flickr photos, twitter feed and author’s bio.

Slanted

Slanted is an extremely unique Tumblog WordPress theme with a literally slanted design. This theme has an extensive multimedia support, which makes posting images, video, audio, quotes, notes, links and other multimedia elements super-easy to do.

Slanted Simple Tumblr Style WordPress Theme
Slanted theme supports the Express App for iPhone, so you can post while on the go. It includes jQuery navigation and hotkeys that makes scrolling and navigating so much fun. Also, you can choose from 10 different color schemes.

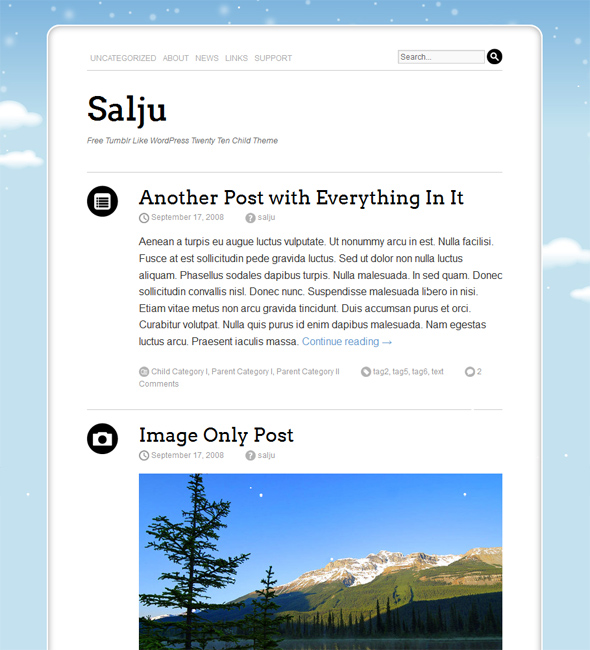
Salju (Free)

Salju is a vivacious WordPress theme that features falling snowflakes and a snowman. It is very niche specific and could only be used for a Winter season. There are 7 different post types available and a space for 3 different widgets in the footer.

Salju Theme for Microblogging
Salju uses TwentyTen theme as a Framework, so it is only a child theme. It was built for WordPress 3.0 and above, therefore it does support custom drop-down menus and custom post types.

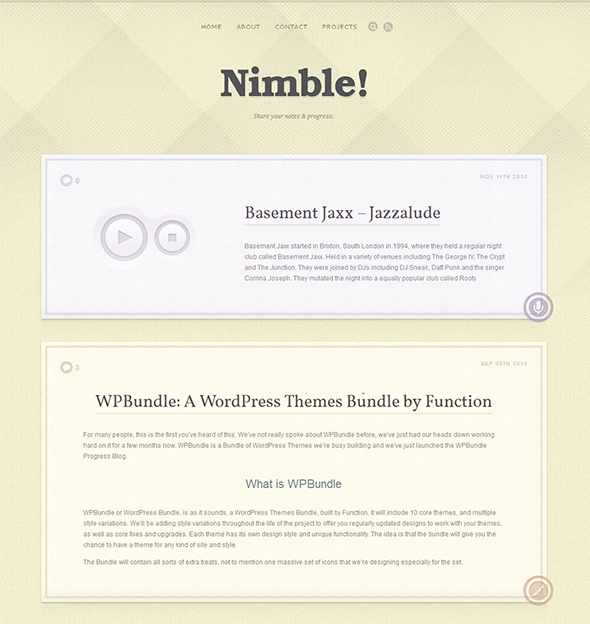
Nimble

If you need something to share various media types and do it in an easy and professional way, Nimble is ideal. It has a custom made audio player and support for video embedding, so your media will surely attract the attention of blog readers.

Nimble Tumblog Style WordPress Theme for microblogging
With WordPress’s built-in post formats, different types of post are distinguished and that makes it easy to focus on a gallery, video, single image, link, etc. Have a quick few Images you want to share? You can add multiple images to a post and they’ll be displayed in a beautiful grid.

My Journey

My Journey works just like Tumblr, only better. Not only that it is perfect for a personal blog or portfolio, but you can even have fun on the run by posting videos, photos, links and more by using Express App, an iPhone app made by WooThemes that can be bought for $4.99 from the apple app store.

My Journey WordPress Theme for Microblogging
MyJourney WordPress theme comes with 1 click auto-install feature that installs demo content into the theme helping you understand how your new theme works. Built-in SEO options, cross browser optimization, thumbnail auto-sizing and other essential features are included.

LightBright

LightBright is one of the Tumblr style WordPress themes that makes it easy to share the moment of your daily life. Using different post types, you are able to add photos, videos, audio files, quotes or links and make your blog lively in a matter of seconds. LightBright comes with four different color variations. If Turquoise isn’t your style, then try switching to the Purple, Green or Black color schemes.

LightBright WordPress Tumblr Theme for Microblogging
This theme utilizes Timthumb to automatically resize your thumbnail images. If you love the format of Tumblr, but you don’t want to give up the versatility of WordPress, this theme is for you. As long as you are a member of ElegantThemes, you can be sure that your theme will always be compatible with the latest version of WordPress.

Retreat

Based on a theme that has become very successful as tumblog theme. Retreat theme is fully packed with easy to use quick publishing tools. It also comes with AJAX-based Twitter widget that updates often, and can track keywords, mentioned there. This theme support the Express App for iPhone.

Retreat WordPress Theme for Effortless Microblogging
Posting a variety of multimedia elements (images, video, audio, quotes, notes & links) is an easy task to do with Retreat. Post to your tumblog from your dashboard, using the amazing new AJAX-powered & WooThemes-exclusive QuickPress functionality that is bundled with this theme. 7 delicious color schemes to choose from and a possibility to change more colors from the options panel.

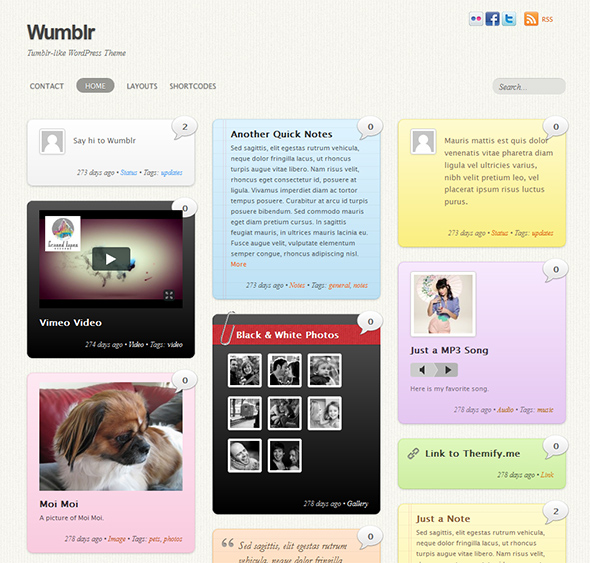
Wumblr

Fluid and responsive layout that works well on desktop and mobile devices such as iPhone, Android, Blackberry, etc. 9 different post formats including 15 color presets that help customize the look of each post. Clean and SEO friendly markups for better search engine rankings.

Wumblr Tumblr Style WordPress Theme for microblogging
Take full control of your theme with an easy to use theme options panel. Layered Photoshop file is included when you purchase a Developer Package. There are some custom widget including a header widget for social media profiles.

Tumble

The Tumble Theme is another Tumblr style microblogging theme for WordPress. It takes advantage of WordPress post formats, providing a variety of post styles such as video posts, status updates, quotes, galleries and more.

Tumble WordPress Theme for Microblogging
Organic Themes are coded with the developer in mind, providing W3C valid code and clean formatting for easy theme customization. The design is clean, minimal and easily customized. Tumble theme comes with Option Framework, that allows you to customize your theme easily. Gravity Forms are included for quick and easy form building.

Garuda Di Dadaku (Free)

Garuda Di Dadaku is a free Tumblog style WordPress themes brought to you by WPCharity. Actually it is built on the same TwentyTen theme, so it is another child theme. WPCharity tend to use only free graphic resources to build their themes, so you are 100% sure that all the graphic elements within this theme are legally used.

Salju Theme for Microblogging
It was built for WordPress 3.0 and above, therefore it does support custom drop-down menus and custom post types. There are 7 different post types to choose from including rich media formats. Garuda Di Dadaku headings are enhanced with beautiful custom typography.

Blog Writer

Blog Writer is a great option for bloggers who prefer Tumblr style blogging with some extra content to it. It is also perfect for people, who want Tumblr style blogging and professional look for their personal site. Writer comes with 4 different flavors for you to choose from: Fabric, Leather, Wood and Grass.

Blog Writer Tumblr Style WordPress Theme
With ThemeFuse themes there are no more fiddling with server settings and ordinary WordPress installation procedures, because their themes have one click auto install feature that lets you enjoy your coffee while framework auto-installs the theme.

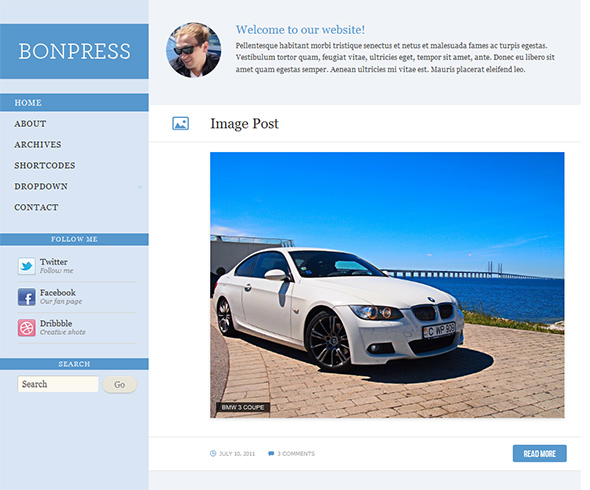
BonPress (Free)

BonPress is another Tumblog style theme that could be perfect for your personal blog. Packed with various post formats, multiple custom widgets for Twitter and Flickr integration. Theme has 4 color styles: blue, black, pink, orange.

BonPress Tumblr Style Theme
The layout of this theme automatically adapts to fit on any screen resolution on desktop and mobile devices. With an advanced WPZOOM options panel, you can easily customize every major detail of your theme.
Tired of common repetitive templates? Want something different, unusual and unique? This carefully selected list of “Creative WordPress Themes” is dedicated to you."
read more

How To Create A Simple 404 Error Page For WordPress Themes

"A visitor can encounter a 404 error for a number of reasons. As a website owner, you should ensure that the user experience of your website doesn’t leave your visitor feeling lost or confused when this happens. Creating a custom 404 page is easy using the 404.php template in your WordPress theme, and it can go a long way to ensuring a visitor remains on your website, even after they encounter a 404 error.


What is a 404 page?

A classic default 404 page
Adding a custom 404 page to your WordPress theme is simple. All you need to do is have a file named ’404.php’ in your theme directory…
A 404 ‘Not Found’ error page is a page generated by the server to inform you that the content you were trying to access on the website cannot be found. Typically you will encounter a 404 error when something has been moved or deleted, or when you click a link/type a website address with a typo in it.
I encounter 404 pages all of the time, usually because I type a lot of web addresses rather than use bookmarks, and I have clumsy fingers. This will often lead me to requesting www.google.com/mial, instead of the GMail page I intended. Very frustrating! A few years ago 404 pages were nothing more than the standard server 404 page, but in recent times developers and designers have taken it upon themselves to create more user-friendly 404 pages, to let you know where you are, why you got there, and where you can go now.

How To Add A Custom 404 Page To Your Theme

Now let’s look at how to actually add a 404 page that’s customized to your theme. Adding a custom 404 page is simple; All you need to do is have a file named ’404.php’ in your theme directory. Of course, if your ’404.php’ file is empty, then the ’404 Not Found’ page that gets displayed to users will be blank.
A quick method of making a custom 404 page that ties in nicely with your theme is to copy the contents of the ‘page.php’ file in your theme to your new ’404.php’ file. Once you’ve done that, remove all of the code referring to The Loop and replace it with the following code:

Page Not Found

Sorry, but the page you requested has not been found

How To Make Your 404 Page Great

If a user has arrived at a 404 page on your website, what you really want to do is help them get to the content they intended to arrive at. If the server’s default 404 page is displayed, chances are the user is going to hit ‘Back’ and find the content they were looking for somewhere else.
To help the user find the content they were looking for, you should implement the following elements on your custom 404 page. These things may already be part of your theme, and therefore already exist on your 404 page (if you copied the code from your ‘page.php’ file, for example), in which case you should point them out to the user.
  1. Display an apologetic message explaining that the content the user requested has not been found. Mentioning the error code “404″ isn’t really necessary, but you can put it there if you like.
  2. Suggest that the user checks their address bar to ensure there are no typos in the web address.
  3. Display/point out a search box allowing the user to search your website for the content they were looking for.
  4. Suggest articles the user might have been looking for based on the page they requested/popular entries on your website.
  5. Give the user a list of “what you can do now” options, such as going to your home page or browsing your archives.
  6. Finally, allow the user to report the error to you by including an e-mail link/contact form/Tweet button so that you can fix the error where applicable.
In my imaginary theme, I would implement the above something like this:
<?php get_header(); ?>
   <div id="page">
       <h1>Page Not Found</h1>
       <p>We're very sorry, but the page you requested has not been found! It may have been moved or deleted.</p>
       <p>I'm not blaming you, but have you checked your address bar? There might be a typo in the URL.</p>
       <p>If there isn't, you could try searching my website for the content you were looking for:</p>
       <?php get_search_form(); ?>
       <p>Or maybe you were looking for one of my popular posts:</p>
       <ul>
           <li><a href="http://www.website.com/popular-post1">Popular Post 1</a></li>
           <li><a href="http://www.website.com/popular-post2">Popular Post 2</a></li>
           <li><a href="http://www.website.com/popular-post3">Popular Post 3</a></li>
           <li><a href="http://www.website.com/popular-post4">Popular Post 4</a></li>
       </ul>
       <p>Alternatively, you can go to <a href="http://www.website.com">my home page</a> or <a href="http://www.website.com/archives">browse my archives</a></p>
       <p>One last thing, if you're feeling so kind, please <a href="mailto:webmaster@website.com">tell me</a> about this error, so that I can fix it. Thanks!</p>
   </div>
   <?php get_sidebar(); get_footer(); ?>
Tutsplus 404 page

The Key Elements

If you can nail the “helpful” part of your 404 page, you’re welcome to add humor and design perks after the fact… Just don’t put the cart before the horse.
Now let’s break down the key elements that we used:
  • The very basics: We’re using the 404.php filename, so that WordPress knows to use this as the error page template.
  • Our page title (inside an H1 tag) clearly states that a page wasn’t found.
  • Offer a brief text explanation and offer some alternative solutions (check the URL).
  • Provide a search bar (using the default WP search form function)
  • Provide at the very least, a link to the archives. Advanced users might want to include a page, category or tag listing right here on this page as well.
  • Provide a contact for people to report errors.
Whilst it’s often very tempting to leave a humorous image & note on your 404 page, try to be as helpful as possible first, and funny later. Despite the fact there are entire websites dedicated to the hilarity of certain 404 pages, ensuring a visitor stays on and returns to your website is your first priority (unless you intend to be featured on one of those websites, in which case, go nuts!)

Other Considerations

When a user arrives at a 404 page, and it’s not because there is a typo in the URL (most users don’t type in URLs directly), so chances are good that you have either moved something or deleted something.

Redirect Old Content

When moving content, you should always redirect the old URL to the new URL, as this is a simple and effective way of ensuring that all visitors intending to reach that content are able to. Redirecting is a fairly simple task in WordPress when you use the popular plugin, Redirection. This plugin also allows you to monitor the 404 errors generated by your server, and what URL was requested when the 404 was generated. This allows you to redirect that URL to the correct location, thus improving your overall user experience.

Going an Extra Step

As we mentioned above, a truly great 404 page doesn’t even need to look like a 404 page… by including things like a full page, category and tag listing, you can not only help fill out the page design, you can provide immediate links for users to browse rather than expecting them to spend time trying to refine their search. Also consider providing a list of “popular” content… sometimes popular content can be better than relevant content if your goal is to keep 404 visitors on the site.

Don’t Delete the Posts; Delete the Content.

Finally, when deleting content, consider simply deleting the page/post content, rather than the entire post/page, and informing your visitors why you have removed the content. You could take that a step further and recommend alternative sources where a user could find similar content to the content you have removed. This helps prevent “link-rot” on your site while still removing the content that you want to disappear."
read more