


Start Using HTML5 WebSockets Today: "
One of the cool new features of HTML5 is WebSockets, which let us talk to the server without using AJAX requests. In this tutorial, we’ll review the process of running a WebSocket server in PHP, and then building a client to send and receive messages to it over the WebSocket protocol.
What are WebSockets?
WebSockets is a technique for two-way communication over one (TCP) socket, a type of PUSH technology. At the moment, it’s still being standardized by the W3C; however, the latest versions of Chrome and Safari have support for WebSockets.
What do WebSockets Replace?
Websockets can replace long-polling. This is an interesting concept; the client sends a request to the server – now, rather than the server responding with data it may not have, it essentially keeps the connection open until the fresh, up-to-date data is ready to be sent – the client next receives this, and sends another request. This has its benefits: decreased latency being one of them, as a connection which has already been opened does not require a new connection to be established. However, long-polling isn’t really a piece of fancy technology: it’s also possible for a request to time-out, and thus a new connection will be needed anyway.
Many Ajax applications makes use of the above – this can often be attributed to poor resource utilization.
Wouldn’t it be great if the server could wake up one morning and send its data to clients who are willing to listen without some sort of pre established connection? Welcome to the world of PUSH technology!
Step 1: Get the WebSocket Server
This tutorial will focus more on the client building rather than server implementation.
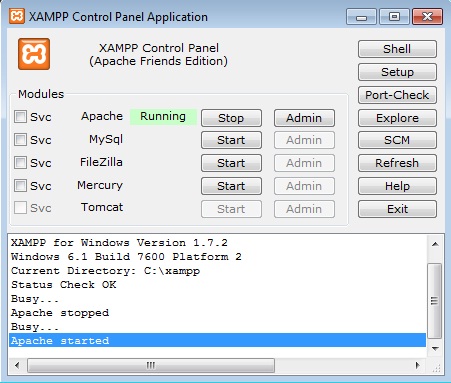
I’m using XAMPP on Windows 7 to run the PHP server locally. Grab a copy of phpwebsockets which is a WebSocket server in PHP. (Note: I experienced some problems with this version, I made some changes to it and will including it in the source files) There are various WebSocket implementations; if one doesn’t work, you can try another or just continue with the tutorial.
- jWebSocket (Java)
- web-socket-ruby (ruby)
- Socket IO-node (node.js)
Start the Apache server
Step 2: Change URLs and Ports
Change the server according to your setup, for example in setup.class.php:
public function __construct($host='localhost',$port=8000,$max=100)
{
$this->createSocket($host,$port);
}
Browse through the files and make changes where appropriate.
Step 3: Start Building the Client
Lets get a basic template up; this is my client.php file:
<!DOCTYPE html> <html> <head> <script src="http://ajax.googleapis.com/ajax/libs/jquery/1.4.2/jquery.min.js"></script> <title>WebSockets Client</title> </head> <body> <div id="wrapper"> <div id="container"> <h1>WebSockets Client</h1> <div id="chatLog"> </div><!-- #chatLog --> <p id="examples">e.g. try 'hi', 'name', 'age', 'today'</p> <input id="text" type="text" /> <button id="disconnect">Disconnect</button> </div><!-- #container --> </div> </body> </html>
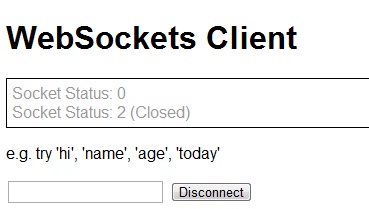
So in this code we’re creating a simple template: we have a box for the chat log, an input box, and one disconnect button.
Step 4: Add Some CSS
Nothing fancy, just space some elements out.
body {
font-family:Arial, Helvetica, sans-serif;
}
#container{
border:5px solid grey;
width:800px;
margin:0 auto;
padding:10px;
}
#chatLog{
padding:5px;
border:1px solid black;
}
#chatLog p {
margin:0;
}
.event {
color:#999;
}
.warning{
font-weight:bold;
color:#CCC;
}
Step 5: WebSocket Events
First, let’s try and understand the idea of WebSocket events.
The Events
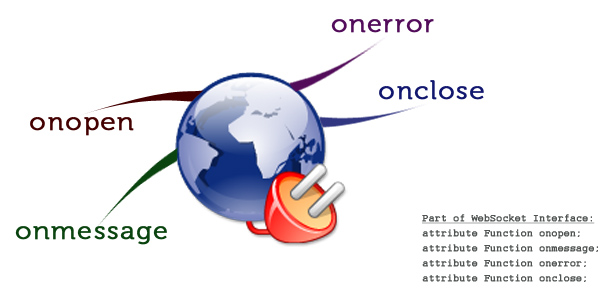
We’ll be using three events:
- onopen: When a socket has opened
- onmessage: When a message has been received
- onclose: When a socket has been closed
But how can we implement this?
First create a WebSocket object
var socket = new WebSocket('ws://localhost:8000/socket/server/startDaemon.php');And checking for events is as simple as:
socket.onopen = function(){
alert('Socket has been opened!');
}
But what about when we receive a message?
socket.onmessage = function(msg){
alert(msg); //Awesome!
}
However, let’s avoid using alert boxes, and actually integrate what we’ve learned into the client page.
Step 6: JavaScript
Ok, so let’s get started. First we put our code in jQuery’s document ready function, then we check whether the user has a WebSockets-enabled browser. If they do not, we append a link to Chrome in the HTML.
$(document).ready(function() {
if(!("WebSocket" in window)){
$('#chatLog, input, button, #examples').fadeOut("fast");
$('<p>Oh no, you need a browser that supports WebSockets. How about <a href="http://www.google.com/chrome">Google Chrome</a>?</p>').appendTo('#container');
}else{

//The user has WebSockets

connect();

function connect(){
//the connect function code is below

}
});
As you can see, if the user has WebSockets then we call a connect() function. This is the core of the functionality: we’ll start with the open, close and receive events.
We’ll define the URL of our server
var socket;
var host = 'ws://localhost:8000/socket/server/startDaemon.php';
Wait, where’s the
http in that URL? Oh right, it’s a WebSocket URL, so it’s using a different protocol. Here’s a breakdown of the pieces of our URL:
Let’s continue with our connect() function. We will put our code within a try/catch block; so if something goes wrong, we can let the user know. We create a new WebSocket, and pass the message to a message function which I’ll explain later. We create our onopen, onmessage and onclose functions. Note that we also show the user the socket status; this is not necessary, but I’m including it here as it can be helpful for debugging.
- CONNECTING = 0
- OPEN = 1
- CLOSED = 2
function connect(){
try{

var socket;
var host = "ws://localhost:8000/socket/server/startDaemon.php";
var socket = new WebSocket(host);

message('<p class="event">Socket Status: '+socket.readyState);

socket.onopen = function(){
message('<p class="event">Socket Status: '+socket.readyState+' (open)');
}

socket.onmessage = function(msg){
message('<p class="message">Received: '+msg.data);
}

socket.onclose = function(){
message('<p class="event">Socket Status: '+socket.readyState+' (Closed)');
}

} catch(exception){
message('<p>Error'+exception);
}
}
The message() function is fairly simple, it takes in some text that we want to show the user and appends it to the chatLog. We create the appropriate class for paragraph tags in the socket event functions which is why there is only one closing paragraph tag in the message function.
function message(msg){
$('#chatLog').append(msg+'</p>');
}
So Far…
If you’ve been following up to this point, well done! We’ve managed to create a basic HTML/CSS template, create and establish a WebSocket connection and keep the user updated as progress was made with the connection.
Step 7: Sending Data
Now rather than having a submit button, we can detect when the user presses return on their keyboard, and run the send function. The ’13′ you see below is the ASCII key for the enter button.
$('#text').keypress(function(event) {
if (event.keyCode == '13') {
send();
}
});
And here’s the send() function:
function send(){

var text = $('#text').val();
if(text==""){
message('<p class="warning">Please enter a message');
return ;
}
try{
socket.send(text);
message('<p class="event">Sent: '+text)
} catch(exception){
message('<p class="warning"> Error:' + exception);
}

$('#text').val("");

}
Remember what you see above may be a chunky bit of code, but in reality, the code we really need is:
socket.send(); //Thanks JavaScript
The extra code is doing a number of things: detecting if the user didn’t enter anything but still hit return, clearing the input box, and calling the message functions.
Step 8: Closing the Socket
Closing the socket is fairly straightforward: attach a click handler to our disconnect button and we’re done!
$('#disconnect').click(function(){
socket.close();
});
The Completed JavaScript
$(document).ready(function() {

if(!("WebSocket" in window)){
$('#chatLog, input, button, #examples').fadeOut("fast");
$('<p>Oh no, you need a browser that supports WebSockets. How about <a href="http://www.google.com/chrome">Google Chrome</a>?</p>').appendTo('#container');
}else{
//The user has WebSockets

connect();

function connect(){
var socket;
var host = "ws://localhost:8000/socket/server/startDaemon.php";

try{
var socket = new WebSocket(host);

message('<p class="event">Socket Status: '+socket.readyState);

socket.onopen = function(){
message('<p class="event">Socket Status: '+socket.readyState+' (open)');
}

socket.onmessage = function(msg){
message('<p class="message">Received: '+msg.data);
}

socket.onclose = function(){
message('<p class="event">Socket Status: '+socket.readyState+' (Closed)');
}

} catch(exception){
message('<p>Error'+exception);
}

function send(){
var text = $('#text').val();

if(text==""){
message('<p class="warning">Please enter a message');
return ;
}
try{
socket.send(text);
message('<p class="event">Sent: '+text)

} catch(exception){
message('<p class="warning">');
}
$('#text').val("");
}

function message(msg){
$('#chatLog').append(msg+'</p>');
}

$('#text').keypress(function(event) {
if (event.keyCode == '13') {
send();
}
});

$('#disconnect').click(function(){
socket.close();
});

}//End connect

}//End else

});
Step 9: Run the WebSocket Server
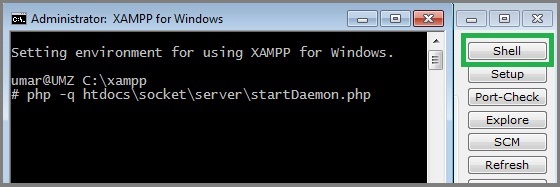
We will need command line access. Luckily, XAMPP has a handy shell option. Click ‘Shell’ on the XAMPP control panel, and type in:
php -q path\to\server.php
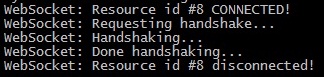
You have now started a WebSocket server!
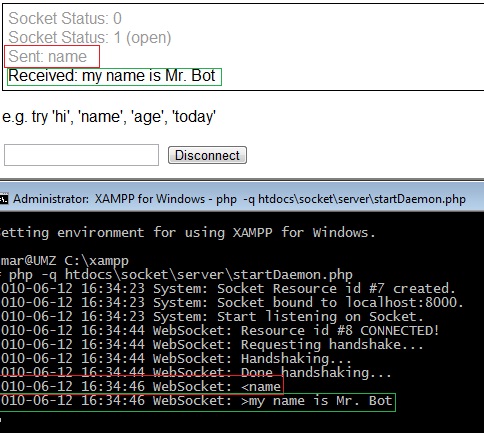
Finished
When the page loads, a WebSocket connection will attempt to be established (try editing the code so the user has connect/disconnect option). Then, the user can enter messages and receive messages from the server.
That’s it!
Thanks for reading; I hope you enjoyed this tutorial! Remember, as exciting as WebSockets may be, things may change. You can refer here to keep up to date on the W3C WebSocket API.
"
 Posted in:


