


5 Little-Known Web Files That Can Enhance Your Website: "
Previously, I wrote about 5 web files that will improve your website and discussed files that, while small in size, pack a solid punch and make our work that little bit better. In this article, we’ll look at five more web files that can improve and your website.
Quick Overview
Here are the files we will cover:
- P3P.xml – for user privacy
- Geo.kml (and Geo.rdf) – for geolocation
- Humans.txt – for attribution
- vCard.vcf – digital business card
- PICS.rdf – declares a website to be safe (or not safe) for young web users
P3P.xml
Issues related to user privacy on the web are of paramount concern both to those who store information (site owners) and to those who submit the information (site users).
The Platform for Privacy Preferences Project (P3P) encourages website owners to declare all details relating to their privacy measures in a standardized XML document (or via meta tags), so that browsers can pick up the information, display warnings and details, and empower users to take whatever action they feel necessary.
On the surface, this system sounds wonderful: it gives users control over their data, it helps site owners keep them informed, and the browsers let users choose sites to trust.
 Platform for Privacy Preferences or Pretty Poor Privacy? The truth is out there!
Unfortunately, creating the file can be quite complex, with all of the variables involved (it’s like filing a tax return).
Worse, Internet Explorer is the only major browser that does much with the file. It grants greater control over cookie-blocking in IE6+, while letting you display an on-screen privacy policy.
In addition, the issuer of the file is responsible for complying with its own guidelines, and there is no enforcement.
The reality is that, with all of the critics and compatibility issues, no alternative has gained as broad of a support as P3P.
Website owners need to deal with these increasingly prevalent privacy issues, and because P3P offers a workable solution right now, adopting it for the sake of IE, privacy search engines, and other user-focused tools is justifiable.
Creating a P3P.xml File
Once you’ve created the file, it requires little maintenance.
There are two ways to go about creating a P3P.xml file.
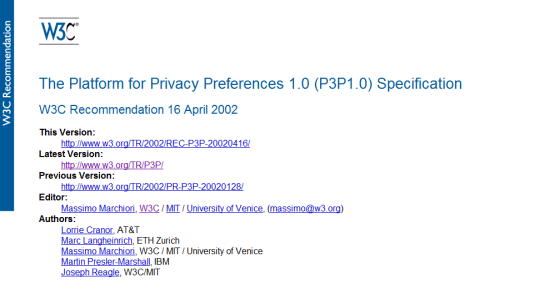
One way is you could follow the W3C Platform for Privacy Preferences 1.0 (P3P1.0) specification and build the file by hand using your favorite text editor.
Alternatively, a few useful apps will do the work for you.
P3P.xml tools:
- IBM P3P Policy Editor (freeware)
- JRC Policy Workbench (open source)
- P3PEdit (web-based, $39)
Other useful resources:
- P3P policy validator
- Internet Explorer and P3P
- P3P privacy verification
- Search for privacy-friendly websites
Once you’ve created the file, name it P3P.xml, put it in either the site’s root directory or a directory named w3c.
Next, you’ll need to add a reference in the
<head> of your HTML document. Below is a sample reference:<head> <link rel="P3Pv1" type=" text/xml" href="/w3c/p3p.xml" /> </head>
Geo.kml and Geo.rdf
Geotagging has taken the web by storm. Disclosing your geographic location to site visitors can build trust, especially in e-commerce websites.
 Using Google Earth or Maps, we can guide visitors to our office.
The benefits of geotagging are quite evident. You let users see where your offices are (great if you need to arrange meetings with clients at your headquarters). Also, showing that there are real people behind the website makes you seem less like an anonymous corporation. Not to mention, mapping services will be able to index you in their listings.
There are several possible approaches to geotagging your site, including using microformats. We’ll look at how to build two different solutions: one for Google Earth (Geo.kml) and a helpful RDF fallback (Geo.rdf) for other tools.
Creating a Geo.kml file
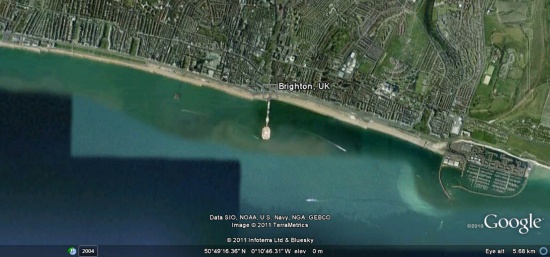
You can create this file using any text editor. You could name the file after the website or place that you’re mapping. For example, if we made a file for Six Revisions, it could be named SixRevisions.kml.
Put your Geo.kml file in the root directory of your website.
Below is a basic example of what the code should include:
<?xml version="1.0" encoding="UTF-8"?>
<kml xmlns="http://www.opengis.net/kml/2.2" xmlns:gx="http://www.google.com/kml/ext/2.2" xmlns:kml="http://www.opengis.net/kml/2.2" xmlns:atom="http://www.w3.org/2005/Atom">
<Document>
<name>Brighton</name>
<description>The place that I call home!</description>
<Style id="pin"><IconStyle><Icon><href>http://maps.google.com/mapfiles/kml/pushpin/ylw-pushpin.png</href></Icon></IconStyle></Style>
<Placemark>
<LookAt>
<longitude>-0.13642</longitude>
<latitude>50.819522</latitude>
<altitude>0</altitude>
<tilt>0</tilt>
<range>5500</range>
</LookAt>
<styleUrl>#pin</styleUrl>
<Point><coordinates>-0.13642,50.819522,0</coordinates></Point>
</Placemark>
</Document>
</kml>
Every KML file begins with a document type declaration (DTD), which states that this is an XML file that follows the KML specification.
Inside the KML element, there should be a
<Document> tag (just as an HTML document has a <body> tag), and in it, you put the details of your address.Briefly, here are explanations for tags to include:
<name>and<description>lets users know what is being shown<style>offers an image to pinpoint the location on the globe<Placemark>pinpoints the object<Point>contains<coordinates>to the latitude and longitude of your location
<LookAt>data about the coordinates, such as altitude and tilt<range>tells how far to zoom in
Most of these are easy to declare. The only thing to find are the coordinates.
Finding your coordinates is rather easy. If you visit maps.google.com and type in the place or address, half the job is done.
Of the many methods of extracting these details, my favorite requires the least amount of work. Simply using the script below into the address bar after you’ve found your location will yield the information.
javascript:void(prompt('',gApplication.getMap().getCenter()));
To reference it in HTML, add the following inside your
<head> tag:<link rel="alternate" type="application/vnd.google-earth.kml+xml" href="SixRevisions.kml" />
Of course, you can do more with your KML file than what is described here. If you’d like to explore further, Google has a KML Reference documention.
Creating a Geo.rdf File
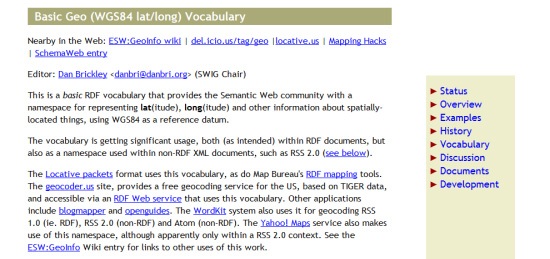
Of course, not everyone uses Google Earth, and many other web services exist (such as search engines) that gather geodata. So, we should also produce an RDF file that works some geo magic on the semantic web.
 Geodata has a lot of uses, and it’s very easy to create.
If you have the coordinates, the file is actually a lot more straightforward to create than the Google Earth KML file, because we’re not worried about visual representation; we simply want to get the coordinates out there for other services to make use of them (whether social networks or search engines).
To build the file, create a new document named Geo.rdf, and in it, just use the code below, replacing details such as your website (
rdf:about), the place or website name (dc:title), and your coordinates (geo:lat and geo:long tags).<rdf:RDF xmlns:dc="http://purl.org/dc/elements/1.1/" xmlns:foaf="http://xmlns.com/foaf/0.1/" xmlns:geo="http://www.w3.org/2003/01/geo/wgs84_pos#" xmlns:rdf="http://www.w3.org/1999/02/22-rdf-syntax-ns#"> <rdf:Description rdf:about="http://www.mysite.com"> <dc:title>Brighton</dc:title> <foaf:topic rdf:parseType="Resource"> <geo:lat>50.819522</geo:lat> <geo:long>-0.13642</geo:long> </foaf:topic> </rdf:Description> </rdf:RDF>
Once you’ve created the file, add the link reference to your website:
<link rel="alternate" type="application/rdf+xml" title="Geo" href="Geo.rdf" />
Humans.txt
The proper way to attribute work has been up for debate since the Internet went mainstream. As professionals, we want to act in our clients’ best interests, but as creatives, we want people to know who is behind the wonderful work we put together (which could lead to new clients).
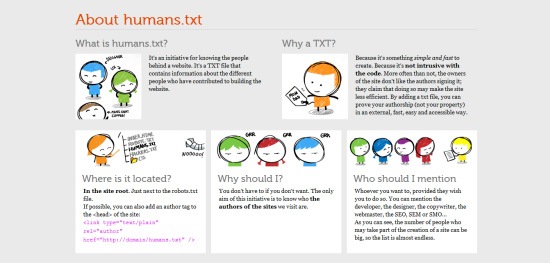 Websites are built by people, so why not credit them?
humans.txt is a standard format not unlike a robots.txt, but with the intention of providing information about the people behind a particular website.
Creating a Humans.txt File
The great thing about Humans.txt is its simplicity. While there is no formal standard for what (or who) to include, there are some best practices to ensure that the file is as human-readable (and possibly machine-readable, for web spiders) as possible.
To begin, create a humans.txt file and put it in your website’s root directory. In that file, you will be enclosing three primary categories in comments. You could add and remove categories as you see fit
The first category, TEAM, can include directives such as title, position, website, Twitter profile and location. The purpose is to provide information about the individuals responsible for creating the site.
The second category, THANKS, attributes the project’s contributors by name (or URL).
The final category, SITE, provides information about the standards, components and software used in the website’s production, along with a timestamp for the last update and language details.
Below I’ve adapted a humans.txt template, illustrating this format:
/* TEAM */
Title:      YourName.
Position:   Job Role
Site:       http://yoursite.com
Twitter:    @YourSite
Location:   City, Country.
/* THANKS */
Name: TheirName
/* SITE */
Updated:     YYYY/MM/DD
Language:    English (US)
Standards:   HTML5, CSS3, JavaScript
Components:  jQuery, etc.
Software:    Adobe Photoshop, Notepad++
Once you’ve filled in as much detail as you’d like (remember that this file is primarily for humans, so keep it simple), you just need to link to the
<head> (as always).<link type="text/plain" rel="author" href="humans.txt" />
It’s a great way to credit the entire team unobtrusively.
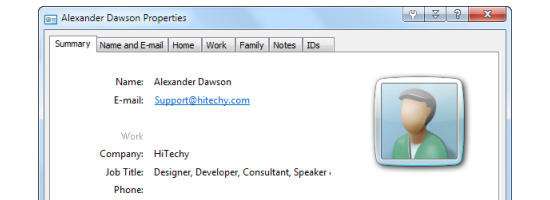
vCard.vcf
Next on the list is a personal favorite of mine. In this era of communication, enabling clients and visitors to get (and stay) in touch is essential. Our contact pages are often fragmented by social network icons, email forms and lists of instant messaging and VoIP accounts. Visitors and clients just want to get in touch with us, so make the process as easy as possible.
 With a few lines of code, we can produce a useful importable contact reference.
vCard is a standardized format for digital business cards. One file lists all of the applications, services and social networks that people can use to connect with you. It functions as an index of meta data about you or your business, and people can import all of the data into their favorite address book or email client. Microsoft Outlook and other clients support vCards, as do the Windows and Mac address books.
vCard has its own microformat that semantically marks up any related information on our pages. You could offer just the microformat version, but for compatibility and ease of access, vCard (or even both formats) is preferred.
Creating a vCard.vcf File
The first thing to do is create the vCard.vcf file (which is case-insensitive). Inside are a few things every vCard must have, according to the specifications:
BEGIN:VCARDandEND:VCARD(case-sensitive) to map the start and end of the line (the same way that we open and close the<html>tag in HTML documents)VERSION:with a value of 3.0 (the latest edition)N:(Lastname;Firstname) andFN:(Full Name) directives
Here is an example:
BEGIN:VCARD
VERSION:3.0
N:LastName;FirstName
FN:FirstName SecondNames LastName
END:VCARD
You can add a bunch of other useful directives to declare things about yourself; if supported, these details can be used by other apps and services.
The general syntax for vCard files is the directive in uppercase, followed by a colon character, except where a variable is required (like
TYPE=HOME or EMAIL), in which case the colon becomes a semi-colon. TYPE= becomes the variable identifier, multiple variables are comma-separated (like TYPE=HOME, WORK), and new lines for values are identified by more semi-colons.Below are some examples of the various directives:
NICKNAME:Name
X-GENDER:Male
BDAY:YYYY-MM-DDT
ORG:Company
TITLE:Web Designer
URL;TYPE=WORK:http://www.yoursite.com/
EMAIL;INTERNET:Hello@yoursite.com
EMAIL;TYPE=PREF,INTERNET:Support@yoursite.com
X-MSN;TYPE=HOME:You@hotmail.com
X-SKYPE;TYPE=WORK:MySkypeID
X-GOOGLE-TALK;TYPE=WORK:MyGoogleID
The variable
TYPE=PREF indicates a preferred contact type (if the destination program recognizes it).For more details about directives and extensions, please check the links below. You can add all sorts of awesome things into vCards, like images, links and even sometimes audio!
There are many more directives than are mentioned here. Another reason vCards are great is that they are extensible, supporting proprietary extensions. vCard extensions are prefixed with
X- (the way we use vendor prefixes like -moz- in CSS). The only downside is that, as with CSS, support isn’t a given, so you’ll have to figure out the best semantic route.Once you have your vCard.vcf ready, reference it in your HTML documents like so:
<link rel="alternate" type="text/directory" title"vCard" href="vCard.vcf" />
PICS.rdf
Not everything on the web is child-friendly, and this last file helps with that issue. Many software providers (even Windows with IE6+) provide specialized tools to filter out objectionable content for young audiences (i.e. generic content filtering). While some providers use human-based filtering, PICS (Platform for Internet Content Selection) helps any automated product gauge whether your content is age-appropriate. And it’s well supported.
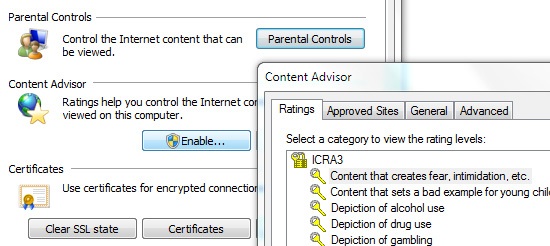 The content advisor in Internet Explorer is just one system that integrates PICS tags.
Getting your content blocked automatically reduces your ability to reach users, and while some newer tools rely on human screening (because of a distrust of self-regulation), we can at least certify our content to aid with such decisions. It’s pretty much like how the music and film industries work, and there are several ratings systems, too.
Creating a PICS.rdf file
Because there are several ratings systems, each with its own methodology, I’ve adapted one of the most popular formats (ICRA’s RDF method) to accept other types of labeling. Even though the ICRA has ceased developing its PICS labeling system, the system is still widely used by content filters, so it still has an important role to play, until something better comes along.
Start by creating a PICS.rdf file, and use the following code in it:
<?xml version="1.0" encoding="iso-8859-1"?>
<rdf:RDF xmlns:rdf="http://www.w3.org/1999/02/22-rdf-syntax-ns#" xmlns:rdfs="http://www.w3.org/2000/01/rdf-schema#" xmlns:dc="http://purl.org/dc/elements/1.1/" xmlns:dcterms="http://purl.org/dc/terms/" xmlns:label="http://www.w3.org/2004/12/q/contentlabel#" xmlns:icra="http://www.icra.org/rdfs/vocabularyv03#" xmlns:rsac="http://www.icra.org/rdfs/vocabularyv01#"  xmlns:ss="http://www.safesurf.com/ssplan/" xmlns:sfk="http://www.weburbia.com/safe/ratings/ ">
<rdf:Description rdf:about="">
<dc:creator rdf:resource="http://www.icra.org" />
<dc:creator rdf:resource="http://www.safesurf.com" />
<dc:creator rdf:resource="http://www.weburbia.com/safe" />
<dcterms:issued>2011-04-15</dcterms:issued>
<label:authorityFor>http://www.icra.org/rdfs/vocabularyv03#</label:authorityFor>
</rdf:Description>
<label:Ruleset>
<label:hasHostRestrictions><label:Hosts><label:hostRestriction>www.yoursite.com</label:hostRestriction></label:Hosts></label:hasHostRestrictions>
<label:hasDefaultLabel rdf:resource="#label_1" />
</label:Ruleset>
<label:ContentLabel rdf:ID="label_1">
<rdfs:comment>ICRA Ratings</rdfs:comment>

</label:ContentLabel>
<label:ContentLabel rdf:ID="label_2">
<rdfs:comment>RSACi Ratings</rdfs:comment>

</label:ContentLabel>
<label:ContentLabel rdf:ID="label_3">
<rdfs:comment>SafeSurf Ratings</rdfs:comment>

</label:ContentLabel>
<label:ContentLabel rdf:ID="label_4">
<rdfs:comment>WebUrbia Ratings</rdfs:comment>

</label:ContentLabel>
</rdf:RDF>
Below each
rdfs:comment element, you’ll notice some empty spaces. Your job is to fill them in according to the specifications of the various groups. Guides exist to help you determine what code to put in each category (mentioned below).In each section, create a tag that begins with the letters of the system you’re using there, and then (separated by a colon) define the relevant rating by its unique abbreviation. Once you have the tag, simply enter the appropriate digit, 0 or 1, inside it.
 ICRA, RSAC, SafeSurf and Safe for Kids represent the four most popular PICS systems.
For example, if you used ICRA, your tags would be
<icra:x></icra:x>, with the x‘s being replaced by the rating, and the 1 or 0 value going between the tags.For RSAC, it would be
<rsac:x>, for SafeSurf it would be <ss:x>, and for Weburbia’s "Safe for Kids" system it would be <sfk:x>.To determine exactly what sections you’ll need, visit these websites:
To see how this code might look, I’ve pre-built some example labels. ICRA labels have a two-letter code (for example,
NZ declares that there is no nudity on the website). For RSAC, it’s a letter followed by a number (indicating severity).For SafeSurf, it’s a slightly longer value (
SS~~, followed by two zeros and the number or letter). The easiest of all (with only one declaration) is Weburbia’s "Safe for Kids" scheme, with an S to represent the safety level, and a value of a 0, 1 or 2 to match the PICS scheme.Below are some basic examples of PICS labels from the four providers:
<label:ContentLabel rdf:ID="label_1">
<rdfs:comment>ICRA Ratings</rdfs:comment>
<icra:nz>1</icra:nz>
<icra:sz>1</icra:sz>
<icra:vz>1</icra:vz>
<icra:lz>1</icra:lz>
<icra:oz>1</icra:oz>
<icra:cz>1</icra:cz>
<icra:xz>1</icra:xz>
</label:ContentLabel>
<label:ContentLabel rdf:ID="label_2">
<rdfs:comment>RSACi Ratings</rdfs:comment>
<rsac:L>0</rsac:L>
<rsac:N>0</rsac:N>
<rsac:S>0</rsac:S>
<rsac:V>0</rsac:V>
</label:ContentLabel>
<label:ContentLabel rdf:ID="label_3">
<rdfs:comment>SafeSurf Ratings</rdfs:comment>
<ss:ss000>1</ss:ss000>
<ss:ss001>1</ss:ss001>
<ss:ss002>1</ss:ss002>
<ss:ss003>1</ss:ss003>
<ss:ss004>1</ss:ss004>
<ss:ss005>1</ss:ss005>
<ss:ss006>1</ss:ss006>
<ss:ss007>1</ss:ss007>
<ss:ss008>1</ss:ss008>
<ss:ss009>1</ss:ss009>
<ss:ss00A>1</ss:ss00A>
</label:ContentLabel>
<label:ContentLabel rdf:ID="label_4">
<rdfs:comment>WebUrbia Ratings</rdfs:comment>
<SFK:S>0</SFK:S>
</label:ContentLabel>
Once you’ve created the PICS label and determined your content’s suitability for younger audiences (basically by filling out the RDF file like a questionnaire), all that’s left to do is save the file, put it in the root directory of your website, and declare it in the
<head> via a link tag:<link rel="meta" href="PICS.rdf" type="application/rdf+xml" title="PICS labels" />
About the Author
 Alexander Dawson is a freelance web designer, author and recreational software developer specializing in web standards, accessibility and UX design. As well as running a business called HiTechy and writing, he spends time on Twitter, SitePoint’s forums and other places, helping those in need.
 Posted in:


