


"Give your site a boost! Implement crucial optimization techniques that will improve not only your ySlow score, but your Google rank too. In this tutorial we will cover all aspects of W3 caching, ySlow, Google page speed, CSS sprites & htaccess rules, to achieve a high ySlow score like i have done on my blog.
Before We Begin
A quick note before we start, although this tutorial will cover everything in as much detail as is required, there will (wherever possible) be shortcuts, to save you some time.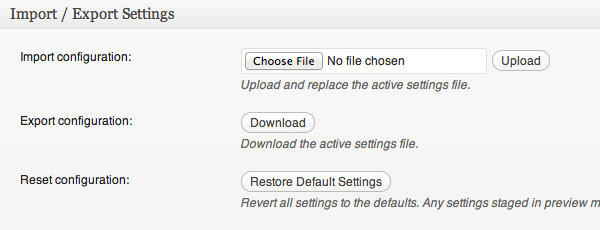
Step 1: Install the Necessary Components
Install a Caching Plugin: First off, whatever caching plugin you are using, switch it off NOW! Unless it is the mighty W3 Total cache, as that is what we will be working with here. (Ok, so that came on a bit strong, but I’ve used a lot of the caching plugins and W3 is my favorite. If you’re using another for any reason, that’s probably fine – we’ll move along with the W3 recommendation though.) Head over to your “Add new” plugins section within the WordPress, search “W3 Total Cache” download it, install it but don’t switch it on… well not yet anyway.Install a Database Manager Plugin: Next you will need another plugin called “WP-DBmanager” again search and install this making sure you have no other database plugins installed.
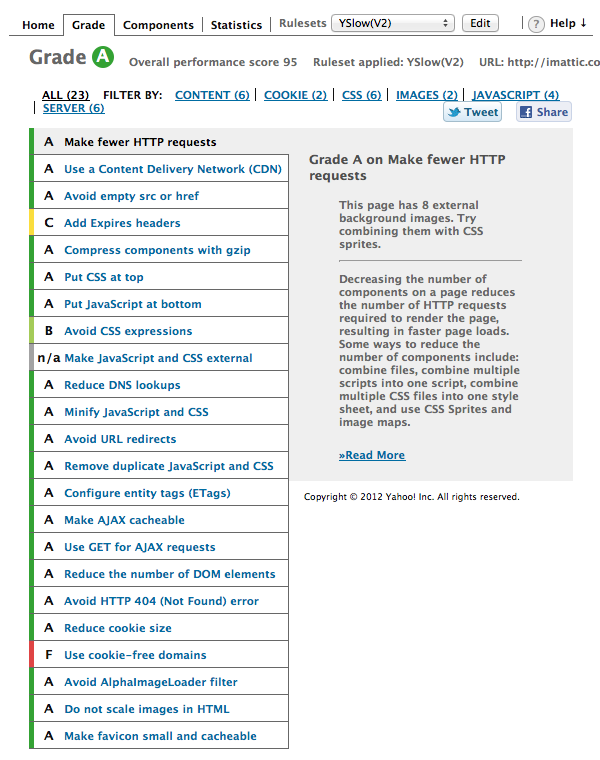
Before we go ahead and start improving your site lets first see what were dealing with. Open up Google chrome or install it if you don’t have it already. Once you are in chrome install the ySlow plugin HERE once installed you will see a new icon in the top right of your screen. Click it. (Ensuring you are on the homepage of your site)
ySlow will then check your site, tell you what’s good, what’s bad and everything in between. We want to focus first on everything that is below a grade B. Below i will run through every W3 setting you need to improve your sites load time.
Step 2: Switch on W3 Total Cache
Once W3 Total Cache is switched on you will see a new sidebar tab called “Performance” click it. Now obviously we will run though all the different sections of W3 but to save you some time you could import the W3 settings file, bundled in the “source files” & jump to step 2C.This is where all the settings for W3 sit. Let’s first look at the “General Settings”, you will want to tick the following boxes (to enable):
- Page Cache (select “Disk: Enhanced” in the drop down) – Caching pages will reduce the response time of your site and increase the scale of your web server.

- Minify (Select “Manual”, leave the other settings) – Minification can decrease file size of HTML, CSS, JS and feeds respectively by ~10% on average.

- Do not tick Database cache (we will sort this later via a different method)
- Object cache (select “Disk” in the drop down) – Object caching greatly increases performance for highly dynamic sites (that use the Object Cache API).
- Browser Cache – Enable HTTP compression and add headers to reduce server load and decrease file load time.
- Leave CDN, Varnish & cloudflare untouched. (again to do this quick upload the settings file included in the “source files” via the option at the bottom of the “General Settings”)
Step 2B: Get Cracking with Minify
Click the “Minify” tab/link at the top of the W3 panel/page. In the “HTML & XML” section make sure that the first three boxes are checked. Then click the “Help” button at the top.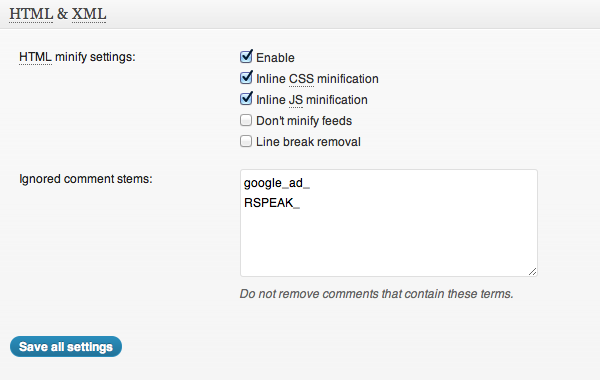
- Jquery files
- Google ads (or any ads for that matter)
- Any stats.wordpress.js files (you will have these if you have jetpack installed
Minify is one of the biggest improvements you will be integrating, once you have selected all your files (and done the same with every theme, if you are using more than one) then click “Apply & close”, directly followed by “Save all settings” (Deploy it if your site still looks/works the same).
Step 2C: Head Over to Browser Cache…
Once your in the “Browser Cache” tab/page you will need to change the “Expires header lifetime” to 691200 seconds. This will immediately boost your ySlow score.Now head back to “General Settings” and click “empty all caches”, then go to your homepage and run the ySlow test again, you should see a nice improvement.
Step 3: Let’s get back to that pesky Database optimization
Below the “Performance” sidebar tab in the WordPress backend there should be another tab with the name “Database” (if not then go back and activate it).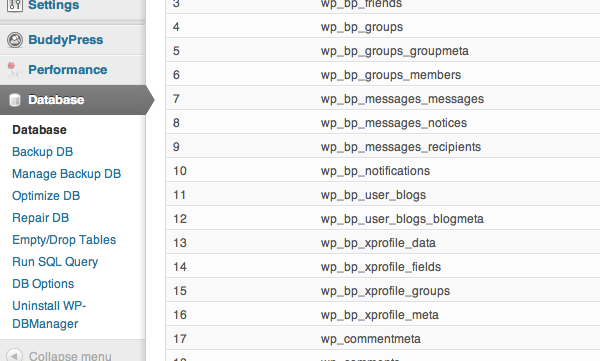
To backup click the “Backup DB” then at the bottom click “Backup” (Don’t worry about gzipping).
Next up we want to repair your database (just incase) so go to the “Repair DB” in the sidebar. Click the “Repair” button at the bottom.
Lastly, optimize it. Click the “Optimize DB” sidebar button & yep you’ve guessed it, click the “Optimize” button at the bottom.
To avoid this process again pop into the “DB Options” sidebar tab. At the bottom there will be an “Automatic Scheduling” section. Ensure that backups are done EVERY DAY (you can’t be too careful) then set it to optimize say every few days and repair once a week. Then save the changes.
Step 4: CSS Sprites
Now in ySlow you will probably have noticed in the “Make fewer HTTP requests” section a string of text that says something like “This page has 10 external background images. Try combining them with CSS sprites.”Imagine the savings if all those little images could be just one image… It would sure speed things up. For this we are going to use a free tool called “Spriteme” so head on over to the site HERE (do so in a new tab though, again make sure your site is on the homepage).
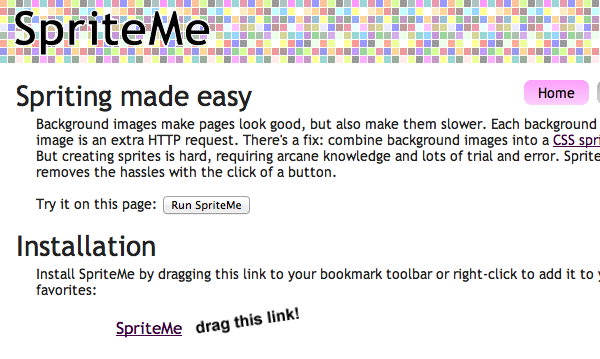

Now click the “export CSS” button in the top right of the “SpriteMe” popover, copy & paste the css code it has given you ( that’s right ALL of it) directly into the bottom of your themes “style.css” or anywhere it is going to be used instead of the default code (as we don’t really want to overwrite the default theme code). You will need to ensure the second “background-image: url” is changed from “http://www.jaredhirsch.com” to where ever you saved the sprite image from earlier.
Once you have done this please once again “empty all caches” in the “Performance” sidebar tab.
Step 5: Optimize Those Images (compression)
For the most part i personally always use Photoshop to compress my images before uploading but for many of you this is not an option as you don’t have photoshop. So here i will assist you in how to decrease the file size of you images.First off you will want to make sure any theme images are optimized and you can do this buy grabbing all of them and whacking them in this fantastic little app called “ImageOptim“
Once your theme images are nice an compressed you may want to look at plugins such as “Smush.it” for WordPress that will optimize images you may use in posts and the like.
Step 6: GZIP-APPAGE!!!
This is most certainly a crucial optimization technique. To enable PHP GZIP compression, edit the php.ini (example locations such as in /etc/ or /usr/local/lib) with any text editor such as vi, and locate the following directive: zlib.output_compressionThe default value is Off, change the setting to On to make the line looks like below:
zlib.output_compression = On
Restart Apache HTTPD server after the change. Every web pages produced by PHP will now be compressed before sending over Internet to the web browser to decode.
PHP also has a directive which can be used to adjust the compression level. To set the compress level, use the following line in php.ini, with valid values between 1 and 9, where 1 is least compress and 9 is most compress. Default compression level is 6, which provides the best compression without degrading server performance.
zlib.output_compression_level = 6
Previously, PHP compression is achieved by entering <?php ob_start(“ob_gzhandler”); ?> code at the beginning of each PHP scripts. The method is not recommended as each and every scripts have to be changed. zlib enabling in php.ini will apply to all PHP scripts on the web server without exclusion.
If it’s impossible to modify php.ini file, or does not have control over php.ini especially on a shared hosting, the PHP GZIP compression can also be setup via .htaccess file, typically located on the root of the website. To enable PHP GZIP compression via Zlib, just add the following line to the .htaccessfile. Note that each website has to be changed individually.
php_flag zlib.output_compression on
The disadvantage of enabling GZIP compression via PHP is that only web pages generated by PHP scripts will be compressed by GZIP encoding. All external CSS or JavaScript files will not be compressed. For the ability to enable GZIP compression on all file types, uses mod_deflate or mod_gzip on HTTPD web server instead.
Do check and verify that GZIP compression is running properly
Step 7: Tidbits
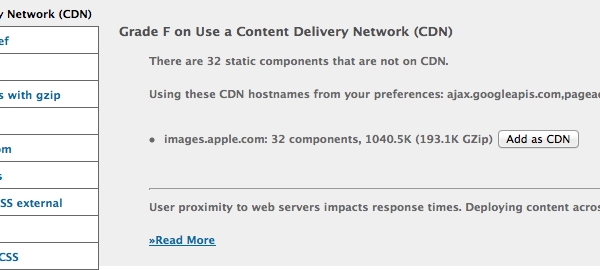
As we come towards the end of this tutorial i just want to run through a few last things. Now that your images have been crushed and sprites have been made you may want to clear both your browser cache and once more “empty all caches” in the “Performance” sidebar tab.Now let’s head back, log out of WordPress load up your sites homepage and do a ySlow test. Again it should have risen, in the CDN section of ySlow you have the option to “Add as CDN” on some components. Doing this will boost your grade even further.
Now Fingers crossed you should be looking at a grade A test score and if you compare this with Google’s own page speed report test you will see a very healthy score.
One section of ySlow that i haven’t covered is the “Cookie free domain” which is when the browser makes a request for a static image and sends cookies together with the request, the server doesn’t have any use for those cookies. So they only create network traffic for no good reason. You should make sure static components are requested with cookie-free requests. Create a subdomain and host all your static components there.
If your domain is www.example.org, you can host your static components onstatic.example.org. However, if you’ve already set cookies on the top-level domain example.org as opposed to www.example.org, then all the requests to static.example.org will include those cookies. In this case, you can buy a whole new domain, host your static components there, and keep this domain cookie-free. Yahoo! uses yimg.com, YouTube uses ytimg.com, Amazon uses images-amazon.com and so on.
Another benefit of hosting static components on a cookie-free domain is that some proxies might refuse to cache the components that are requested with cookies. On a related note, if you wonder if you should use example.org or www.example.org for your home page, consider the cookie impact. Omitting www leaves you no choice but to write cookies to *.example.org, so for performance reasons it’s best to use the www subdomain and write the cookies to that subdomain.
I won’t go into this but the above should give you a fair idea. I will go over this in depth in a later tutorial. This does improve the score but it’s not completely essential.
 Posted in:


