


Introduction to the Smarty Templating Framework: "
Smarty is a PHP-based templating engine/framework. It allows you to further separate your business logic from its visualization, by removing as much PHP code as possible away from your views. Some developers and frameworks prefer not to use a templating engine, others do prefer them to using plain PHP in your views. Both points of view can be argued, and in the end, it’s mostly a matter of taste. Anyway, it’s never a bad idea to try it out before deciding not to use it, and that’s what this tutorial is about: trying out the Smarty Templating Framework.
Step 0: What To Expect
At the end of this tutorial, you’ll have a basic idea of how Smarty works. You’ll be able to load template files, pass variables to them, use a “layout” in which your other views are inserted, and write your own modifiers. This will all be accomplished using an additional wrapper class, which you can easily integrate in your existing projects.
Step 1: Setting Up The Project
The project for this tutorial will have a very easy setup, since we’re not developing a real application. Just create a project folder (mine is named “smarty_example”) with an index.php file in it, and a directory called “lib” inside of it. Also, create a file named smtemplate.php in the “lib” folder. Next, create a “views” folder inside “smarty_example”. This folder will contain our smarty template files.
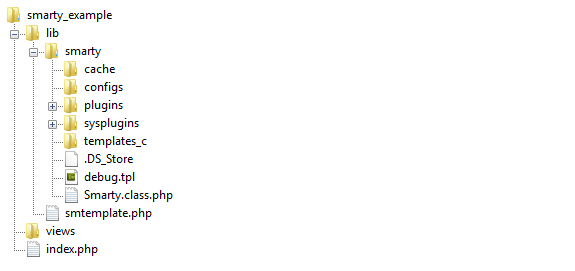
Before you’re able to use something, you have to install it. Thankfully, installing Smarty is extremely easy and requires almost no configuration. First of all, download Smarty and extract the archive. You can check out everything inside the archive, but we’ll only need the “libs” folder for our application. Rename it to “smarty” and paste it inside the “lib” folder of our application. Smarty uses some additional folders, so create the “templates_c”, “cache” and “configs” folders inside our “lib/smarty” folder. If you’re not using Windows, you’ll have to give 775 permissions on these folders to your webserver. Your directory tree should now look like this:
Step 2: Creating The SMTemplate Class
Every programmer has his own idea about the ideal API. In order to adjust Smarty’s API slightly, and allow us to add some additional functionality, we’ll create a wrapper class called SMTemplate, which will take care of the smarty details for us. This approach has another advantage: if, at one moment in time, you should choose to use another template engine, you can create a wrapper for that engine, while retaining the SMTemplate interface, and thus without breaking the code that uses our SMTemplate class.
Storing Your Configuration
Before coding the SMTemplate class functionality, we’ll need a place to store some configuration details. You can do this in multiple ways, i.e. by defining config options as class constants, by defining them as constants in the smtemplate.php file, or by keeping them in a separate config file. I prefer the last option, so I’ll create an smtemplate_config.php file. Smarty needs configuration for the template, compiled template, cache, and config directories. Later, we might also add SMTemplate specific options to our config file, but for now, this will do:
/**
* @file
* Configuration file for the SMTemplate class
*/

$smtemplate_config =
array(
'template_dir' => 'views/',
'compile_dir' => 'lib/smarty/templates_c/',
'cache_dir' => 'lib/smarty/cache/',
'configs_dir' => 'lib/smarty/configs/',
);
Building the SMTemplate Class
The SMTemplate class will load this config file, and pass the options to Smarty. Before we can pass the options, we’ll need an object of class Smarty. Our SMTemplate class could extend the Smarty class, but I prefer to use a private instance variable to contain the Smarty object. So far, we have the following for our SMTemplate class:
/**
* @file
* Wrapper for Smarty Template Engine
*/

require_once('smarty/Smarty.class.php');
require_once('smtemplate_config.php');

class SMTemplate{

private $_smarty;

function __construct(){
$this->_smarty = new Smarty();

global $smtemplate_config;
$this->_smarty->template_dir = $smtemplate_config['template_dir'];
$this->_smarty->compile_dir = $smtemplate_config['compile_dir'];
$this->_smarty->cache_dir = $smtemplate_config['cache_dir'];
$this->_smarty->configs_dir = $smtemplate_config['configs_dir'];
}
}
Rendering templates
As you can see, our class is still pretty pathetic, as it can’t render anything. We’ll solve this issue by adding a render function, which loads a template and displays it.
function render($template){
$this->_smarty->display($template . '.tpl');
}
In order to render anything, we’ll need to create a template file, and then call the render function from our index.php file. The template file will be pretty basic, containing a simple html page. Name it “home.tpl”, and place it inside our “views” directory.
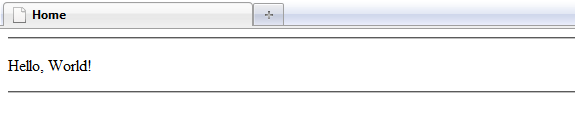
<html>
<head>
<meta http-equiv="Content-type" content="text/html; charset=utf-8" />
<title>Home</title>
<link rel="stylesheet" href="/css/master.css" type="text/css" media="screen" title="no title" charset="utf-8" />
</head>
<body>
<p>Hello, World!</p>
</body>
</html>
Now, all that is left is to create an SMTemplate object and render ‘home’. Open up index.php, add the following lines of code, and navigate there in your browser.
require_once('lib/smtemplate.php');

$tpl = new SMTemplate();
$tpl->render('home');

Step 3: Assigning and Formatting Variables
If we couldn’t render anything dynamically, Smarty would be pretty useless. Luckily, we can assign variables to our smarty class, and display those in our template. We can also use some Smarty functions (well, modifiers actually) to format them the right way.
Passing an Array of Variables
Though Smarty supports the assignment of variables, our SMTemplate doesn’t (yet). We’ll provide the CodeIgniter-style of assignment, where you pass an array to the render function. You can adapt SMTemplate to support other methods as well; for example, assigning them to the object and then using __set to store them in an array is also a clean way. For this tutorial though, passing an array will do. Before assigning the variables, we’ll edit our template to something a little more dynamic. Saying hello to the world is customary for programmers, but not very useful, so let’s use a variable to determine who we’re hello-ing. Secondly, we’ll add today’s date to the message. Variables can be displayed by wrapping them in curly brackets.
<body>
<p>Hello, {$receiver}! It's {$date} today!</p>
</body>
If you refresh the page, you’ll see that the variables haven’t been filled in, since we didn’t set them. Setting variables can be done using smarty->assign, so let’s assign them. The render function will now take an optional data array as a second argument.
function render($template, $data = array()){
foreach($data as $key => $value){
$this->_smarty->assign($key, $value);
}
$this->_smarty->display($template . '.tpl');
}
It still won’t work, because we don’t pass in an array when calling our render function. We can easily do this, by altering a few lines in our index.php file.
$data = array(
'receiver' => 'JR',
'date' => time(),
);

$tpl = new SMTemplate();
$tpl->render('home', $data);
If you refresh now, the page will say something like “Hello, JR! It’s 1282810169 today!”. Of course, this date isn’t really what we had in mind. It needs to be formatted, which brings us to the next section.
Using Modifiers to Format Variables
Smarty isn’t just a template engine that searches and replaces variables. It’s also a powerful framework, that allows you to save time by using things like modifiers, functions, and blocks. If we wish to format our date, for example, we can use the date_format modifier. To apply a modifier to a variable, simply put a pipe character and the modifier name behind it, followed by the optional arguments which are separated by colons. The date_format modifier takes a string argument, which represents the format the date will take, and an optional default date, which we won’t need. The following code will display the date as “day (in decimals) Month”.
<body>
<p>Hello, {$receiver}! It's {$date|date_format:"%d %B"} today!</p>
</body>
This should now give something of the form “Hello, JR! It’s 26 August today!” Now, maybe we want to make sure our receiver is uppercased. We can achieve that by using the upper modifier.
<body>
<p>Hello, {$receiver|upper}! It's {$date|date_format:"%d %B"} today!</p>
</body>
Now, if I alter index.php to pass ‘jr’ instead of ‘JR’, the template will still show ‘JR’. Easy, isn’t it? Next, we’ll include our templates in a default “layout”.
Step 4: Working With a Layout
Before we alter our SMTemplate class to enable layouts, we’ll create a layout first. Create a new directory named “layouts” inside our “smarty_example” folder and move home.tpl there. Rename it to ‘page.tpl’. We’ll remove our previous ‘hello world’ content, and put two horizontal lines in. Our content will be placed in between these lines.
<html>
<head>
<meta http-equiv="Content-type" content="text/html; charset=utf-8" />
<title>Home</title>
<link rel="stylesheet" href="/css/master.css" type="text/css" media="screen" title="no title" charset="utf-8" />
</head>
<body>
<hr />
<hr />
</body>
</html>
Of course, this won’t cut it, since Smarty won’t know where to insert our content. There is more than one way to get content from another template inside of our layout, and I’ll use Smarty’s fetch function. This function returns our template as text, instead of displaying it. This means we can fetch the template, and then assign it to a variable for use within our template! This variable’s name is yours to choose. I prefix my special variables with __, to distinguish them from the other variables I use. I’ll call this one ‘content’, since we’re assigning our page content to it.
<body>
<hr />
{$__content}
<hr />
</body>
This concludes our layout, so let’s create some templates to use as content. I’ll create a ‘hello’ template, which will contain a standard ‘hello world’ line, and a ‘lipsum’ template, which holds some Lorem Ipsum text. Don’t forget to give these templates a .tpl extension.
<p>Hello, World!</p>
<p>Lorem ipsum dolor sit amet, consectetur adipiscing elit. Aenean aliquet dignissim diam at vulputate. Aenean nec ligula ac dolor fringilla pharetra. Cras in augue ac tellus dictum pellentesque. Integer elementum tempus lectus, non rutrum sem viverra a. Sed tincidunt sollicitudin dolor, ut blandit magna auctor non. Maecenas sed nibh felis. Donec dictum porta ante at faucibus. Morbi massa tellus, pulvinar id porta id, imperdiet vel nibh. Donec lectus nulla, porttitor a tempor id, cursus vitae leo. Nulla eget nunc eu lorem posuere hendrerit ut ac urna. Aenean sodales lobortis egestas. Integer faucibus hendrerit tempor. </p>
Adapting our SMTemplate class to use a layout is also extremely easy. We’ll first set up a configuration option for the layouts directory, like we did for our views.
/**
* @file
* Configuration file for the SMTemplate class
*/

$smtemplate_config =
array(
'layouts_dir' => 'layouts/',
'template_dir' => 'views/',
'compile_dir' => 'lib/smarty/templates_c/',
'cache_dir' => 'lib/smarty/cache/',
'configs_dir' => 'lib/smarty/configs/',
);
Next, we’ll change our render function. We’ll supply the layout as an optional third parameter, and let it default to ‘page’. Then, we’ll fetch the requested template, assign it to the $__content variable, and display our layout.
function render($template, $data = array(), $layout = 'page'){
foreach($data as $key => $value){
$this->_smarty->assign($key, $value);
}
$content = $this->_smarty->fetch($template . '.tpl');
$this->_smarty->assign('__content', $content);
$this->_smarty->display($layout . '.tpl');
}
There are a couple of things to consider, regarding this code. First of all, we haven’t told Smarty where to find our layouts yet. We can do that by adding a template dir, but this approach means we can’t give our layouts the same name as our templates – Smarty wouldn’t know which one to pick. We could solve this by giving our layouts a different extension, or by setting and resetting our template directory inside our render function, or by using more advanced Smarty functions. For now, we’ll just settle with the constraint that layouts and views can’t have the same name. We can add our layouts directory using the addTemplateDir() function.
function __construct(){
$this->_smarty = new Smarty();

global $smtemplate_config;
$this->_smarty->template_dir = $smtemplate_config['template_dir'];
$this->_smarty->addTemplateDir($smtemplate_config['layouts_dir']);  // <- new line
$this->_smarty->compile_dir = $smtemplate_config['compile_dir'];
$this->_smarty->cache_dir = $smtemplate_config['cache_dir'];
$this->_smarty->configs_dir = $smtemplate_config['configs_dir'];
}
Let’s check it out by changing our index.php file again.
require_once('lib/smtemplate.php');

$tpl = new SMTemplate();
$tpl->render('hello');
It works!
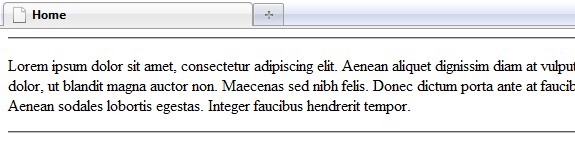
And if we change it to render ‘lipsum’, it works as well:
Step 5: Creating Your Own Modifiers
As the final part of this tutorial, I’ll introduce one of Smarty’s more advanced features, that make it more than a simple templating engine. Smarty contains a number of standard functions and modifiers, but it’s also extremely easy to create your own. Let’s have a look at the modifier we used to format our date:
{$date|date_format:'%d %B'}
If you want a custom modifier, all you need to do is write a PHP function.
This will actually result in a call to the function smarty_modifier_date_format(), with $date and our format string as arguments. This function will return a string, and this string will be displayed. So if you want a custom modifier, all you need to do is write a PHP function. As an example, we’ll write a modifier called ‘weirdcase’, which will uppercase all consonants and lowercase all vowels, i.e. ‘Lorem Ipsum’ becomes ‘LoReM IPSuM’. To do this, create a file called ‘modifier.weirdcase.php’ in the ‘lib/smarty/plugins’ folder. Our modifier will take only one argument, the string that needs to be altered.
/**
* Smarty weirdcase modifier plugin
*
* Type:     modifier
* Name:     weirdcase
* Purpose:  turn consonants into uppercase and vowels into lowercase
* @param string
* @return string
*/

function smarty_modifier_weirdcase($string){

}
We can get our result by defining an array ‘vowels’, turning our string into an array and then traversing it, and checking whether each character is in our vowels array. If it is, we lowercase it, otherwise, we uppercase it. The modified characters are then appended to a result variable.
function smarty_modifier_weirdcase($string){
$str_array = str_split($string);
$result = '';
$vowels = array('a', 'e', 'i', 'o', 'u');

foreach ($str_array as $char){
if (in_array($vowels, $char)) $result .= strtolower($char);
else $result .= strtoupper($char);
}

return $result;
}
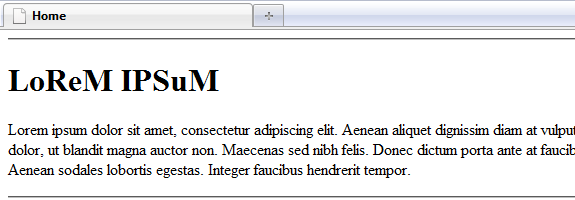
This should do the trick, so let’s check it out. Edit the ‘lipsum.tpl’ template and add an h1 containing our weirdcased ‘Lorem Ipsum’ to it.
<h1>{'Lorem Ipsum'|weirdcase}</h1>
<p>Lorem ipsum dolor sit amet, consectetur adipiscing elit. Aenean aliquet dignissim diam at vulputate. Aenean nec ligula ac dolor fringilla pharetra. Cras in augue ac tellus dictum pellentesque. Integer elementum tempus lectus, non rutrum sem viverra a. Sed tincidunt sollicitudin dolor, ut blandit magna auctor non. Maecenas sed nibh felis. Donec dictum porta ante at faucibus. Morbi massa tellus, pulvinar id porta id, imperdiet vel nibh. Donec lectus nulla, porttitor a tempor id, cursus vitae leo. Nulla eget nunc eu lorem posuere hendrerit ut ac urna. Aenean sodales lobortis egestas. Integer faucibus hendrerit tempor. </p>
Step 6: Conclusion
Although there is a lot more to Smarty than I could fit within this tutorial, hopefully this should provide you with a basic knowledge of how to work with it. You essentially already know everything you need to know. You should also be able to determine whether you like the idea of using this templating framework or not by now. The more advanced topics, such as filters and blocks, are useful, however, you’ll still do fine without them. You can find documentation on the more advanced features at the Smarty website. Thanks for reading!
"
 Posted in:


