


"Learn in this tutorial how to make a filterable Portfolio with jQuery integrated with WordPress, remember that this portfolio kind can make a big difference on your themes!
Step 1: Introduction
You can use the code from this tutorial in any theme that you’ve created or are creating, we’ll follow simple steps and in my case, I’ll use the default Twenty Eleven theme and running on WordPress 3.3. Okay, let’s work!You can use the code used in this tutorial in any theme that you’ve created or are creating.
Step 2: Creating the Project Item on Admin
We’ll need to create a section on Admin bar called Project, in this section you’ll create all the portfolio entries with their respective thumbnail and demo link.Open the functions.php file and at the end, let’s create a function to register the Project item. (You can see the complete function at the end of this step)
add_action('init', 'project_custom_init');

/* SECTION - project_custom_init */
function project_custom_init()
{
 // the remainder code goes here
}
/* #end SECTION - project_custom_init --*/
In this code we are using the add_action function so that when WordPress begins to load our function will be called.Inside the project_custom_init function lets add the code that registers a Custom Post Type called Project.
// The following is all the names, in our tutorial, we use "Project"
 $labels = array(
  'name' => _x('Projects', 'post type general name'),
  'singular_name' => _x('Project', 'post type singular name'),
  'add_new' => _x('Add New', 'project'),
  'add_new_item' => __('Add New Project'),
  'edit_item' => __('Edit Project'),
  'new_item' => __('New Project'),
  'view_item' => __('View Project'),
  'search_items' => __('Search Projects'),
  'not_found' =>  __('No projects found'),
  'not_found_in_trash' => __('No projects found in Trash'),
  'parent_item_colon' => '',
  'menu_name' => 'Portfolio'
 );

 // Some arguments and in the last line 'supports', we say to WordPress what features are supported on the Project post type
 $args = array(
  'labels' => $labels,
  'public' => true,
  'publicly_queryable' => true,
  'show_ui' => true,
  'show_in_menu' => true,
  'query_var' => true,
  'rewrite' => true,
  'capability_type' => 'post',
  'has_archive' => true,
  'hierarchical' => false,
  'menu_position' => null,
  'supports' => array('title','editor','author','thumbnail','excerpt','comments')
 );

 // We call this function to register the custom post type
 register_post_type('project',$args);
The code above will add an item on the Admin menu called Portfolio and it will be in this section that we’ll create all the portfolio items.Now, inside the function, let’s add more code.
// Initialize Taxonomy Labels
 $labels = array(
  'name' => _x( 'Tags', 'taxonomy general name' ),
  'singular_name' => _x( 'Tag', 'taxonomy singular name' ),
  'search_items' =>  __( 'Search Types' ),
  'all_items' => __( 'All Tags' ),
  'parent_item' => __( 'Parent Tag' ),
  'parent_item_colon' => __( 'Parent Tag:' ),
  'edit_item' => __( 'Edit Tags' ),
  'update_item' => __( 'Update Tag' ),
  'add_new_item' => __( 'Add New Tag' ),
  'new_item_name' => __( 'New Tag Name' ),
 );

 // Register Custom Taxonomy
 register_taxonomy('tagportfolio',array('project'), array(
  'hierarchical' => true, // define whether to use a system like tags or categories
  'labels' => $labels,
  'show_ui' => true,
  'query_var' => true,
  'rewrite' => array( 'slug' => 'tag-portfolio' ),
 ));
Attention to the ‘hierarchical’ argument on the register_taxonomy function, if you type true you will have a system like categories for your portfolio items, but if you type false you will have a system like tags. I prefer the category style system.Oh yeah! The project_custom_init() function is finished! See below for the full code of this function.
add_action('init', 'project_custom_init');

 /*-- Custom Post Init Begin --*/
 function project_custom_init()
 {
   $labels = array(
  'name' => _x('Projects', 'post type general name'),
  'singular_name' => _x('Project', 'post type singular name'),
  'add_new' => _x('Add New', 'project'),
  'add_new_item' => __('Add New Project'),
  'edit_item' => __('Edit Project'),
  'new_item' => __('New Project'),
  'view_item' => __('View Project'),
  'search_items' => __('Search Projects'),
  'not_found' =>  __('No projects found'),
  'not_found_in_trash' => __('No projects found in Trash'),
  'parent_item_colon' => '',
  'menu_name' => 'Project'

   );

  $args = array(
  'labels' => $labels,
  'public' => true,
  'publicly_queryable' => true,
  'show_ui' => true,
  'show_in_menu' => true,
  'query_var' => true,
  'rewrite' => true,
  'capability_type' => 'post',
  'has_archive' => true,
  'hierarchical' => false,
  'menu_position' => null,
  'supports' => array('title','editor','author','thumbnail','excerpt','comments')
   );
   // The following is the main step where we register the post.
   register_post_type('project',$args);

   // Initialize New Taxonomy Labels
   $labels = array(
  'name' => _x( 'Tags', 'taxonomy general name' ),
  'singular_name' => _x( 'Tag', 'taxonomy singular name' ),
  'search_items' =>  __( 'Search Types' ),
  'all_items' => __( 'All Tags' ),
  'parent_item' => __( 'Parent Tag' ),
  'parent_item_colon' => __( 'Parent Tag:' ),
  'edit_item' => __( 'Edit Tags' ),
  'update_item' => __( 'Update Tag' ),
  'add_new_item' => __( 'Add New Tag' ),
  'new_item_name' => __( 'New Tag Name' ),
   );
  // Custom taxonomy for Project Tags
  register_taxonomy('tagportfolio',array('project'), array(
  'hierarchical' => true,
  'labels' => $labels,
  'show_ui' => true,
  'query_var' => true,
  'rewrite' => array( 'slug' => 'tag-portfolio' ),
   ));

 }
 /*-- Custom Post Init Ends --*/
If you go to the Admin now, you will see a new item on menu called Portfolio like the image below: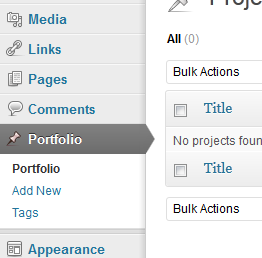
The code below must be typed below our last function and not inside it.
/*--- Custom Messages - project_updated_messages ---*/
 add_filter('post_updated_messages', 'project_updated_messages');

 function project_updated_messages( $messages ) {
   global $post, $post_ID;

   $messages['project'] = array(
  0 => '', // Unused. Messages start at index 1.
  1 => sprintf( __('Project updated. <a href="%s">View project</a>'), esc_url( get_permalink($post_ID) ) ),
  2 => __('Custom field updated.'),
  3 => __('Custom field deleted.'),
  4 => __('Project updated.'),
  /* translators: %s: date and time of the revision */
  5 => isset($_GET['revision']) ? sprintf( __('Project restored to revision from %s'), wp_post_revision_title( (int) $_GET['revision'], false ) ) : false,
  6 => sprintf( __('Project published. <a href="%s">View project</a>'), esc_url( get_permalink($post_ID) ) ),
  7 => __('Project saved.'),
  8 => sprintf( __('Project submitted. <a target="_blank" href="%s">Preview project</a>'), esc_url( add_query_arg( 'preview', 'true', get_permalink($post_ID) ) ) ),
  9 => sprintf( __('Project scheduled for: <strong>%1$s</strong>. <a target="_blank" href="%2$s">Preview project</a>'),
    // translators: Publish box date format, see http://php.net/date
    date_i18n( __( 'M j, Y @ G:i' ), strtotime( $post->post_date ) ), esc_url( get_permalink($post_ID) ) ),
  10 => sprintf( __('Project draft updated. <a target="_blank" href="%s">Preview project</a>'), esc_url( add_query_arg( 'preview', 'true', get_permalink($post_ID) ) ) ),
   );

   return $messages;
 }

 /*--- #end SECTION - project_updated_messages ---*/
This function creates custom messages for when a user modifies the portfolio post, see a message example on image below: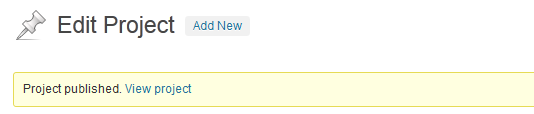
Adding a Demo URL Meta Box
In this step, we’ll add a meta box on the portfolio item creation screen where the user can paste a url to the website or other page.Let’s create three functions to add this meta box where we will save our URL for the portfolio item. The code goes below the last function that we’ve created.
/*--- Demo URL meta box ---*/

 add_action('admin_init','portfolio_meta_init');

 function portfolio_meta_init()
 {
  // add a meta box for WordPress 'project' type
  add_meta_box('portfolio_meta', 'Project Infos', 'portfolio_meta_setup', 'project', 'side', 'low');

  // add a callback function to save any data a user enters in
  add_action('save_post','portfolio_meta_save');
 }

 function portfolio_meta_setup()
 {
  global $post;

  ?>
   <div class="portfolio_meta_control">
    <label>URL</label>
    <p>
     <input type="text" name="_url" value="<?php echo get_post_meta($post->ID,'_url',TRUE); ?>" style="width: 100%;" />
    </p>
   </div>
  <?php

  // create for validation
  echo '<input type="hidden" name="meta_noncename" value="' . wp_create_nonce(__FILE__) . '" />';
 }

 function portfolio_meta_save($post_id)
 {
  // check nonce
  if (!isset($_POST['meta_noncename']) || !wp_verify_nonce($_POST['meta_noncename'], __FILE__)) {
  return $post_id;
  }

  // check capabilities
  if ('post' == $_POST['post_type']) {
  if (!current_user_can('edit_post', $post_id)) {
  return $post_id;
  }
  } elseif (!current_user_can('edit_page', $post_id)) {
  return $post_id;
  }

  // exit on autosave
  if (defined('DOING_AUTOSAVE') == DOING_AUTOSAVE) {
  return $post_id;
  }

  if(isset($_POST['_url']))
  {
   update_post_meta($post_id, '_url', $_POST['_url']);
  } else
  {
   delete_post_meta($post_id, '_url');
  }
 }

 /*--- #end  Demo URL meta box ---*/
I won’t explain in details this code because you can learn about meta boxes in this tutorial: Reusable Custom Meta Boxes or just do a little search through the WordPress Codex or on Google.The code above just creates one meta box with one field where the user can type a URL. We need all these functions, the first just initializes the meta box, the second is the meta box code, and the last is a function to save the data.
Ok! After this, we can go on to next step and work on the front-end, because the back-end is done! We’ll then add the content after.
Step 3: Creating the Portfolio Page template
Now we’ll work to show our portfolio entries to the user! But first let’s create some categories and then add some items to the portfolio.In this tutorial I’ll use a two column portfolio layout, with some adjustments on markup and CSS you can create a lots of layouts!
A few tips to create a portfolio item
- Create the tags/categories first
- In the “Add New Project” page you’ll have an editor like the post/page editor, then just type all the text and images that your user will see when they click on the “More Details” link
- To add thumbnails we’ll use the Featured Image that is a default WordPress feature
- In this tutorial I’ll use images with 400px x 160px (width and height), but feel free to use one that you like and that fits in your layout
- Use http:// before the links on the meta box so you don’t get a 404 not found error
Creating the Page Template
First, duplicate the page.php file. Then, rename it to page_portfolio_2c.php.We need to edit this new file and paste the code below on the file’s first line:
<?php
/*
Template Name: Portfolio 2 Columns
*/
?>
This will show a new option on the page creation screen, but remember that this code MUST be pasted on the file’s first line!
Now just erase all the content inside content div, in this tutorial, I’m using the Twenty Eleven theme and after erasing, I have this code in my file:
<?php
/*
Template Name: Portfolio 2 Columns
*/
?>

<?php
get_header(); ?>

  <div id="primary">
   <div id="content" role="main">

    <?php // I removed all the lines here ?>

   </div><!-- #content -->
  </div><!-- #primary -->

<?php get_footer(); ?>
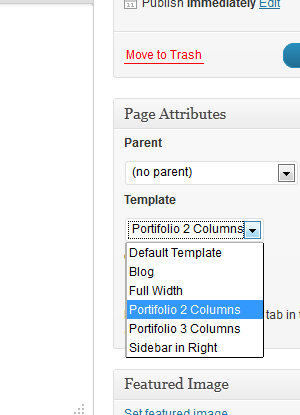
If you are using your own theme, then erase all the lines that get content from your page, like the_content() for example. We’ll create some custom code, so don’t leave other code here, in the portfolio page we just need your projects!Now, go to WordPress Admin and create a new Page called “Portfolio” and don’t forget to select “Portfolio 2 Columns” in the Template field, like the image below.
If you try to access the page now you’ll get only the header, footer and blank content. So, let’s add life to our filterable portfolio!
Step 4:The jQuery Filterable Portfolio
Let’s talk a little about the plugin that we’ll use to make the portfolio.The plugin
In this tutorial I’ll make use of a plugin called Filterable, this plugin was created by GetHifi.This plugin was written without jQuery’s compatibility mode, so I just changed it and the version that works fine with WordPress is in the Source Code file for this tutorial.
The plugin is a little old, to be more exact, it’s from 2009, but it’s on MIT License, so you can use on premium themes, commercial sites and wherever you like.
Just download the modified script that is on Source Code (link on tutorial top) and let’s begin! If you like, visit the homepage to get more details about it.
How Filterable works
Using Filterable is very simple! The first step is use the right markup, the plugin expects markup like the example below:<ul id="portfolio-filter"> <li><a href="#all">All</a> <li><a rel="jquery" href="#jquery">jQuery</a> <li><a rel="webdesign" href="#webdesign">Webdesign</a> </ul>Here we have the filter items, when we click on one of these links, then all the magic will happen. Important: all the entries will need a class with the same text in the ‘href’ and ‘rel’ attributes.
And now, we have the portfolio items markup:
<div id="portfolio-wrapper">
  <ul id="portfolio-list">

   <li class="portfolio-item all webdesign">
    <!-- ALL CUSTOM MARKUP HERE -->
   </li>

   <li class="portfolio-item all jquery">
    <!-- ALL CUSTOM MARKUP HERE -->
   </li>

  </ul>
  <div class="clearboth"></div>
 </div>
Important: What really matters here is that all the items (li) must be inside a (ul), in other words, must be wrapped. Note that we use a div too, we use it because we’ll ‘float’ the li elements, so it is important to have another wrapper and a clear div to avoid structure breaking problems.After this, we’ll need to call the filterable script in our functions.php file and initialize the filterable portfolio by calling the filterable() function, like the code below:
<script>
  jQuery(document).ready(function() {
   jQuery("#portfolio-list").filterable();
  });
 </script>
But for now, we’ll add our custom markup inside the li, but, we’ll need to generate all the filters and class names with PHP to get all the categories, portfolio entries and all the other details from WordPress! Let’s work!Creating the Portfolio Filter
Let’s back to the page_portfolio_2c.php file and write the portfolio filter. The code actually is something like the code below:<?php
/*
Template Name: Portfolio 2 Columns
*/
?>
<?php
get_header(); ?>
<div id="primary">
<div id="content" role="main">
<!-- WE'LL ADD OUR CODE HERE, INSIDE CONTENT DIV -->
</div><!-- #content -->
</div><!-- #primary -->
<?php get_footer(); ?>
We need get all the terms/categories from WordPress, edit some names to use inside the class attribute and print a ul for the required template.We’ll type the following code inside the #content div:
<?php
  $terms = get_terms("tagportfolio");
  $count = count($terms);
  echo '<ul id="portfolio-filter">';
  echo '<li><a href="#all" title="">All</a></li>';
   if ( $count > 0 )
   {
    foreach ( $terms as $term ) {
     $termname = strtolower($term->name);
     $termname = str_replace(' ', '-', $termname);
     echo '<li><a href="#'.$termname.'" title="" rel="'.$termname.'">'.$term->name.'</a></li>';
    }
   }
  echo "</ul>";
 ?>
The code above will generate a ul with the default element ‘All’, and do a loop on terms to print all other categories that have entries. Let’s do a more detailed explanation:First, we create a variable called $terms, and we use the get_terms() function that returns an array with all terms. As a parameter, the function requires a string or an array of strings with the taxonomy name(s), we pass tagportfolio, that was the name we used in our functions.php file. You can get more detailed info under get_terms() in the WordPress Codex.
Then, we create a variable called $count and use the count() function to get the total number of elements in the array, we print the default markup and the All item.
After that, we verify if the $count variable is greater than zero, if yes, we have at least one category with items to print.
Inside if, we create a foreach loop to get all array values, and create a different li element for each element in the $terms array.
Inside foreach, we create a variable called $termname to store the term name, remember that we change the text to lower case, because this variable will be used inside the class attribute. Then, we just replace any white space with a - using the str_replace function, this line will enable you to use categories/terms with more than one word, like “WordPress Themes” for example. And last, we print an li element and use our variables to print the data in the right place.
If you test now, you’ll see a categories/terms list with the names that you created in WordPress Admin. Now, let’s work on the items.
Displaying the Portfolio Items
Now let’s display the portfolio items, we need do it following the required template shown above.We’ll do it just adding the code below:
<?php
 $loop = new WP_Query(array('post_type' => 'project', 'posts_per_page' => -1));
 $count =0;
?>

<div id="portfolio-wrapper">
 <ul id="portfolio-list">

  <?php if ( $loop ) :

   while ( $loop->have_posts() ) : $loop->the_post(); ?>

    <?php
    $terms = get_the_terms( $post->ID, 'tagportfolio' );

    if ( $terms && ! is_wp_error( $terms ) ) :
     $links = array();

     foreach ( $terms as $term )
     {
      $links[] = $term->name;
     }
     $links = str_replace(' ', '-', $links);
     $tax = join( " ", $links );
    else :
     $tax = '';
    endif;
    ?>

    <?php $infos = get_post_custom_values('_url'); ?>

    <li class="portfolio-item <?php echo strtolower($tax); ?> all">
     <div class="thumb"><a href="<?php the_permalink() ?>"><?php the_post_thumbnail( array(400, 160) ); ?></a></div>
     <h3><a href="<?php the_permalink() ?>"><?php the_title(); ?></a></h3>
     <p class="excerpt"><a href="<?php the_permalink() ?>"><?php echo get_the_excerpt(); ?></a></p>
     <p class="links"><a href="<?php echo $infos[0]; ?>" target="_blank">Live Preview →</a> <a href="<?php the_permalink() ?>">More Details →</a></p>
    </li>

   <?php endwhile; else: ?>

    <li class="error-not-found">Sorry, no portfolio entries found.</li>

  <?php endif; ?>

 </ul>

 <div class="clearboth">
</div>
A lot of lines of code, no? But don’t worry, I’ll explain the code for you.The first step is create a custom query, we do it with WP_Query function, I pass as parameter the custom post type “project”, that we created on functions.php file. This query will get all the projects that you’ve created.
Then, I do a loop like we do normally with post exhibition, for example.
Inside the while, we do the same process used on filter creation, but here we create a array called links where we’ll store all the terms of the post. Note that now, beyond the taxonomy name we pass the post ID in get_the_terms().
Then, we use join and create a unique string with all array elements, if the post terms are “WordPress” and “Design”, the $tax variable will be equal to “wordpress design”, we’ll use this to add the right classes to allow the portfolio to be filterable. If the post doesn’t have terms, we just set $tax being equal to a blank string.
After this, we create a variable called $infos where we’ll get the demo url from our Custom Post Field created in the functions.php file
Then, we just print the template markup and make use of functions like get_the_excerpt(), the_post_thumbnail (note that you can change the dimensions to fit your layout, if you for example, would like to create a three column portfolio.)
If you update the page, you will see all the items listed, but the filter still doesn’t work. Let’s fix it!
Using Filterable in WordPress
Now, let’s use our plugin. Did you already download it? If yes, copy and paste the filterable.js file inside the js/ folder.In the functions.php file, let’s add the jQuery library to the ‘head’ tag first. To do it we’ll use a custom function and the wp_enqueue_script function.
function enqueue_filterable()
 {
  wp_register_script( 'filterable', get_template_directory_uri() . '/js/filterable.js', array( 'jquery' ) );
  wp_enqueue_script( 'filterable' );
 }
 add_action('wp_enqueue_scripts', 'enqueue_filterable');
Now, back to the page_portfolio_2c.php file and below the last code added but inside the content div, add the following code:<script>
jQuery(document).ready(function() {
jQuery("#portfolio-list").filterable();
});
</script>
This only links the plugin to the page and calls the filterable() function to make our portfolio filterable.Full Code
<?php
/*
Template Name: Portfolio 2 Columns
*/
?>
<?php
get_header(); ?>
<div id="primary">
<div id="content" role="main">
<?php
$terms = get_terms("tagportfolio");
$count = count($terms);
echo '<ul id="portfolio-filter">';
echo '<li><a href="#all" title="">All</a></li>';
if ( $count > 0 ){
foreach ( $terms as $term ) {
$termname = strtolower($term->name);
$termname = str_replace(' ', '-', $termname);
echo '<li><a href="#'.$termname.'" title="" rel="'.$termname.'">'.$term->name.'</a></li>';
}
}
echo "</ul>";
?>
<?php
$loop = new WP_Query(array('post_type' => 'project', 'posts_per_page' => -1));
$count =0;
?>
<div id="portfolio-wrapper">
<ul id="portfolio-list">
<?php if ( $loop ) :
while ( $loop->have_posts() ) : $loop->the_post(); ?>
<?php
$terms = get_the_terms( $post->ID, 'tagportfolio' );
if ( $terms && ! is_wp_error( $terms ) ) :
$links = array();
foreach ( $terms as $term )
{
$links[] = $term->name;
}
$links = str_replace(' ', '-', $links);
$tax = join( " ", $links );
else :
$tax = '';
endif;
?>
<?php $infos = get_post_custom_values('_url'); ?>
<li class="portfolio-item <?php echo strtolower($tax); ?> all">
<div class="thumb"><a href="<?php the_permalink() ?>"><?php the_post_thumbnail( array(400, 160) ); ?></a></div>
<h3><a href="<?php the_permalink() ?>"><?php the_title(); ?></a></h3>
<p class="excerpt"><a href="<?php the_permalink() ?>"><?php echo get_the_excerpt(); ?></a></p>
<p class="links"><a href="<?php echo $infos[0]; ?>" target="_blank">Live Preview →</a> <a href="<?php the_permalink() ?>">More Details →</a></p>
</li>
<?php endwhile; else: ?>
<li class="error-not-found">Sorry, no portfolio entries for while.</li>
<?php endif; ?>
</ul>
<div class="clearboth"></div>
</div> <!-- end #portfolio-wrapper-->
<script>
  jQuery(document).ready(function() {
   jQuery("#portfolio-list").filterable();
  });
 </script>
</div><!-- #content -->
</div><!-- #primary -->
<?php get_footer(); ?>
Step 5: Some style
Now that we’ve coded everything that we need, let’s add some CSS to our style.css file, if you have other files just add the code there./* CLEARFIX
----------------------------------------------- */
.clearboth {
display: block;
margin: 0;
padding: 0;
clear: both;
}
/* PORTFOLIO FILTER STYLE
----------------------------------------------- */
#portfolio-filter {
list-style-type: none;
}
#portfolio-filter li {
display: inline;
padding-right: 10px;
}
#portfolio-filter li a {
color: #777;
text-decoration: none;
}
#portfolio-filter li .current,
#portfolio-filter li:hover {
color: #084a9a;
}
/* PORTFOLIO LIST STYLE
----------------------------------------------- */
#portfolio-wrapper {
padding-bottom: 25px;
}
#portfolio-list {
list-style-type: none;
}
#portfolio-list .portfolio-item {
width: 400px;
float: left;
margin-right: 5px;
}
#portfolio-list .portfolio-item h3 a {
color: #084a9a;
text-transform: uppercase;
font-weight: bold;
}
#portfolio-list .portfolio-item .excerpt
{
text-align: justify;
font-size: 14px;
line-height: 18px;
padding-right: 15px;
margin-bottom: 5px;
}
#portfolio-list .portfolio-item .excerpt a {
color: #555;
}
#portfolio-list .portfolio-item .excerpt a:hover {
text-decoration: none;
}
Now, if you test again you’ll get a nice filterable portfolio! Wow, all the work is done!Conclusion
And it’s done! Now you know how to create an amazing filterable portfolio with a free jQuery plugin that you can use in any work that you do.I hope that you enjoy the content, thank you very much for reading!"
 Posted in:


