


"Using Facebook Comments on your blog offers your readers a way to instantaneously comment on posts, as well as to share them without having to do any work. If you think this type of commenting system will suit your audience, read on to find out how you can implement it the right way.
Step 1: Create A Facebook App
Before you actually generate the Facebook Comments code and implement it on your blog, you need to create an app for your site.- Go to developers.facebook.com
- Click Apps
- Click Create New App
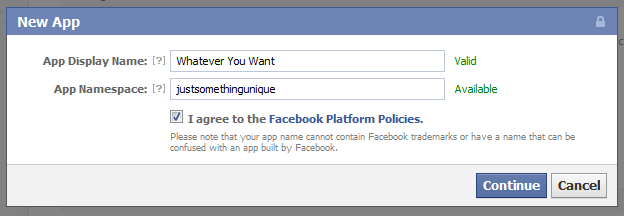
- Enter an App Display Name and Namespace
Step 2: Insert the Facebook Comments Code into Your Theme
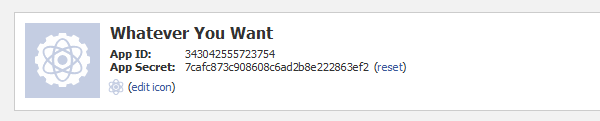
In this tutorial, we’ll be implementing Facebook Comments alongside the default WordPress comment system instead of replacing it. If you want, you can head over to the Facebook Comments code generator to get the code you’ll need for inserting the comment system; however, I’ve included it here so you can just copy it. You’ll need to customize a few parts of it, however; I’ll note which parts those are for each block.The code block below should be placed in your theme’s header.php file. Find the opening <body> tag and paste the block directly below it. On the 6th line, replace “Your App ID Here” with your App ID.
<div id="fb-root"></div>
<script>(function(d, s, id) {
 var js, fjs = d.getElementsByTagName(s)[0];
 if (d.getElementById(id)) return;
 js = d.createElement(s); js.id = id;
 js.src = "//connect.facebook.net/en_US/all.js#xfbml=1&appId=Your App ID Here";
 fjs.parentNode.insertBefore(js, fjs);
}(document, 'script', 'facebook-jssdk'));</script>
While you’re still in your header.php file, go up into the <head> section and paste this block of code somewhere. It will ensure that the Facebook Commenting system on your blog posts knows it’s owned by the app you created before. Replace the “Your App ID Here” bit with your App ID (leave the quotes in place).<meta property="fb:app_id" content="Your App ID Here"/>The next code block should be placed in your theme’s comments.php file. Since we’re implementing Facebook Comments alongside WordPress comments, you’ll just be pasting it where you want the Facebook Comments box to appear, and you won’t be deleting any of the original code.
<div class="fb-comments" data-href="<?php the_permalink() ?>" data-num-posts="2" data-width="470" data-colorscheme="light" data-mobile="false"></div>If you generate your Facebook Comments code from the link I gave you earlier, instead of just grabbing it from this tutorial, remember to change the data-href attribute from the original URL to <?php the_permalink() ?>, otherwise Facebook Comments won’t work.
You can also edit the data-num-posts, data-width, and data-colorscheme attributes to your liking. The first defines how many comments will be shown on each post before a user needs to click “See More”, the second defines the width of the commenting system (set it to something slightly smaller than your content area’s width), and the last is the color scheme, which can be set to “light” or “dark”.
Step 3: Display the Combined Facebook and WordPress Comment Count
Your theme most likely has several areas where it will show the number of comments there are on a post. By default, it will only show the number of WordPress comments. Since you’re implementing Facebook Comments alongside WordPress comments now, you’ll want to display the sum of the comments from both systems on each post.To do this, first open up your theme’s functions.php file. Paste the code shown below at the bottom of the file and save it.
// Get combined FB and WordPress comment count
function full_comment_count() {
global $post;
$url = get_permalink($post->ID);

$filecontent = file_get_contents('https://graph.facebook.com/?ids=' . $url);
$json = json_decode($filecontent);
$count = $json->$url->comments;
$wpCount = get_comments_number();
$realCount = $count + $wpCount;
if ($realCount == 0 || !isset($realCount)) {
   $realCount = 0;
}
return $realCount;
}
Note: This code was built off of a function written by Viceprez on the WordPress Stack Exchange. I’ve simply added a couple of lines to his original function that add in the WordPress comment count. Thanks Viceprez!Now that you have the function added to your theme, you can use it to replace the original comment count functions used throughout your theme. In my theme, the comments are called using this code:
<?php comments_popup_link('0','1','%'); ?>
Your theme may use this function to display the comment count, or it may not. Once you’ve found whatever does display it, replace it with this code:<?php echo full_comment_count(); ?>There will likely be several places within your theme that you’ll need to insert this code. Here’s a list of the most common ones:
- The comments.php file
- Near the top of your single.php file
- The index.php – it’ll be located in the loop that calls each post
- Any archive files like archive.php, category.php, author.php, etc. In this, it’ll be located in the loop that calls each post as well.
- On search.php
- On page.php if you allow comments on pages
<?php
 $commentCount = full_comment_count();
 if ( $commentCount == 0 ) {
  echo '<h5>No comments yet - you should start the discussion!</h5>';
 }
 else if ( $commentCount == 1 ) {
  echo '<h5>One comment so far - add yours!</h5>';
 }
 else {
  echo '<h5>' . $commentCount . ' comments so far - add yours!</h5>';
 }
?>
Step 4: Get Immediate Notifications of New Comments
The last part of the tutorial will show you how to get Facebook Notifications whenever someone comments on your blog.First, you’ll need to access your comments moderation panel. You can do that by pasting the following URL into your browser, substituting “Your App ID Here” with your App ID. You might also want to add this page to your bookmarks once you’re at it.
https://developers.facebook.com/tools/comments/?id=Your App ID Here
Once you’re at your comments moderation panel, hit the Settings button in the top right corner. A window will come up, and you should see a Moderators field in the middle of it. Simply add yourself as a moderator, and you’ll start getting notications whenever someone comments on a blog post.

Conclusion
If you’ve followed all the steps in this tutorial, your blog should now have Facebook Comments implemented right alongside the default WordPress comment system. I believe this is an ideal setup, as it gives your readers the best of both worlds; Facebook Comments is probably the most convenient commenting system out there, if a reader is signed in to Facebook (they most likely are), then there’s absolutely no authentication or identification fields to fill out. They can just comment away. However, if a reader doesn’t want to use Facebook, or wants to add their link or get CommentLuv benefits, you can still let them use WordPress comments.You also now have a comment count for each post that shows the sum of the comments from each system, and since you’re a moderator for your app, you’ll get immediate notifications of new comments. I hope you enjoy your new and improved commenting solution!"
 Posted in:


