• Feed RSS

Five Useful CSS/jQuery Coding Techniques For More Dynamic Websites

Five Useful CSS/jQuery Coding Techniques For More Dynamic Websites:
Interactivity can transform a dull static website into a dynamic tool that not only delights users but conveys information more effectively. In this post, we’ll walk through five different coding techniques that can be easily implemented on any website to provide a richer user experience.
The techniques will allow you to better display difficult content, help users find information more effectively and provide meaningful UI cues without overwhelming the user.
  1. On-page text search
  2. Drag controls for oversized content
  3. Subtle hover effects
  4. Comment count bars
  5. Full-page slider

[Offtopic: by the way, did you know that there is a Smashing eBook Series? Book #2 is Successful Freelancing for Web Designers, 260 pages for just $9,90.]

1. On-Page Text Search

E-read-search-instant in Five Useful CSS/jQuery Coding Techniques For More Dynamic WebsitesPublish Post
Websites often have search boxes to allow users to find content from their archives. But what if you want to find content on the given page? Information Architects
has
had on-page text search that provides a great user experience. Let’s recreate this using jQuery.

Mark-Up and Interaction

First let’s build an input box for the search:
<input type="text" id="text-search" />
Next we’ll need jQuery to attach a listener to track changes to the input box:
$(function() {
$('#text-search').bind('keyup change', function(ev) {
// pull in the new value
var searchTerm = $(this).val();
)};
});
Here we bound our function to both the keyup and change events. This ensures that our operation fires regardless of whether the user types or pastes the text.
Now, let’s turn to Highlight, a useful and lightweight jQuery plug-in that handles text highlighting. After including the plug-in source, let’s add a highlight() call to our JavaScript:
$(function() {
$('#text-search').bind('keyup change', function(ev) {
// pull in the new value
var searchTerm = $(this).val();

// disable highlighting if empty
if ( searchTerm ) {
// highlight the new term
$('body').highlight( searchTerm );
}
});
});
In addition to highlighting the given text, we’ve also added a check to make sure the search term isn’t empty (which causes an infinite loop).
This snippet highlights the search query throughout the page, but we can also limit the scope to a given id:
$('#myId').highlight( searchTerm );
Or we can search only within a certain element:
$('p').highlight( searchTerm );
This text highlighting by default is case insensitive. If you’d prefer case-sensitive highlighting, remove the .toUpperCase() on both lines 21 and 41 of the Highlight plug-in.

Styling the Highlighted Text

Now that the JavaScript is attached, we’ll need to style our highlighted items. The Highlight plug-in wraps the highlighted terms in <span class="highlight"></span>, which we can style with CSS.
First, let’s change the background color and then add rounded corners and a drop-shadow for all browsers except IE:
.highlight {
background-color: #fff34d;
-moz-border-radius: 5px; /* FF1+ */
-webkit-border-radius: 5px; /* Saf3-4 */
border-radius: 5px; /* Opera 10.5, IE 9, Saf5, Chrome */
-moz-box-shadow: 0 1px 4px rgba(0, 0, 0, 0.7); /* FF3.5+ */
-webkit-box-shadow: 0 1px 4px rgba(0, 0, 0, 0.7); /* Saf3.0+, Chrome */
box-shadow: 0 1px 4px rgba(0, 0, 0, 0.7); /* Opera 10.5+, IE 9.0 */
}
Although the highlighting is now visible, it still appears a bit tight around the text and could use some padding. But we’ll have to be careful not to adjust the layout of text. These spans are inline elements, and if we simply add padding, the text will shift around on the page. So, let’s include padding with a negative margin to compensate:
.highlight {
padding:1px 4px;
margin:0 -4px;
}

Finishing the Interaction

Last but not least, let’s make sure to remove the highlighted text whenever the user edits text in the input box:
$(function() {
$('#text-search').bind('keyup change', function(ev) {
// pull in the new value
var searchTerm = $(this).val();

// remove any old highlighted terms
$('body').removeHighlight();

// disable highlighting if empty
if ( searchTerm ) {
// highlight the new term
$('body').highlight( searchTerm );
}
});
});
Here we added a call to remove any text highlighting, which is performed outside of the empty field check. This ensures that the highlight is also removed if the user clears the field.
Although removeHighlight() works well in most browsers, it will crash IE6. This is due to an IE6 bug with node.normalize().
We can get the Highlight plug-in working in IE6 by rewriting this function. Simply replace lines 45-53 of highlight.js with the following:
jQuery.fn.removeHighlight = function() {
function newNormalize(node) {
for (var i = 0, children = node.childNodes, nodeCount = children.length; i < nodeCount; i++) {
var child = children[i];
if (child.nodeType == 1) {
newNormalize(child);
continue;
}
if (child.nodeType != 3) { continue; }
var next = child.nextSibling;
if (next == null || next.nodeType != 3) { continue; }
var combined_text = child.nodeValue + next.nodeValue;
new_node = node.ownerDocument.createTextNode(combined_text);
node.insertBefore(new_node, child);
node.removeChild(child);
node.removeChild(next);
i--;
nodeCount--;
}
}

return this.find("span.highlight").each(function() {
var thisParent = this.parentNode;
thisParent.replaceChild(this.firstChild, this);
newNormalize(thisParent);
}).end();
};
This new function replaces the standard Javascript normalize() with a custom function that works in all browsers.
Download the complete example.

2. Drag Controls For Oversized Content

Moscow in Five Useful CSS/jQuery Coding Techniques For More Dynamic Websites
When layout constraints bump up against the need for large images, finding a quality solution can be difficult. Mospromstroy uses a creative technique to handle this situation: a 'drag and drop' control bar that allows users to pan through images.
We can accomplish something similar using jQuery UI's draggable behavior.

Mark-Up and CSS

First let's set up some mark-up for the content and controls:
<div id="full-sized-area">
<div id="full-sized-content">
Your content here
</div>
</div>

<div id="drag-controls-area">
<div id="drag-controls"></div>
</div>
Next, let's apply some basic CSS:
#full-sized-area {
position: relative;
overflow: hidden;
width: 800px;
height: 400px;
}

#full-sized-content {
position: absolute;
top: 0;
left: 0;
}

#drag-controls-area {
position: relative;
width: 300px;
height: 50px;
}

#drag-controls {
position: absolute;
top: 0;
left: 0;
height: 48px;
border: 1px solid white;
}
Here we applied an absolute position to both the #full-sized-content and #drag-controls, and we also hid any overflow from the large image. Additionally, we applied some arbitrary dimensions to the content and drag controls wrappers; make sure to adjust these as needed.

Building Interactivity With jQuery

Now, let's use jQuery UI to build the interaction. Begin by including jQuery UI with the draggable module.
Before attaching the controls, let's resize the drag control box to the right dimensions:
$(function() {
var $fullArea = $('#full-sized-area');
var $fullContent = $('#full-sized-content', $fullArea);

// find what portion of the content is displayed
var contentRatio = $fullArea.width() / $fullContent.width();

// scale the controls box
var $controlsArea = $('#drag-controls-area');
var $controls = $('#drag-controls', $controlsArea);

$controls.css('width', $controlsArea.width() * contentRatio);
});
Here, we've determined what portion of the content is visible in the content area and then scaled the width of the control box accordingly.
Next, let's attach the draggable behavior:
$(function() {
var $fullArea = $('#full-sized-area');
var $fullContent = $('#full-sized-content', $fullArea);

// find what portion of the content is displayed
var contentRatio = $fullArea.width() / $fullContent.width();

// scale the controls box
var $controlsArea = $('#drag-controls-area');
var $controls = $('#drag-controls', $controlsArea);

$controls.css('width', $controlsArea.width() * contentRatio);

// determine the scale difference between the controls and content
var scaleRatio = $controlsArea.width() / $fullContent.width();

// attach the draggable behavior
$controls.draggable({
axis : 'x', // confine dragging to the x-axis
containment : 'parent',
drag : function(ev, ui) {
// move the full sized content
$fullContent.css('left', -1 * ui.position.left / scaleRatio );
}
});
});
Here, we've attached a draggable event and set a couple options. First, we set axis to restrict dragging to the x-axis, and then we set containment to confine dragging to the parent element (i.e. the controls wrapper).
Finally, we set up a drag listener to move the full-sized content according to how far the user has dragged the control. For this, we negatively positioned the content to the left by the drag amount multiplied by the ratio of the controls to the content.

Custom Cursors

The draggable content is working, but we still have room for improvement.
First let's add some more styling to the control box to make it more interactive. jQuery UI's draggable attaches two class names that we can use for this: ui-draggable and ui-draggable-dragging.
#drag-controls.ui-draggable {
cursor: -moz-grab !important;
cursor: -webkit-grab !important;
cursor: e-resize;
}

#drag-controls.ui-draggable-dragging {
cursor: -moz-grabbing !important;
cursor: -webkit-grabbing !important;
border-color: yellow;
}
In addition to applying a new border color to the active controls, this snippet also attaches a number of cursor properties, which use proprietary UI cursors available in Firefox and Safari, with a back-up for IE.
Because of the implementation of the cursor property, we had to 'bootstrap' this together using !important. This ensures that the proprietary cursors are used if available, while allowing the default cursor to overwrite them in IE. Unfortunately, Chrome does not currently support -webkit-grab, so we leave it out of this implementation. If you'd prefer to use the back-up e-resize cursor in both Chrome and Safari, just remove the -webkit-grab and -webkit-grabbing properties.

Parallax Effect

Let's make the sliding animation more three-dimensional by adding a two-layer parallax effect. To do so, we simply add a background to our full-sized content area and animate it at a slower rate.
Add the mark-up first:
<div id="full-sized-area">
<div id="full-sized-background">
Your background here
</div>

<div id="full-sized-content">
Your content here
</div>
</div>

<div id="drag-controls-area">
<div id="drag-controls"></div>
</div>
And then some basic styling:
#full-sized-background {
position: absolute;
top: 0;
left: 0;
}
Here, we use absolute positioning to lock the background in place. Note that we did not need to attach a z-index, because we placed the background element before the content area in the mark-up.
Finally, let's add the background animation to our drag event:
$fullBackground = $('#full-sized-background');

$controls.draggable({
axis : 'x', // confine dragging to the x-axis
containment : 'parent',
drag : function(ev, ui) {
// move the full sized content
var newContentPosition = -1 * ui.position.left / scaleRatio;
$fullContent.css('left', newContentPosition);

// move the background
$fullBackground.css('left', newContentPosition * .4);
}
});
Here, we simply used the new position that we calculated for the main content and applied 40% of that change to the background. Adjust this value to change the speed of the parallax.
Download the complete example.

3. Subtle Hover Effects

Veerle in Five Useful CSS/jQuery Coding Techniques For More Dynamic Websites
Veerle's blog uses subtle transitions to create a natural feel for mouse interactions. These can be easily accomplished using CSS3's transition property (and a jQuery back-up for unsupported browsers).
First, let's attach some CSS with the class subtle to all elements:
.subtle {
background-color: #78776C;
color: #BBBBAD;
}

.subtle:hover, .subtle:focus {
background-color: #F6F7ED;
color: #51514A;
}
Here, we've styled these elements with a background and text color and included a hover state using the pseudo-class :hover. Additionally, we included the :focus pseudo-class for active input and text-area elements.
This CSS causes the style to change immediately on hover, but we can apply a smoother transition using CSS3:
.subtle {
-webkit-transition: background-color 500ms ease-in; /* Saf3.2+, Chrome */
-moz-transition: background-color 500ms ease-in; /* FF3.7+ */
-o-transition: background-color 500ms ease-in; /* Opera 10.5+ */
transition: background-color 500ms ease-in; /* futureproofing */
background-color: #78776C;
color: #BBBBAD;
}

.subtle:hover, .subtle:focus {
background-color: #F6F7ED;
color: #51514A;
}
Here, we've attached a CSS3 transition that works in all modern browsers except IE. The transition property consists of three different values. The first is the CSS property to animate, and the second is the duration of the animation—in our case, background-color and 500 milliseconds, respectively. The third value allows us to specify an easing function, such as ease-in or linear.

jQuery Back-Up

Our subtle transitions now work across a variety of browsers, but let's include support for all users by leveraging a jQuery back-up technique.
First we'll need to detect whether the user's browser supports transition:
// make sure to execute this on page load
$(function() {
// determine if the browser supports transition
var thisStyle = document.body.style,
supportsTransition = thisStyle.WebkitTransition !== undefined ||
thisStyle.MozTransition !== undefined ||
thisStyle.OTransition !== undefined ||
thisStyle.transition !== undefined;
});
Here, we check whether the body element can use any of the browser-specific transition properties that we defined above.
If the browser doesn't support transition, we can apply the animation using jQuery. However, jQuery's animate() function does not natively support color-based animations. To accommodate our background-color animation, we'll have to include a small chunk of jQuery UI: the effects core.
After including jQuery UI, we'll need to attach the animation to the hover and focus event listeners:
// make sure to execute this on page load
$(function() {
// determine if the browser supports transition
var thisStyle = document.body.style,
supportsTransition = thisStyle.WebkitTransition !== undefined ||
thisStyle.MozTransition !== undefined ||
thisStyle.OTransition !== undefined ||
thisStyle.transition !== undefined;

// assign jQuery transition if the browser doesn't support
if ( ! supportsTransition ) {
var defaultCSS = {
backgroundColor: '#78776C'
},
hoverCSS = {
backgroundColor: '#F6F7ED'
};

// loop through each button
$('.subtle').each(function() {
var $subtle = $(this);

// bind an event listener for mouseover and focus
$subtle.bind('mouseenter focus', function() {
$subtle.animate(hoverCSS, 500, 'swing' );
});

// bind the reverse for mouseout and blur
$subtle.bind('mouseleave blur', function(ev) {
if ( ev.type == 'mouseleave' && ev.target == document.activeElement ) return false;

$subtle.animate(defaultCSS, 500, 'swing' );
});
});
}
});
Here, we recreated the transition using jQuery's animate(). Notice how we used values that are to the CSS3 transition—500 specifies 500 milliseconds, and swing specifies an easing method that is close to ease-in.
While the mouse-over and focus event is fairly straightforward, notice the difference in the mouse-out and blur event. We added some code to end the function if the element is in focus. This retains the active state even if the user moves their mouse. jQuery's is() method does not support the :focus pseudo-class, so we have to rely on DOM's document.activeElement.
Download the complete example.

4. Comment Count Bars

Most-commented in Five Useful CSS/jQuery Coding Techniques For More Dynamic Websites
IT Expert Voice uses a nice method for displaying the 'Most commented' posts in its sidebar. Let's recreate this using WordPress and a bit of CSS and jQuery (non-WordPress users can skip the first section).

Pulling Posts With WordPress

Let's start by pulling in the top-five most-commented posts:
<?php $most_commented = new WP_Query('orderby=comment_count&posts_per_page=5'); ?>
Here, we used WP_Query and a custom variable name so as not to disrupt any other post loops on the page.
Next, let's loop through the posts we've selected, outputting each as a list item:
<ul id="most-commented">

<?php $most_commented = new WP_Query('orderby=comment_count&posts_per_page=5'); ?>
<?php while ($most_commented->have_posts()) : $most_commented->the_post(); ?> 

<li>
<a href="<?php the_permalink() ?>" rel="bookmark" title="<?php the_title_attribute(); ?>"><?php the_title(); ?></a>

<span class="comment-bar"><span class="comment-count"><?php comments_number('0','1','%'); ?></span></span>
</li>

<?php endwhile; ?>

</ul>
Here, we used a while() loop to run through each post. First, we output a link to the post using the_permalink() and the_title(), and then we output the comment count using comments_number() and some additional mark-up for styling.

Basic CSS Styling

Let's style the basic layout of the comments list using CSS:
#most-commented li {
list-style: none;
}

#most-commented a {
display: block;
}
We've removed any list styling and defined the links as a block element so that they stay separate from our comment bar visualizations.
Let's set up some base styles for the comment bar and comment count:
#most-commented .comment-bar {
display: inline-block;
position: relative;
height: 30px;
width: 0;
margin: 5px 0;
padding-left: 20px;
background-color: #999;
}

#most-commented .comment-count {
display: inline-block;
position: absolute;
right: -20px;
top: -5px;
width: 34px;
height: 34px;
border-width: 3px;
border-style: solid;
border-color: #FFF;
-moz-border-radius: 20px;
-webkit-border-radius: 20px;
border-radius: 20px;
text-align: center;
line-height: 34px;
background-color: #6CAC1F;
font-size: 13px;
font-weight: bold;
color: #FFF;
}
Most of this styling is arbitrary, so feel free to attach a background image or otherwise tweak it to fit your theme. The main thing is to align the comment count to the right of the comment bar so that we can adjust the width of the bar at will.
Pay attention to the total width of the comment count, in our case 40px (34px wide plus 3px for the left and right borders). We're using half of that value to position the comment count: 20px of negative positioning so that the count hangs on the right, and 20px of left padding so that the comment bar reaches the center of the comment count.

Tying It All Together With jQuery

Finally, let's use jQuery to set the widths of the individual bars. We'll start by looping through the comments after the page loads:
$(function() {
$('#most-commented li').each(function(i) {
var $this = $(this);
var thisCount = ~~$this.find('.comment-count').text();
});
});
We loop through all of the <li> elements, pulling out the comment count from the mark-up. Notice that we've used the primitive data type ~~ to convert the text to an integer. This is significantly faster than alternatives such as parseInt().
Let's set up some key variables in the first iteration of our loop:
$(function() {
// define global variables
var maxWidth, maxCount;

$('#most-commented li').each(function(i) {
var $this = $(this);
var thisCount = ~~$this.find('.comment-count').text();

// set up some variables if the first iteration
if ( i == 0 ) {
maxWidth = $this.width() - 40;
maxCount = thisCount;
}
});
});
Here, we started by defining variables outside of the each() loop. This allows us to use these values in every iteration.
Next, we subtracted 40 pixels from the width of the list item to define a maximum width for the comment bar. The 40 pixels compensate for the left-padding and negative position that we applied above.
We also set maxCount to the first value. Because we initially pulled the posts according to their number of comments, we can be sure that the first item will have the highest count.
Finally, let's calculate the width of each bar and animate the transition:
$(function() {
// define global variables
var maxWidth, maxCount;

$('#most-commented li').each(function(i) {
var $this = $(this);
var thisCount = ~~$this.find('.comment-count').text();

// set up some variables if the first iteration
if ( i == 0 ) {
maxWidth = $this.width() - 40;
maxCount = thisCount;
}

// calculate the width based on the count ratio
var thisWidth = (thisCount / maxCount) * maxWidth;

// apply the width to the bar
$this.find('.comment-bar').animate({
width : thisWidth
}, 200, 'swing');
});
});
If you'd rather style the elements without any animation, simply replace the animate() with a static css().
Download the complete example.

5. Full-Page Slider

Wine-jax in Five Useful CSS/jQuery Coding Techniques For More Dynamic Websites
Sliding animation is an interactive way to show related content. But JAX Vineyards takes the standard sliding gallery to the next level by animating across the entire page. Let's create a similar effect using jQuery.

Mark-Up and CSS

Start by adding the mark-up:
<div id="full-slider-wrapper">
<div id="full-slider">

<div class="slide-panel active">
Panel 1 content here
</div>

<div class="slide-panel">
Panel 2 content here
</div>

<div class="slide-panel">
Panel 3 content here
</div>
</div>
</div>
We set up the basic mark-up and wrappers that we need for the animation. Make sure that the full-slider-wrapper is not contained in any element that is narrower than the browser window—we'll need the full width of the browser to pull off the effect.
Now, let's add some basic CSS to handle overflow and to position the panels:
html {
min-width: 800px;
}

#full-slider-wrapper {
overflow: hidden;
}

#full-slider {
position: relative;
width: 800px;
height: 600px;
margin: 0 auto;
}

#full-slider .slide-panel {
position: absolute;
top: 0;
left: 0;
width: 800px;
height: 600px;
visibility: hidden;
}

#full-slider .slide-panel.active {
visibility: visible;
}
We defined absolute positioning and set up some arbitrary dimensions for the panels and wrapper. Feel free to tweak these dimensions to your content.
We also attached overflow: hidden to our wrapper element, which will prevent scroll bars from appearing when we animate the panels. Because we hid the overflow, we also had to assign a min-width to the html document. This ensures that the content will get scroll bars if the browser window is too small.
Finally, we used the active class that we established in the mark-up to show the first panel.

jQuery Animation

Let's build the interaction using jQuery. We'll start by defining some variables and then create a function to handle the sliding animation in both directions:
$(function() {
var $slider = $('#full-slider');
var $sliderPanels = $slider.children('.slide-panel');

function slidePanel( newPanel, direction ) {
// define the offset of the slider obj, vis a vis the document
var offsetLeft = $slider.offset().left;

// offset required to hide the content off to the left / right
var hideLeft = -1 * ( offsetLeft + $slider.width() );
var hideRight = $(window).width() - offsetLeft;

// change the current / next positions based on the direction of the animation
if ( direction == 'left' ) {
currPos = hideLeft;
nextPos = hideRight;
}
else {
currPos = hideRight;
nextPos = hideLeft;
}

// slide out the current panel, then remove the active class
$slider.children('.slide-panel.active').animate({
left: currPos
}, 500, function() {
$(this).removeClass('active');
});

// slide in the next panel after adding the active class
$( $sliderPanels[newPanel] ).css('left', nextPos).addClass('active').animate({
left: 0
}, 500 );
}
});
Here our slidePanel() function accepts two arguments: the index of the panel that we want to slide into view, and the direction of the slide (i.e. left or right).
Although this function looks complicated, the concepts are fairly simple. We determined the amount of offset necessary to hide the panels on the left and right sides. To calculate these values, we used jQuery's offset() and the slider and window widths. These offsets represent the left position values needed to hide the content on either side.
Next, we have a switch based on the direction of the animation, which uses the two values we defined previously.
Finally, we trigger the animation using jQuery's animate(). We slide the active panel out of view and then remove the active class once the animation completes. Then we set the new panel's left position off the screen, attach the active class to make it visible and slide it into place.

Building the Controls

Our function now handles the animation, but we still have to build controls to leverage it.
Append navigation elements to the slider object that we defined previously:
var $navWrap = $('<div id="full-slider-nav"></div>').appendTo( $slider );
var $navLeft = $('<div id="full-slider-nav-left"></div>').appendTo( $navWrap );
var $navRight = $('<div id="full-slider-nav-right"></div>').appendTo( $navWrap );
We could have included this navigation in the initial mark-up, but we're appending it with JavaScript for two reasons: it ensures that the navigation won't appear until the JavaScript is loaded, and it keeps the navigation from being displayed on the off chance that JavaScript isn't enabled.
Let's style the navigation:
#full-slider-nav {
position: absolute;
top: 0;
right: 0;
}

#full-slider-nav-left, #full-slider-nav-right {
display: inline-block;
height: 0;
width: 0;
margin-left: 15px;
border: 20px solid transparent;
cursor: pointer;
}

#full-slider-nav-left {
border-right-color: #BBB;
}

#full-slider-nav-left:hover {
border-right-color: #999;
}

#full-slider-nav-right {
border-left-color: #BBB;
}

#full-slider-nav-right:hover {
border-left-color: #999;
}
Here we absolute position the navigation to the top right. We also use a CSS triangle trick to quickly style the controls.
Let's attach our new slider navigation to the slidePanel() function that we defined previously:
var $navWrap = $('<div id="full-slider-nav"></div>').appendTo( $slider );
var $navLeft = $('<div id="full-slider-nav-left"></div>').appendTo( $navWrap );
var $navRight = $('<div id="full-slider-nav-right"></div>').appendTo( $navWrap );

var currPanel = 0;

$navLeft.click(function() {
currPanel--;

// check if the new panel value is too small
if ( currPanel < 0 ) currPanel = $sliderPanels.length - 1;

slidePanel(currPanel, 'right');
});

$navRight.click(function() {
currPanel++;

// check if the new panel value is too big
if ( currPanel >= $sliderPanels.length ) currPanel = 0;

slidePanel(currPanel, 'left');
});
This snippet assigns click events to the left and right navigation. In each, we change the value of currPanel according to the direction. If this new value falls outside of the available panels, we loop to the other end of our set. Finally, we trigger the slidePanel() function with the new panel and appropriate direction.
In our example, we built controls only for left and right navigation, but you could easily tweak this to have buttons for each panel. Simply pass the correct panel index to slidePanel.
Let's bring all the jQuery code together:
$(function() {
function slidePanel( newPanel, direction ) {
// define the offset of the slider obj, vis a vis the document
var offsetLeft = $slider.offset().left;

// offset required to hide the content off to the left / right
var hideLeft = -1 * ( offsetLeft + $slider.width() );
var hideRight = $(window).width() - offsetLeft;

// change the current / next positions based on the direction of the animation
if ( direction == 'left' ) {
currPos = hideLeft;
nextPos = hideRight;
}
else {
currPos = hideRight;
nextPos = hideLeft;
}

// slide out the current panel, then remove the active class
$slider.children('.slide-panel.active').animate({
left: currPos
}, 500, function() {
$(this).removeClass('active');
});

// slide in the next panel after adding the active class
$( $sliderPanels[newPanel] ).css('left', nextPos).addClass('active').animate({
left: 0
}, 500 );
}

var $slider = $('#full-slider');
var $sliderPanels = $slider.children('.slide-panel');

var $navWrap = $('<div id="full-slider-nav"></div>').appendTo( $slider );
var $navLeft = $('<div id="full-slider-nav-left"></div>').appendTo( $navWrap );
var $navRight = $('<div id="full-slider-nav-right"></div>').appendTo( $navWrap );

var currPanel = 0;

$navLeft.click(function() {
currPanel--;

// check if the new panel value is too small
if ( currPanel < 0 ) currPanel = $sliderPanels.length - 1;

slidePanel(currPanel, 'right');
});

$navRight.click(function() {
currPanel++;

// check if the new panel value is too big
if ( currPanel >= $sliderPanels.length ) currPanel = 0;

slidePanel(currPanel, 'left');
});
});
Download the complete example.

Final Thoughts

In this post we walked through a variety of methods for adding dynamic functionality to your websites. These techniques can be easily adapted to work with almost any site. The majority of these techniques rely on jQuery to provide interaction, but there are plenty of other approaches, both with and without jQuery. Please post any alternate solutions in the comments below, or fork the example files on github.
Furthermore, these five methods represent only a small portion of interactive techniques. Please post any links to other dynamic techniques and functionality in the comments below.
"
read more

Quick Tip: Working with the Official jQuery Templating Plugin

Quick Tip: Working with the Official jQuery Templating Plugin: "
Just this week, the jQuery team announced that Microsoft’s templating plugin (along with a couple others) is now being officially supported. What this means is that the plugin will now be maintained and updated directly by the core team. In this video tutorial, we’ll review the essentials of the plugin, and why it’s so awesome.


As a quick example, we’ll, again, refer to the Twitter search API example from Friday (think Bieber). The only difference is that, this time, we’ll use an HTML template to attach the returned data, rather than muddying up our JavaScript!

Months ago, Andrew Burgess introduced you to this plugin, still in beta. However, today, we’ll integrate the plugin into real-live code.


Crash Course


Step 1 : Import jQuery and the Templating Plugin


<script src="http://ajax.googleapis.com/ajax/libs/jquery/1.4.2/jquery.min.js"></script>
<script src="jquery.tmpl.js"></script>


Step 2 : Create your Template


<script id="tweets" type="text/x-jquery-tmpl">
<li>
<img src="${imgSource}" alt="${username}" />
<h2> ${username} </h2>
<p> ${tweet} </p>
{{if geo}}
<span> ${geo} </span>
{{/if}}
</li>
</script>

  • Notice how this template is wrapped within script tags, and that a type of text/x-jquery-tmpl has been applied.
  • We reference template variables names by prepending a dollar sign, and wrapping the property name within curly braces.
  • If statements can be created by using two sets of curly braces, as demonstrated above. (See screencast for more detail.)


Step 3 : Find Some Data to Render!


In this case, we'll do a quick search of the Twitter search API.

<script>

$.ajax({
type : 'GET',
dataType : 'jsonp',
url : 'http://search.twitter.com/search.json?q=nettuts',

success : function(tweets) {
var twitter = $.map(tweets.results, function(obj, index) {
return {
username : obj.from_user,
tweet : obj.text,
imgSource : obj.profile_image_url,
geo : obj.geo
};
});
}
});

</script>

Thanks to Peter Galiba (see comments), for recommending the more elegant $.map solution, shown above.

Refer to the screencast for a full walk-through of the code above. Most importantly, though, is that we're creating an array of objects. This will then serve as the data for the the template that we created in step two. Notice how the property names:

username : obj.from_user,
tweet : obj.text,
imgSource : obj.profile_image_url,
geo : obj.geo

...correspond to the template variables that we created in step two.


Step 4 : Where Should the Mark-up Be Rendered?


Next, we must designate where the mark-up and data should be rendered. We'll create an unordered list for this purpose.

<ul id="tweets"> </ul>


Step 5 : Render the Data


Finally, we attach the data to the template, and append it to the unordered list (#tweets) that we created in step four.

$('#tweets').tmpl(twitter).appendTo('#twitter');

  1. Find the script (template) element with an id of tweets.
  2. Attach the twitter array to this template.
  3. Add the new mark-up to the DOM.


Final Source


<!DOCTYPE HTML>
<html lang="en">
<head>
<meta charset="UTF-8">
<title></title>
<link rel="stylesheet" href="style.css" />

<script src="http://ajax.googleapis.com/ajax/libs/jquery/1.4.2/jquery.min.js"></script>
<script src="jquery.tmpl.js"></script>
</head>
<body>

<h1> Tweets about Nettuts+ </h1>

<script id="tweets" type="text/x-jquery-tmpl">
<li>
<img src="${imgSource}" alt="${userName}" />
<h2> ${username} </h2>
<p> ${tweet} </p>

{{if geo}}
<span>
${geo}
</span>
{{/if}}
</li>
</script>

<ul id="twitter"></ul>

<script>
$.ajax({
type : 'GET',
dataType : 'jsonp',
url : 'http://search.twitter.com/search.json?q=nettuts',

success : function(tweets) {
var twitter = $.map(tweets.results, function(obj, index) {
return {
username : obj.from_user,
tweet : obj.text,
imgSource : obj.profile_image_url,
geo : obj.geo
};
});

$('#tweets').tmpl(twitter).appendTo('#twitter');
}
});

</script>
</body>
</html>


So What do you Think?


Now that the templating plugin is officially supported by the core jQuery team, will you be using it in your future projects?
"
read more

Progressively Enhance a Form to a Modal Form

Progressively Enhance a Form to a Modal Form: "
With something as important as a contact form, you want it working properly for all visitors—even the JavaScript challenged. How do you handle this if you want to use a modal (pop-up) form? The answer is progressive enhancement; start with baseline, usable functionality; then increase the user experience for those who have browsers to support it.


Step 1: Decide on the Project Goals


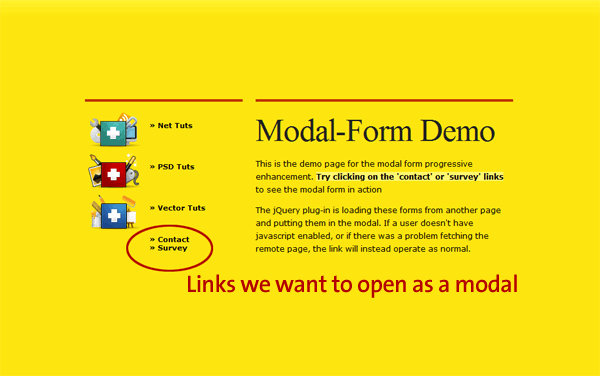
Before starting any journey, it helps (most times) to have a destination. The goal of this project is to take a standard link to a page containing a contact form and enable that form to pop-up on the current page in a modal dialog.

There’s several reasons for this approach:

  • If the user has JavaScript disabled, they are sent to the contact form page as usual.
  • Only one version of the form must be maintained.
  • The additional content (the form) can be loaded asynchronously.

A Modal Form


Step 2: List the Tools


To write this from scratch in raw JavaScript would be a lot of code. Fortunately for us, there are existing tools we can leverage to make the task easier. This tutorial relies on:


To make this code as reusable as possible, we’ll write a plug-in. If you are unfamiliar with authoring a plug-in, you can get an introduction from Jeffrey Way’s article here on Nettuts+. The modal functionality will come from jQuery-UI’s $.dialog.

Plug-In Theory


Step 3: Design the Plug-in Interface


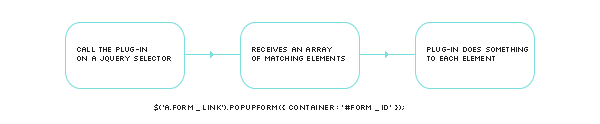
We’re going to follow the normal pattern for a jQuery plug-in: calling the plug-in on a selector and setting options via array. What options are needed? There will be options both for the modal window and for the plug-in itself. We’re going to expect the plug-in to be called on an anchor, and enforce that in the code.

$('a.form_link').popUpForm({
container   : '',
modal       : true,
resizeable  : false,
width       : 440,
title       : 'Website Form',
beforeOpen  : function(container) {},
onSuccess   : function(container) {},
onError     : function(container) {}
});

Examining the options


Container: This is how the plug-in user will specify the ID of the form on the remote page. The link itself specifies the page, but container option will allow us to fetch the relevant part. This will be the only required option when calling the plug-in.

Modal, Resizeable, Width, Title: These options are all going to be passed along to jQuery UI’s $.dialog. The values above are defaults and the plug-in will run just fine without any of these being set when $.popUpForm is called.

beforeOpen, onSuccess, onError: These are all callbacks, and expect a function. The function will be passed the object for the link that was clicked as ‘this’ and the container to which that link is targeted. Callbacks are designed to allow custom functionality for the users of a plug-in. The default for these callbacks will be an empty function.

The minimum code required to use the plug-in would then look like this:

$('a.form_link').popUpForm({ container : '#form_id' });

That seems simple, doesn’t it? When you call a plug-in like this, the plug-in’s code is called with a jQuery collection of all the DOM elements matching the selector, which will be available in the special variable ‘this’.


Step 4: The Plug-In’s Skeleton


Most jQuery plug-ins follow a very similar pattern. They iterate over the group of selectors and do whatever it is they do. I’ve got a basic plug-in “outline” I generally work from, and it will fit in here nicely. This would be the start of your plug-in file, popUpForm.jquery.js.

(function($) {
$.fn.popUpForm = function(options) {

// Defaults and options
var defaults = {
container   : '',
modal       : true,
resizeable  : false,
width       : 440,
title       : 'Website Form',
beforeOpen  : function(container) {},
onSuccess   : function(container) {},
onError     : function(container) {}
};
var opts = $.extend({}, defaults, options);

self.each(function() {

// The REAL WORK happens here.
// Within the scope of this function 'this' refers to a single
// DOM element within the jQuery collection (not a jQuery obj)
});
}
})(jQuery);

The code is wrapped in a self-executing function, and adds itself to jQuery using the $.fn namespace. The identifier following $.fn is the method name you’ll use to invoke it.

We’re also following good coding practices by passing in the jQuery variable explicitly. This will keep us from getting into trouble if the plug-in is used on a page with other JavaScript frameworks, some of which use $ as a variable.

Next, an array of default values is created, and these defaults will be used if they aren’t defined when the plug-in is called. The line immediately following the defaults array merges the passed in options with the defaults and stores them all in the opts array.

Finally, a loop is created for iterating over the jQuery collection identified by the selector when the plug-in is called.. While chances are in most situations it will be a single item ( an anchor), it will still handle multiple links with a single call – assuming they all load the same form.

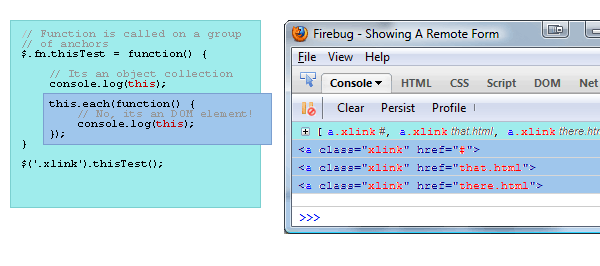
An important thing to understand is that the value of the special variable ‘this’ changes when we enter the self.each loop; it’s a special jQuery method designed to make looping DOM collections easier. The callback function uses the context of the current DOM element, so the variable ‘this’ refers to that element within the loop.

You can see in a very simple example how ‘this’ refers to a jQuery collection of jQuery objects in the plug-in function scope, but inside the each loop, ‘this’ refers to a single, non-jQuery DOM element.

The Scope of This


Step 5: Starting the Guts


The code for the next few sections is all contained within the self.each block of our skeleton. What do we do now? For each jQuery element passed in, there are going to be several steps to take:

  • Make sure it is a link, and that it goes somewhere
  • Fetch the part of the remote page specified
  • Attach the remote form to the page, and create a hidden dialog for it
  • Steal the link so it creates our pop-up
  • Handle form submissions AJAX style

Before doing any of that, however, we’re going to add one line of code inside the callback, at the very top

var $this = $(this);

This is more then just convenience; the variable ‘this’ will go out of scope in any closures within the each loop, and we’re going to need access to the current object later. Since we’ll almost always want it as a jQuery object, we’re storing it as one.


Step 6: Make Sure the Element Is Valid


$.popUpForm is only going to operate on anchor tags, and the anchor tag must have a href value so we know where to fetch the form from. If either of those conditions is not met, we’re going to leave the element alone. The second line of our ‘guts’ will be:

if (!$this.is('a') || $this.attr('href') == '') { return ; }

Some people hate multiple return points in a function, but I’ve always found having one at the start can make a function more readable, as opposed to using an if(condition) to wrap the rest of the function. Performance wise, they’re identical.


Step 7: Fetch the From From the Remote Page


The $.load method has nice functionality that allows a call to specify and ID in order to only attach part of a fetched document. The script won’t attach the returned HTML directly to the DOM, because $.load only overwrites, it doesn’t append.

var SRC = $this.attr('href') + ' ' + opts.container;
var formDOM = $("<div />").load(SRC, function() {

The variable opts.container has the ID of the form element on the remote page. The second line loads this remote page, and attaches the form and its contents to a div, the entirety of which is stored in the variable formDOM. Notice that $.load includes a callback (the function) — we’ll use formDOM inside that callback.


Step 8: Attach the HTML and Create the Dialog


Inside the $.load callback, the code is going to attach the form, override the click event of the anchor, and override the submit event of the form.

The form’s HTML is stored in the formDOM variable at this point, and attaching it to the existing page is easy.

$('#popUpHide').append(formDOM);

The id #popUpHide refers to a hidden div that will attached to the page by the plug-in. In order to provide that div, the following line will be added at the top of the plug-in. If it already exists, we don’t recreate it.

$("#popUpHide").length || $('<div id="popUpHide" />').appendTo('body').css('display','none');

Now that the form is hidden safely away on our page, it is time to use a call to the $.dialog method to create the form. Most of the set-up params are taken from our plug-in. The ‘autoopen’ option is hard coded since we want the dialog to open when the link is clicked, and not when the dialog is created.

// Create and store the dialog
$(opts.container).dialog({
autoOpen    : false,
width       : opts.width,
modal       : opts.modal,
resizable   : opts.resizeable,
title       : opts.title
});


Step 9: Override Default Event Handling


If we stopped here, the plug-in wouldn’t be doing much. The link would still take us to the next page. The behavior we desire is for the link to open the dialog.

$this.bind('click', function(e) {
e.preventDefault();
opts.beforeOpen.call($this[0], opts.container);
$(opts.container).dialog('open');
});

The first line of this click handler is very important. It stops the link from loading the new page when it is clicked.

The second line is our ‘beforeOpen’ callback. The variable opts.beforeOpen contains a function reference – that much is obvious. The .call method is used to invoke the function in a way where we can provide context — the ‘this’ variable for that function. The first argument passed becomes ‘this’ to the called function.

When a function has access to the variable ‘this’ there are some contracts JavaScript has with the programmer that we should maintain.

  • The ‘this’ variable should be the object the function acts on
  • The ‘this’ variable is a single DOM object

In order to maintain that contract, we pass $this[0] instead of $this. $this[0] represents a single, non-jQuery DOM object.

To help understand this a little better, imagine the following callback function:

opts.beforeOpen = function(container) {

// Gives the value of the link you just clicked
alert('The remote page is ' + this.href);

// Gives the id container assigned to this link
alert('And the container is ' + container);
}

The link click isn’t the only default behavior to override. We also want the form to submit via AJAX, so the normal form onsumbit event needs to be prevented and new behavior coded.

$(opts.container).bind('submit', function(e) {
e.preventDefault();
ajaxSubmit();
});

Again, we use preventDefault() to stop the event, and in this case add a new function to handle the form submission. The ajaxSubmit() code could go directly in the callback, but it has been moved to a new function for readability.


Step 10: Handle Form Submissions, AJAX-Style


This function would be added immediately after the end of the self.each loop ( don’t worry, you’ll see the entire plug-in code in one shot in just a bit ). It takes the form, submits it to a remote script, and fires the appropriate callbacks.

The first step is to get the form as a jQuery object, and to determine the form’s method, either GET or POST.

function ajaxSubmit() {
var form    = $(opts.container);
var method  = form.attr('method') || 'GET';

If you remember, we stored the form’s ID in opts.container. The next line checks the form for a method, and assigns ‘GET’ if no method is present. This is consistent with HTML which uses GET by default on forms if no method is specified.

Use the $.ajax method to submit the form:

$.ajax({
type    : method,
url     : form.attr('action'),
data    : form.serialize(),
success : function() {
$(opts.container).dialog('close');
opts.onSuccess.call($this[0], opts.container);
},
error   : function() {
$(opts.container).dialog('close');
opts.onError.call($this[0], opts.container);
}
});

The URL option is determined from the action attribute of the form tag. The data is produced by using the serialize method on the jQuery object containing the form.

The success and error options are $.ajax callbacks, which we’re in turn using to call our callbacks, in the same way the beforeOpen callback was invoked.

We’re also closing the dialog in for both the success and error handlers.


Step 11: The Entire Plug-In


As a review, let’s look at the code we’ve written so far as a whole, including some helpful code comments:

(function($) {
var alog = window.console ? console.log : alert;

$.fn.popUpForm = function(options) {
// REQUIRE a container
if(!options.container) { alert('Container Option Required'); return; }

// Give us someplace to attach forms
$("#popUpHide").length || $('<div id="popUpHide" />').appendTo('body').css('display','none');

// Defaults and options
var defaults = {
container   : '',
modal       : true,
resizeable  : false,
width       : 440,
title       : 'Website Form',
beforeOpen  : function(container) {},
onSuccess   : function(container) {},
onError     : function(container) {}
};
var opts = $.extend({}, defaults, options);

// The "this" within the each loop refers to the single DOM item
// of the jQuery collection we are currently operating on
this.each(function() {
/* We want to keep the value 'this' available to the $.load
* callback */
var $this = $(this);

/* we only want to process an item if it's a link and
* has an href value
*/

if (!$this.is('a') || $this.attr('href') == '') { return ; }

/* For a $.load() function, the param is the url followed by
* the ID selector for the section of the page to grab
*/
var SRC = $this.attr('href') + ' ' + opts.container;

/* the event binding is done in the call back in case the
* form fails to load, or the user clicks the link before
* the modal is ready
*/
var formDOM = $("<div />").load(SRC, function() {
// Append to the page
$('#popUpHide').append(formDOM);

// Create and store the dialog
$(opts.container).dialog({
autoOpen    : false,
width       : opts.width,
modal       : opts.modal,
resizable   : opts.resizeable,
title       : opts.title
});

/* stops the normal form submission; had to come after
* creating the dialog otherwise the form doesn't exist
* yet to put an event handler to
*/
$(opts.container).bind("submit", function(e) {
e.preventDefault();
ajaxSubmit($this[0]);
});

// create a binding for the link passed to the plug-in
$this.bind("click", function(e) {
e.preventDefault();
opts.beforeOpen.call($this[0], opts.container);
$(opts.container).dialog('open');
});
});

});

function ajaxSubmit(anchorObj) {
console.log(anchorObj);
var form    = $(opts.container);
var method  = form.attr('method') || 'GET';

$.ajax({
type    : method,
url     : form.attr('action'),
data    : form.serialize(),
success : function() {
$(opts.container).dialog('close');
opts.onSuccess.call(anchorObj, opts.container);
},
error   : function() {
opts.onError.call(anchorObj, opts.container);
}
});
}
}
})(jQuery);

This code should all be saved in a file called popUpForm.jquery.js


Step 12: Setting Up the Plug-In


The first step in plug-in usage would be to include all the required dependencies on your HTML page. Personally I prefer to use the Google CDN. The files being on a separate domain can help page load speed, and the servers are fast. Also, it increases the chances that a visitor will already have these files cached.

In the HEAD of the HTML document, add the following:

<link rel="stylesheet" href="http://ajax.googleapis.com/ajax/libs/jqueryui/1.8/themes/black-tie/jquery-ui.css" type="text/css" />
<link rel="stylesheet" href="css/main.css" type="text/css" />

<script src='http://ajax.googleapis.com/ajax/libs/jquery/1.4.2/jquery.min.js'></script>
<script src='http://ajax.googleapis.com/ajax/libs/jqueryui/1.8.2/jquery-ui.min.js'></script>

The main.css file is for our site specific styles, everything else is from Google’s CDN. Notice you can even use jQuery-UI themes from the CDN in this fashion.


Step 13: Invoking the Plug-In


Remember, we only want to invoke the plug-in on links that go to a form page. In the online demo, the forms are contained in form.html, and only two links go to that page.

<script>
$(document).ready(function() {
$('.contact a').popUpForm({
container   : '#modalform',
onSuccess   : function() { alert('Thanks for your submission!'); },
onError     : function() { alert('Sorry there was an error submitting your form.'); }
});

$('.survey a').popUpForm({ 'container' : '#othercontainer' });
});
</script>

The calls are wrapped in a document.ready block so we can be sure the anchor elements exist before trying to act upon them. The second call, $(‘.survey a’) is an example of the minimum amount needed to use our new plug-in. The first example sets a callback for both onSuccess and onError.


Step 14: Styling the Modal


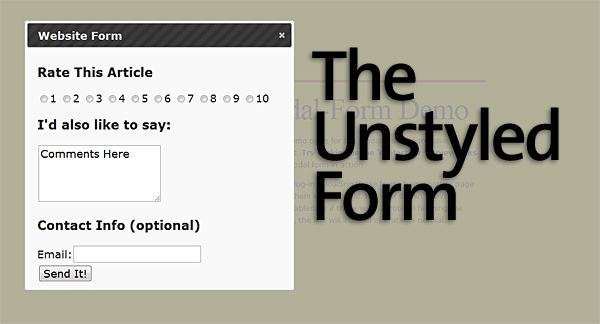
If you’ve gotten this far, and you created examples forms and a page to call them from, you’d notice the form in the modal is probably, well, ugly. The modal itself isn’t bad, because we’re using a jQuery-UI theme. But the form inside the modal is mostly unstyled, so we should make some efforts to pretty it up.

The Unstyled Form

There are some things to keep in mind when creating styles for use in a jQuery-UI modal:

  • The modal itself is only a child of the page’s BODY element
  • The contents of the modal are all children of a div of class ‘ui-dialog’

Using these small bits of information we can begin applying styles to the form in the modal. First we give the modal a background color we’re happy with, and also modify the font for the title bar.

.ui-dialog {
background: rgb(237,237,237);
font: 11px verdana, arial, sans-serif;
}
.ui-dialog .ui-dialog-titlebar  {
font: small-caps bold 24px Georgia, Times, serif;
}

Next, we want to separate each item in the form with lines. Since the form structure alternates h3s with divs containing form elements, we add the following rules:

.ui-dialog h3,
.ui-dialog div {
border-top:1px solid rgb(247,247,247);
border-bottom:1px solid rgb(212,212,212);
padding:8px 0 12px 10px;
}

And we only want lines between the sections, not at the very top or very bottom.

.ui-dialog .puForm div:last-child {
border-bottom:none;
}
.ui-dialog .puForm h3:first-child {
border-top:none;
}

Lets not forget to style the h3s, and the form elements. The radio buttons need to display inline so they are all in a row.

.ui-dialog h3 {
font: 18px Georgia, Times, serif;
margin: 0;
}
.ui-dialog select,
.ui-dialog textarea,
.ui-dialog input {
width:76%;
display: block;
}
.ui-dialog #rating input,
.ui-dialog #rating label {
display: inline;
width:auto;
}

Remember, these styles are specific to this project, you’ll have to style your own forms depending on what structure you use. To target the form elements specifically, you can either target descendants of .ui-dialog, or to style each form individually, include styles descending from the form ID you’ve included.

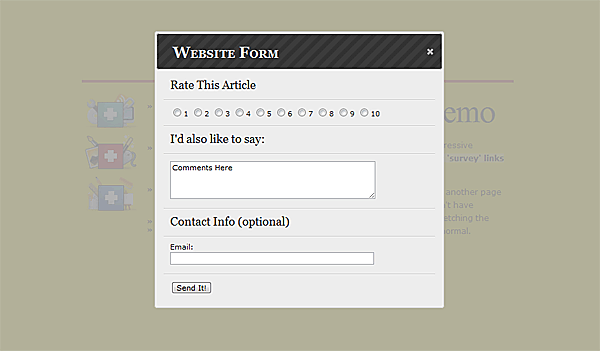
The styled form:

The Styled Form


Step 15: Conclusion


So what have we really done? We’ve taken a normal link leading to a contact form (or forms) and caused that form to load up in a modal dialog, and submit via ajax. For users without javascript, nothing happens and the links behave normally, so we haven’t stopped anyone from filling out your forms.

If you click on the survey link in the demo, be sure to submit something. I’ll post the results in the comments for fun after a week or so!
"
read more

Introduction to the Smarty Templating Framework

Introduction to the Smarty Templating Framework: "
Smarty is a PHP-based templating engine/framework. It allows you to further separate your business logic from its visualization, by removing as much PHP code as possible away from your views. Some developers and frameworks prefer not to use a templating engine, others do prefer them to using plain PHP in your views. Both points of view can be argued, and in the end, it’s mostly a matter of taste. Anyway, it’s never a bad idea to try it out before deciding not to use it, and that’s what this tutorial is about: trying out the Smarty Templating Framework.


Step 0: What To Expect


At the end of this tutorial, you’ll have a basic idea of how Smarty works. You’ll be able to load template files, pass variables to them, use a “layout” in which your other views are inserted, and write your own modifiers. This will all be accomplished using an additional wrapper class, which you can easily integrate in your existing projects.


Step 1: Setting Up The Project


The project for this tutorial will have a very easy setup, since we’re not developing a real application. Just create a project folder (mine is named “smarty_example”) with an index.php file in it, and a directory called “lib” inside of it. Also, create a file named smtemplate.php in the “lib” folder. Next, create a “views” folder inside “smarty_example”. This folder will contain our smarty template files.

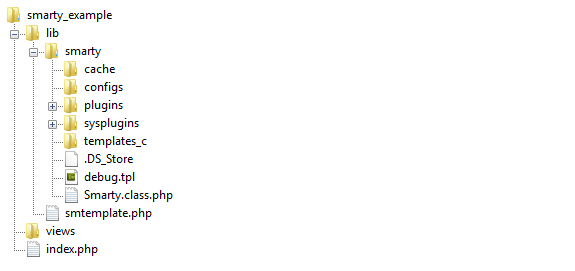
Before you’re able to use something, you have to install it. Thankfully, installing Smarty is extremely easy and requires almost no configuration. First of all, download Smarty and extract the archive. You can check out everything inside the archive, but we’ll only need the “libs” folder for our application. Rename it to “smarty” and paste it inside the “lib” folder of our application. Smarty uses some additional folders, so create the “templates_c”, “cache” and “configs” folders inside our “lib/smarty” folder. If you’re not using Windows, you’ll have to give 775 permissions on these folders to your webserver. Your directory tree should now look like this:


Step 2: Creating The SMTemplate Class


Every programmer has his own idea about the ideal API. In order to adjust Smarty’s API slightly, and allow us to add some additional functionality, we’ll create a wrapper class called SMTemplate, which will take care of the smarty details for us. This approach has another advantage: if, at one moment in time, you should choose to use another template engine, you can create a wrapper for that engine, while retaining the SMTemplate interface, and thus without breaking the code that uses our SMTemplate class.

Storing Your Configuration


Before coding the SMTemplate class functionality, we’ll need a place to store some configuration details. You can do this in multiple ways, i.e. by defining config options as class constants, by defining them as constants in the smtemplate.php file, or by keeping them in a separate config file. I prefer the last option, so I’ll create an smtemplate_config.php file. Smarty needs configuration for the template, compiled template, cache, and config directories. Later, we might also add SMTemplate specific options to our config file, but for now, this will do:

/**
* @file
* Configuration file for the SMTemplate class
*/

$smtemplate_config =
array(
'template_dir' => 'views/',
'compile_dir' => 'lib/smarty/templates_c/',
'cache_dir' => 'lib/smarty/cache/',
'configs_dir' => 'lib/smarty/configs/',
);

Building the SMTemplate Class


The SMTemplate class will load this config file, and pass the options to Smarty. Before we can pass the options, we’ll need an object of class Smarty. Our SMTemplate class could extend the Smarty class, but I prefer to use a private instance variable to contain the Smarty object. So far, we have the following for our SMTemplate class:

/**
* @file
* Wrapper for Smarty Template Engine
*/

require_once('smarty/Smarty.class.php');
require_once('smtemplate_config.php');

class SMTemplate{

private $_smarty;

function __construct(){
$this->_smarty = new Smarty();

global $smtemplate_config;
$this->_smarty->template_dir = $smtemplate_config['template_dir'];
$this->_smarty->compile_dir = $smtemplate_config['compile_dir'];
$this->_smarty->cache_dir = $smtemplate_config['cache_dir'];
$this->_smarty->configs_dir = $smtemplate_config['configs_dir'];
}
}

Rendering templates


As you can see, our class is still pretty pathetic, as it can’t render anything. We’ll solve this issue by adding a render function, which loads a template and displays it.

function render($template){
$this->_smarty->display($template . '.tpl');
}

In order to render anything, we’ll need to create a template file, and then call the render function from our index.php file. The template file will be pretty basic, containing a simple html page. Name it “home.tpl”, and place it inside our “views” directory.

<html>
<head>
<meta http-equiv="Content-type" content="text/html; charset=utf-8" />
<title>Home</title>
<link rel="stylesheet" href="/css/master.css" type="text/css" media="screen" title="no title" charset="utf-8" />
</head>
<body>
<p>Hello, World!</p>
</body>
</html>

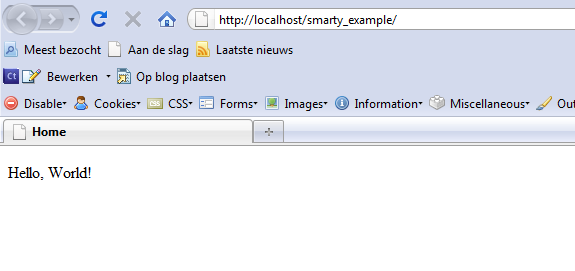
Now, all that is left is to create an SMTemplate object and render ‘home’. Open up index.php, add the following lines of code, and navigate there in your browser.

require_once('lib/smtemplate.php');

$tpl = new SMTemplate();
$tpl->render('home');


Step 3: Assigning and Formatting Variables


If we couldn’t render anything dynamically, Smarty would be pretty useless. Luckily, we can assign variables to our smarty class, and display those in our template. We can also use some Smarty functions (well, modifiers actually) to format them the right way.

Passing an Array of Variables


Though Smarty supports the assignment of variables, our SMTemplate doesn’t (yet). We’ll provide the CodeIgniter-style of assignment, where you pass an array to the render function. You can adapt SMTemplate to support other methods as well; for example, assigning them to the object and then using __set to store them in an array is also a clean way. For this tutorial though, passing an array will do. Before assigning the variables, we’ll edit our template to something a little more dynamic. Saying hello to the world is customary for programmers, but not very useful, so let’s use a variable to determine who we’re hello-ing. Secondly, we’ll add today’s date to the message. Variables can be displayed by wrapping them in curly brackets.

<body>
<p>Hello, {$receiver}! It's {$date} today!</p>
</body>

If you refresh the page, you’ll see that the variables haven’t been filled in, since we didn’t set them. Setting variables can be done using smarty->assign, so let’s assign them. The render function will now take an optional data array as a second argument.

function render($template, $data = array()){
foreach($data as $key => $value){
$this->_smarty->assign($key, $value);
}
$this->_smarty->display($template . '.tpl');
}

It still won’t work, because we don’t pass in an array when calling our render function. We can easily do this, by altering a few lines in our index.php file.

$data = array(
'receiver' => 'JR',
'date' => time(),
);

$tpl = new SMTemplate();
$tpl->render('home', $data);

If you refresh now, the page will say something like “Hello, JR! It’s 1282810169 today!”. Of course, this date isn’t really what we had in mind. It needs to be formatted, which brings us to the next section.

Using Modifiers to Format Variables


Smarty isn’t just a template engine that searches and replaces variables. It’s also a powerful framework, that allows you to save time by using things like modifiers, functions, and blocks. If we wish to format our date, for example, we can use the date_format modifier. To apply a modifier to a variable, simply put a pipe character and the modifier name behind it, followed by the optional arguments which are separated by colons. The date_format modifier takes a string argument, which represents the format the date will take, and an optional default date, which we won’t need. The following code will display the date as “day (in decimals) Month”.

<body>
<p>Hello, {$receiver}! It's {$date|date_format:"%d %B"} today!</p>
</body>

This should now give something of the form “Hello, JR! It’s 26 August today!” Now, maybe we want to make sure our receiver is uppercased. We can achieve that by using the upper modifier.

<body>
<p>Hello, {$receiver|upper}! It's {$date|date_format:"%d %B"} today!</p>
</body>

Now, if I alter index.php to pass ‘jr’ instead of ‘JR’, the template will still show ‘JR’. Easy, isn’t it? Next, we’ll include our templates in a default “layout”.


Step 4: Working With a Layout


Before we alter our SMTemplate class to enable layouts, we’ll create a layout first. Create a new directory named “layouts” inside our “smarty_example” folder and move home.tpl there. Rename it to ‘page.tpl’. We’ll remove our previous ‘hello world’ content, and put two horizontal lines in. Our content will be placed in between these lines.

<html>
<head>
<meta http-equiv="Content-type" content="text/html; charset=utf-8" />
<title>Home</title>
<link rel="stylesheet" href="/css/master.css" type="text/css" media="screen" title="no title" charset="utf-8" />
</head>
<body>
<hr />
<hr />
</body>
</html>

Of course, this won’t cut it, since Smarty won’t know where to insert our content. There is more than one way to get content from another template inside of our layout, and I’ll use Smarty’s fetch function. This function returns our template as text, instead of displaying it. This means we can fetch the template, and then assign it to a variable for use within our template! This variable’s name is yours to choose. I prefix my special variables with __, to distinguish them from the other variables I use. I’ll call this one ‘content’, since we’re assigning our page content to it.

<body>
<hr />
{$__content}
<hr />
</body>

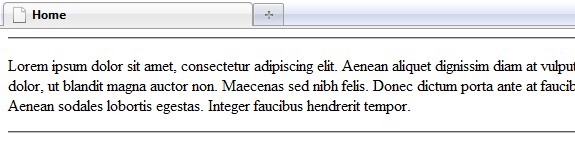
This concludes our layout, so let’s create some templates to use as content. I’ll create a ‘hello’ template, which will contain a standard ‘hello world’ line, and a ‘lipsum’ template, which holds some Lorem Ipsum text. Don’t forget to give these templates a .tpl extension.

<p>Hello, World!</p>

<p>Lorem ipsum dolor sit amet, consectetur adipiscing elit. Aenean aliquet dignissim diam at vulputate. Aenean nec ligula ac dolor fringilla pharetra. Cras in augue ac tellus dictum pellentesque. Integer elementum tempus lectus, non rutrum sem viverra a. Sed tincidunt sollicitudin dolor, ut blandit magna auctor non. Maecenas sed nibh felis. Donec dictum porta ante at faucibus. Morbi massa tellus, pulvinar id porta id, imperdiet vel nibh. Donec lectus nulla, porttitor a tempor id, cursus vitae leo. Nulla eget nunc eu lorem posuere hendrerit ut ac urna. Aenean sodales lobortis egestas. Integer faucibus hendrerit tempor. </p>

Adapting our SMTemplate class to use a layout is also extremely easy. We’ll first set up a configuration option for the layouts directory, like we did for our views.

/**
* @file
* Configuration file for the SMTemplate class
*/

$smtemplate_config =
array(
'layouts_dir' => 'layouts/',
'template_dir' => 'views/',
'compile_dir' => 'lib/smarty/templates_c/',
'cache_dir' => 'lib/smarty/cache/',
'configs_dir' => 'lib/smarty/configs/',
);

Next, we’ll change our render function. We’ll supply the layout as an optional third parameter, and let it default to ‘page’. Then, we’ll fetch the requested template, assign it to the $__content variable, and display our layout.

function render($template, $data = array(), $layout = 'page'){
foreach($data as $key => $value){
$this->_smarty->assign($key, $value);
}
$content = $this->_smarty->fetch($template . '.tpl');
$this->_smarty->assign('__content', $content);
$this->_smarty->display($layout . '.tpl');
}

There are a couple of things to consider, regarding this code. First of all, we haven’t told Smarty where to find our layouts yet. We can do that by adding a template dir, but this approach means we can’t give our layouts the same name as our templates – Smarty wouldn’t know which one to pick. We could solve this by giving our layouts a different extension, or by setting and resetting our template directory inside our render function, or by using more advanced Smarty functions. For now, we’ll just settle with the constraint that layouts and views can’t have the same name. We can add our layouts directory using the addTemplateDir() function.

function __construct(){
$this->_smarty = new Smarty();

global $smtemplate_config;
$this->_smarty->template_dir = $smtemplate_config['template_dir'];
$this->_smarty->addTemplateDir($smtemplate_config['layouts_dir']);  // <- new line
$this->_smarty->compile_dir = $smtemplate_config['compile_dir'];
$this->_smarty->cache_dir = $smtemplate_config['cache_dir'];
$this->_smarty->configs_dir = $smtemplate_config['configs_dir'];
}

Let’s check it out by changing our index.php file again.

require_once('lib/smtemplate.php');

$tpl = new SMTemplate();
$tpl->render('hello');

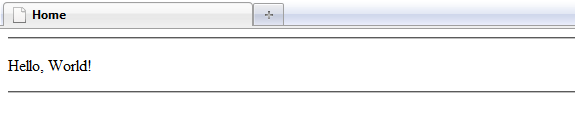
It works!


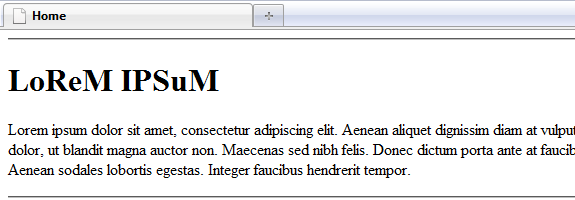
And if we change it to render ‘lipsum’, it works as well:


Step 5: Creating Your Own Modifiers


As the final part of this tutorial, I’ll introduce one of Smarty’s more advanced features, that make it more than a simple templating engine. Smarty contains a number of standard functions and modifiers, but it’s also extremely easy to create your own. Let’s have a look at the modifier we used to format our date:

{$date|date_format:'%d %B'}


If you want a custom modifier, all you need to do is write a PHP function.


This will actually result in a call to the function smarty_modifier_date_format(), with $date and our format string as arguments. This function will return a string, and this string will be displayed. So if you want a custom modifier, all you need to do is write a PHP function. As an example, we’ll write a modifier called ‘weirdcase’, which will uppercase all consonants and lowercase all vowels, i.e. ‘Lorem Ipsum’ becomes ‘LoReM IPSuM’. To do this, create a file called ‘modifier.weirdcase.php’ in the ‘lib/smarty/plugins’ folder. Our modifier will take only one argument, the string that needs to be altered.

/**
* Smarty weirdcase modifier plugin
*
* Type:     modifier
* Name:     weirdcase
* Purpose:  turn consonants into uppercase and vowels into lowercase
* @param string
* @return string
*/

function smarty_modifier_weirdcase($string){

}

We can get our result by defining an array ‘vowels’, turning our string into an array and then traversing it, and checking whether each character is in our vowels array. If it is, we lowercase it, otherwise, we uppercase it. The modified characters are then appended to a result variable.

function smarty_modifier_weirdcase($string){
$str_array = str_split($string);
$result = '';
$vowels = array('a', 'e', 'i', 'o', 'u');

foreach ($str_array as $char){
if (in_array($vowels, $char)) $result .= strtolower($char);
else $result .= strtoupper($char);
}

return $result;
}

This should do the trick, so let’s check it out. Edit the ‘lipsum.tpl’ template and add an h1 containing our weirdcased ‘Lorem Ipsum’ to it.

<h1>{'Lorem Ipsum'|weirdcase}</h1>
<p>Lorem ipsum dolor sit amet, consectetur adipiscing elit. Aenean aliquet dignissim diam at vulputate. Aenean nec ligula ac dolor fringilla pharetra. Cras in augue ac tellus dictum pellentesque. Integer elementum tempus lectus, non rutrum sem viverra a. Sed tincidunt sollicitudin dolor, ut blandit magna auctor non. Maecenas sed nibh felis. Donec dictum porta ante at faucibus. Morbi massa tellus, pulvinar id porta id, imperdiet vel nibh. Donec lectus nulla, porttitor a tempor id, cursus vitae leo. Nulla eget nunc eu lorem posuere hendrerit ut ac urna. Aenean sodales lobortis egestas. Integer faucibus hendrerit tempor. </p>


Step 6: Conclusion


Although there is a lot more to Smarty than I could fit within this tutorial, hopefully this should provide you with a basic knowledge of how to work with it. You essentially already know everything you need to know. You should also be able to determine whether you like the idea of using this templating framework or not by now. The more advanced topics, such as filters and blocks, are useful, however, you’ll still do fine without them. You can find documentation on the more advanced features at the Smarty website. Thanks for reading!
"
read more

Top 15 Podcasts All Web Developers Should Follow

Top 15 Podcasts All Web Developers Should Follow: "
As web developers, we’re always trying to get better at what we do. One of the best ways to do that is to listen to what other developers have to share. And even if you’re not learning, it’s still fun to hear what other devs are talking about. Today, I’ll share 15 podcasts that you should definitely check out.


1. Yahoo! Theater


It seems that as often as a few times a month, Yahoo! brings in developers on the cutting edge of web technology to keep their employees up to date. For the benefit of the rest of us, these talks are recorded and published. You’ll find well-known devs like Douglas Crockford and NNicolas Zakas, and talks on everything from performance and accessibility to JavaScript and the DOM.


2. The Dev Show


This may be my favourite show from this list. The Dev Show, hosted weekly by Dan Benjamin and Jason Seifer, will give you a carefully curated set of development-related links (usually with a web dev slant) to enjoy. As an added bonus, you can watch the show live on Tuesdays at 1pm EST.


3. The Changelog


The tagline for the Changelog says it all: “Open Source moves fast. Keep up.” This podcast, and the accompanying blog, is all about keeping you updated with the latest in Open Source Technology. It’s hosted by Adam Stacoviak and Wynn Netherland, and seems to be the official Github podcast.


4. jQuery Podcast


If you’re familiar with jQuery (and you probably are), you know there’s a podcast to go with it. Each week, hosts Ralph Whitbeck and Rey Bango bring you the latest in jQuery news, as well as great interviews with important people in the jQuery community. You can listen in to the jQuery wisdom of people like Remy Sharp, Yehuda Katz, Cody Lindley, and our own Jeffrey Way, among so many others.


5. SitePoint


Sitepoint is a great resource for anyone interesting in technology, design, and even business. Books, courses, forums, blogs, articles, they’ve got it all. Of course, there’s a podcast too: check it out to find out what’s going on in the web industry.


6. WebPulp


According to the site, WebPulp is “a podcast about technology that powers the web.” In each podcast, host Josh Owens interviews someone from behind the scenes of a well-known webapp; you’ll find out what hardware and software it takes to run apps like the 37signals apps, or GitHub.


7. The WordPress Podcast


It’s pretty apparent that both Nettuts+ readers and writers are big fans of WordPress. If you can’t get enough WordPress goodness, you’ll probably want to sign up for the WordPress Podcast, “a weekly podcast with news, interviews and plugin tips.” There’s a bonus here: one of the most recent interviewees was none other than Collis Ta’eed, CEO of Envato.


8. EE Podcast


If you’re a user of Ellis Lab’s Expression Engine, you’ll enjoy the EE Podcast (Ellis Lab is the company behind CodeIgniter; in fact, EE is build completely on CI). Each week, Ryan Irelan and Lea Alcantara will fill in you on a certain aspect of of EE deveopment.


9. CSS Tricks Screencasts


If you’re a web developer, you’re probably pretty familiar with Chris Coyier’s website CSS Tricks. Besides his excellent articles, Chris occasionally puts out a screencast every few weeks. With his relaxed style, you’ll learn about a random—but always practical—part of web development in each episode.


10. The Big Web Show


Hosted by Jeffrey Zeldman and Dan Benjamin, the Big Web Show “features special guests and topics like web publishing, art direction, content strategy, typography, web technology, and more. It’s everything web that matters.” You’ll listen to interviews in which famous web personalities like Eric Meyer, Jason Fried, Nicole Sullivan, Ethan Marcotte, and other professionals you should know open their minds and let you learn from the best. You can catch this show live on Thursdays a 1PM EST. Just like the Dev Show and the EE Podcast, the Big Web Show is part of Dan Benjamin’s incredible 5by5 podcast network.


11. Think Vitamin Radio


You may be familiar with Carsonified, the company behind many web dev / design training initiatives (including the Future of Web Design and Future of Web Apps confernces). On Think Vitamin, Carsonified’s “blog about the web”, you can catch Think Vitamin Radio, “a bi-weekly chat about web design, development, and entrepreneurship.”


12. The Userability Podcast


User Interface Engineering “is a leading research, training, and consulting firm specializing in web site and product usability.” You can take advantage of some of the free usability training they offer in their podcast, the Userability Podcast.


13. jQuery for Designers


This is a great resource for any beginner (and even intermediate) jQuery developers. In each episode, Remy Sharp will explain how to create an popular web effect using jQuery. You’ll learn how to build pop-up bubbles, sliding headers, and simple tabs.


14. Nettuts+ iTunes


Of course, Nettuts+ publishes screencasts, too! For your convenience, you can get these in an iTunes feed, or subscribe to them on YouTube.


Bonus: HuffDuffer


HuffDuffer is a site created by Jeremy Keith; it allows you to easily create your own podcasts. From the tag cloud above, you can see that a lot of the content being collected is related to web development. Check it out!


Get Listening!


I’m sure most developers listen to the occasional podcast. Have I missed your favourite podcast? Let us all know in the comments!
"
read more

14 Helpful jQuery Tricks, Notes, and Best Practices

14 Helpful jQuery Tricks, Notes, and Best Practices: "

If there is one bad thing about jQuery, it’s that the entry level is so amazingly low, that it tends to attract those who haven’t an ounce of JavaScript knowledge. Now, on one hand, this is fantastic. However, on the flip side, it also results in a smattering of, quite frankly, disgustingly bad code (some of which I wrote myself!).


But that’s okay; frighteningly poor code that would even make your grandmother gasp is a rite of passage. The key is to climb over the hill, and that’s what we’ll discuss in today’s tutorial.


1. Methods Return the jQuery Object


It’s important to remember that most methods will return the jQuery object. This is extremely helpful, and allows for the chaining functionality that we use so often.

$someDiv
.attr('class', 'someClass')
.hide()
.html('new stuff');


Knowing that the jQuery object is always returned, we can use this to remove superfluous code at times. For example, consider the following code:


var someDiv = $('#someDiv');
someDiv.hide();


The reason why we “cache” the location of the someDiv element is to limit the number of times that we have to traverse the DOM for this element to once.


The code above is perfectly fine; however, you could just as easily combine the two lines into one, while achieving the same outcome.


var someDiv = $('#someDiv').hide();


This way, we still hide the someDiv element, but the method also, as we learned, returns the jQuery object — which is then referenced via the someDiv variable.


2. The Find Selector


As long as your selectors aren’t ridiculously poor, jQuery does a fantastic job of optimizing them as best as possible, and you generally don’t need to worry too much about them. However, with that said, there are a handful of improvements you can make that will slightly improve your script’s performance.


One such solution is to use the find() method, when possible. The key is stray away from forcing jQuery to use its Sizzle engine, if it’s not necessary. Certainly, there will be times when this isn’t possible — and that’s okay; but, if you don’t require the extra overhead, don’t go looking for it.

// Fine in modern browsers, though Sizzle does begin 'running'
$('#someDiv p.someClass').hide();

// Better for all browsers, and Sizzle never inits.
$('#someDiv').find('p.someClass').hide();


The latest modern browsers have support for QuerySelectorAll, which allows you to pass CSS-like selectors, without the need for jQuery. jQuery itself checks for this function as well.


However, older browsers, namely IE6/IE7, understandably don’t provide support. What this means is that these more complicated selectors trigger jQuery’s full Sizzle engine, which, though brilliant, does come along with a bit more overhead.


Sizzle is a brilliant mass of code that I may never understand. However, in a sentence, it first takes your selector and turns it into an “array” composed of each component of your selector.


// Rough idea of how it works
['#someDiv, 'p'];

It then, from right to left, begins deciphering each item with regular expressions. What this also means is that the right-most part of your selector should be as specific as possible — for instance, an id or tag name.

Bottom line, when possible:

  • Keep your selectors simple
  • Utilize the find() method. This way, rather than using Sizzle, we can continue using the browser’s native functions.
  • When using Sizzle, optimize the right-most part of your selector as much as possible.

Context Instead?


It’s also possible to add a context to your selectors, such as:

$('.someElements', '#someContainer').hide();

This code directs jQuery to wrap a collection of all the elements with a class of someElements — that are children of someContainer — within jQuery. Using a context is a helpful way to limit DOM traversal, though, behind the scenes, jQuery is using the find method instead.

$('#someContainer')
.find('.someElements')
.hide();

Proof


// HANDLE: $(expr, context)
// (which is just equivalent to: $(context).find(expr)
} else {
return jQuery( context ).find( selector );
}


3. Don’t Abuse $(this)


Without knowing about the various DOM properties and functions, it can be easy to abuse the jQuery object needlessly. For instance:


$('#someAnchor').click(function() {
// Bleh
alert( $(this).attr('id') );
});

If our only need of the jQuery object is to access the anchor tag’s id attribute, this is wasteful. Better to stick with “raw” JavaScript.

$('#someAnchor').click(function() {
alert( this.id );
});


Please note that there are three attributes that should always be accessed, via jQuery: “src,” “href,” and “style.” These attributes require the use of getAttribute in older versions of IE.


Proof


// jQuery Source
var rspecialurl = /href|src|style/;
// ...
var special = rspecialurl.test( name );
// ...
var attr = !jQuery.support.hrefNormalized && notxml && special ?
// Some attributes require a special call on IE
elem.getAttribute( name, 2 ) :
elem.getAttribute( name );

Multiple jQuery Objects


Even worse is the process of repeatedly querying the DOM and creating multiple jQuery objects.


$('#elem').hide();
$('#elem').html('bla');
$('#elem').otherStuff();


Hopefully, you’re already aware of how inefficient this code is. If not, that’s okay; we’re all learning. The answer is to either implement chaining, or to “cache” the location of #elem.


// This works better
$('#elem')
.hide()
.html('bla')
.otherStuff();

// Or this, if you prefer for some reason.
var elem = $('#elem');
elem.hide();
elem.html('bla');
elem.otherStuff();


4. jQuery’s Shorthand Ready Method


Listening for when the document is ready to be manipulated is laughably simple with jQuery.

$(document).ready(function() {
// let's get up in heeya
});

Though, it’s very possible that you might have come across a different, more confusing wrapping function.

$(function() {
// let's get up in heeya
});


Though the latter is somewhat less readable, the two snippets above are identical. Don’t believe me? Just check the jQuery source.


// HANDLE: $(function)
// Shortcut for document ready
if ( jQuery.isFunction( selector ) ) {
return rootjQuery.ready( selector );
}

rootjQuery is simply a reference to the root jQuery(document). When you pass a selector to the jQuery function, it’ll determine what type of selector you passed: string, tag, id, function, etc. If a function was passed, jQuery will then call its ready() method, and pass your anonymous function as the selector.


5. Keep your Code Safe


If developing code for distribution, it’s always important to compensate for any possible name clashing. What would happen if some script, imported after yours, also had a $ function? Bad stuff!


The answer is to either call jQuery’s noConflict(), or to store your code within a self-invoking anonymous function, and then pass jQuery to it.

Method 1: NoConflict


var j = jQuery.noConflict();
// Now, instead of $, we use j.
j('#someDiv').hide();

// The line below will reference some other library's $ function.
$('someDiv').style.display = 'none';

Be careful with this method, and try not to use it when distributing your code. It would really confuse the user of your script! :)

Method 2: Passing jQuery


(function($) {
// Within this function, $ will always refer to jQuery
})(jQuery);

The final parens at the bottom call the function automatically – function(){}(). However, when we call the function, we also pass jQuery, which is then represented by $.

Method 3: Passing $ via the Ready Method


jQuery(document).ready(function($) {
// $ refers to jQuery
});

// $ is either undefined, or refers to some other library's function.


6. Be Smart


Remember – jQuery is just JavaScript. Don’t assume that it has the capacity to compensate for your bad coding. :)


This means that, just as we must optimize things such as JavaScript for statements, the same is true for jQuery’s each method. And why wouldn’t we? It’s just a helper method, which then creates a for statement behind the scenes.

// jQuery's each method source
each: function( object, callback, args ) {
var name, i = 0,
length = object.length,
isObj = length === undefined || jQuery.isFunction(object);

if ( args ) {
if ( isObj ) {
for ( name in object ) {
if ( callback.apply( object[ name ], args ) === false ) {
break;
}
}
} else {
for ( ; i < length; ) {
if ( callback.apply( object[ i++ ], args ) === false ) {
break;
}
}
}

// A special, fast, case for the most common use of each
} else {
if ( isObj ) {
for ( name in object ) {
if ( callback.call( object[ name ], name, object[ name ] ) === false ) {
break;
}
}
} else {
for ( var value = object[0];
i < length && callback.call( value, i, value ) !== false; value = object[++i] ) {}
}
}

return object;
}

Awful


someDivs.each(function() {
$('#anotherDiv')[0].innerHTML += $(this).text();
});

  1. Searches for anotherDiv for each iteration
  2. Grabs the innerHTML property twice
  3. Creates a new jQuery object, all to access the text of the element.

Better


var someDivs = $('#container').find('.someDivs'),
contents = [];

someDivs.each(function() {
contents.push( this.innerHTML );
});
$('#anotherDiv').html( contents.join('') );

This way, within the each (for) method, the only task we're performing is adding a new key to an array…as opposed to querying the DOM, grabbing the innerHTML property of the element twice, etc.

This tip is more JavaScript-based in general, rather than jQuery specific. The point is to remember that jQuery doesn't compensate for poor coding.

Document Fragments


While we're at it, another option for these sorts of situations is to use document fragments.

var someUls = $('#container').find('.someUls'),
frag = document.createDocumentFragment(),
li;

someUls.each(function() {
li = document.createElement('li');
li.appendChild( document.createTextNode(this.innerHTML) );
frag.appendChild(li);
});

$('#anotherUl')[0].appendChild( frag );

The key here is that there are multiple ways to accomplish simple tasks like this, and each have their own performance benefits from browser to browser. The more you stick with jQuery and learn JavaScript, you also might find that you refer to JavaScript's native properties and methods more often. And, if so, that's fantastic!

jQuery provides an amazing level of abstraction that you should take advantage of, but this doesn't mean that you're forced into using its methods. For example, in the fragment example above, we use jQuery's each method. If you prefer to use a for or while statement instead, that's okay too!


With all that said, keep in mind that the jQuery team have heavily optimized this library. The debates about jQuery's each() vs. the native for statement are silly and trivial. If you are using jQuery in your project, save time and use their helper methods. That's what they're there for! :)


7. AJAX Methods


If you're just now beginning to dig into jQuery, the various AJAX methods that it makes available to us might come across as a bit daunting; though they needn't. In fact, most of them are simply helper methods, which route directly to $.ajax.


  • get
  • getJSON
  • post
  • ajax


As an example, let's review getJSON, which allows us to fetch JSON.


$.getJSON('path/to/json', function(results) {
// callback
// results contains the returned data object
});


Behind the scenes, this method first calls $.get.


getJSON: function( url, data, callback ) {
return jQuery.get(url, data, callback, 'json');
}

$.get then compiles the passed data, and, again, calls the 'master' (of sorts) $.ajax method.


get: function( url, data, callback, type ) {
// shift arguments if data argument was omited
if ( jQuery.isFunction( data ) ) {
type = type || callback;
callback = data;
data = null;
}

return jQuery.ajax({
type: 'GET',
url: url,
data: data,
success: callback,
dataType: type
});
}

Finally, $.ajax performs a massive amount of work to allow us the ability to successfully make asynchronous requests across all browsers!


What this means is that you can just as well use the $.ajax method directly and exclusively for all your AJAX requests. The other methods are simply helper methods that end up doing this anyway. So, if you want, cut out the middle man. It's not a significant issue either way.


Just Dandy


$.getJSON('path/to/json', function(results) {
// callback
// results contains the returned data object
});

Microscopically More Efficient


$.ajax({
type: 'GET',
url : 'path/to/json',
data : yourData,
dataType : 'json',
success : function( results ) {
console.log('success');
})
});


8. Accessing Native Properties and Methods


So you've learned a bit of JavaScript, and have learned that, for instance, on anchor tags, you can access attribute values directly:

var anchor = document.getElementById('someAnchor');
//anchor.id
// anchor.href
// anchor.title
// .etc

The only problem is that this doesn't seem to work when you reference the DOM elements with jQuery, right? Well of course not.

Won't Work


// Fails
var id = $('#someAnchor').id;

So, should you need to access the href attribute (or any other native property or method for that matter), you have a handful of options.

// OPTION 1 - Use jQuery
var id = $('#someAnchor').attr('id');

// OPTION 2 - Access the DOM element
var id = $('#someAnchor')[0].id;

// OPTION 3 - Use jQuery's get method
var id = $('#someAnchor').get(0).id;

// OPTION 3b - Don't pass an index to get
anchorsArray = $('.someAnchors').get();
var thirdId = anchorsArray[2].id;


The get method is particularly helpful, as it can translate your jQuery collection into an array.


9. Detect AJAX Requests with PHP


Certainly, for the huge majority of our projects, we can't only rely on JavaScript for things like validation, or AJAX requests. What happens when JavaScript is turned off? For this very reason, a common technique is to detect whether an AJAX request has been made with your server-side language of choice.


jQuery makes this ridiculously simple, by setting a header from within the $.ajax method.

// Set header so the called script knows that it's an XMLHttpRequest
// Only send the header if it's not a remote XHR
if ( !remote ) {
xhr.setRequestHeader('X-Requested-With', 'XMLHttpRequest');
}

With this header set, we can now use PHP (or any other language) to check for this header, and proceed accordingly. For this, we check the value of $_SERVER['HTTP_X_REQUESTED_WITH'].

Wrapper


function isXhr() {
return $_SERVER['HTTP_X_REQUESTED_WITH'] === 'XMLHttpRequest';
}


10. jQuery and $


Ever wonder why/how you can use jQuery and $ interchangeably? To find your answer, view the jQuery source, and scroll to the very bottom. There, you'll see:


window.jQuery = window.$ = jQuery;

The entire jQuery script is, of course, wrapped within a self-executing function, which allows the script to limit the number of global variables as much as possible. What this also means, though, is that the jQuery object is not available outside of the wrapping anonymous function.

To fix this, jQuery is exposed to the global window object, and, in the process, an alias - $ - is also created.


11. Conditionally Loading jQuery


HTML5 Boilerplate offers a nifty one-liner that will load a local copy of jQuery if, for some odd reason, your chosen CDN is down.

<!-- Grab Google CDN jQuery. fall back to local if necessary -->
<script src="http://ajax.googleapis.com/ajax/libs/jquery/1.4.2/jquery.min.js"></script>
<script>!window.jQuery && document.write('<script src="js/jquery-1.4.2.min.js"><\/script>')</script>

To 'phrase' the code above: if window.jQuery is undefined, there must have been a problem downloading the script from the CDN. In that case, proceed to the right side of the && operator, and insert a script linking to a local version of jQuery.


12. jQuery Filters


<script>
$('p:first').data('info', 'value'); // populates ${body}#39;s data object to have something to work with

$.extend(
jQuery.expr[":"], {
block: function(elem) {
return $(elem).css("display") === "block";
},

hasData : function(elem) {
return !$.isEmptyObject( $(elem).data() );
}
}
);

$("p:hasData").text("has data"); // grabs paras that have data attached
$("p:block").text("are block level"); // grabs only paragraphs that have a display of "block"
</script>


Note: jQuery.expr[':'] is simply an alias for jQuery.expr.filters.


13. A Single Hover Function


As of jQuery 1.4, we can now pass only a single function to the hover method. Before, both the in and out methods were required.

Before


$('#someElement').hover(function() {
// mouseover
}, function() {
// mouseout
});

Now


$('#someElement').hover(function() {
// the toggle() method can be used here, if applicable
});

Note that this isn't an old vs. new deal. Many times, you'll still need to pass two functions to hover, and that's perfectly acceptable. However, if you only need to toggle some element (or something like that), passing a single anonymous function will save a handful of characters or so!


14. Passing an Attribute Object


As of jQuery 1.4, we can now pass an object as the second parameter of the jQuery function. This is helpful when we need to insert new elements into the DOM. For example:


Before


$('<a />')
.attr({
id : 'someId',
className : 'someClass',
href : 'somePath.html'
});

After


$('</a>', {
id : 'someId',
className : 'someClass',
href : 'somePath.html'
});

Not only does this save a few characters, but it also makes for cleaner code. In addition to element attributes, we can even pass jQuery specific attributes and events, like click or text.


Thanks for reading!
"
read more

Quick Tip: Validate Email Addresses with PHP

Quick Tip: Validate Email Addresses with PHP: "
Email validation is a common task that most developers have to deal with on a regular basis. Far too often the complex approach is taken (regular expressions), when PHP 5 has a super simple way to validate / sanitize your email string.


Filtering Variables the PHP 5 Way


So what is the quick method to validating emails? The function called filter_var(). This function allows you to run your variable through a filter that you specify, and can either validate the variable, or return a sanitized string depending on the filter you choose.

What does this look like…

1
2
3
4
5
6
7
8
9
10
11
12
13
<?php

//Bad Email...

$badEmail = "bad@email";


//Run the email through an email validation filter.

if( !filter_var($badEmail, FILTER_VALIDATE_EMAIL) ){

echo "Email is no good.";

}else{

echo "Nice email.";

}


//Result - Email is no good.

?>

Alternatively you can use the sanitize filter, and it will remove any characters that aren’t valid.

1
2
3
4
5
6
7
8
9
<?php

//Crappy email.

$var="bad%%@em\#ail.com";


//Runs email through a sanitize filter

print filter_var($var, FILTER_SANITIZE_EMAIL);


//Result - bad@email.com

?>

As you can see these are super easy. You no longer have to worry about your regular expressions sucking. Php has you covered."
read more

Create a Sticky Note Effect in 5 Easy Steps with CSS3 and HTML5

Create a Sticky Note Effect in 5 Easy Steps with CSS3 and HTML5: "
In this tutorial, you’ll learn how to transform an HTML list into a wall of “sticky notes” that look and work like the following…
The effect is built up gradually and works on the latest Webkit browsers (Safari, Chrome), Firefox and Opera. Other browsers simply get some yellow squares.


Step 1: The HTML and Basic Squares


Let’s start with the simplest version that works across all browsers. As we are using HTML5 for the effect, the basic HTML of our sticky notes is an unordered list with a link containing all the other elements in each list item:

<ul>
<li>
<a href="#">
<h2>Title #1</h2>
<p>Text Content #1</p>
</a>
</li>
<li>
<a href="#">
<h2>Title #2</h2>
<p>Text Content #2</p>
</a>
</li>
[…]
</ul>

Notice that each note is surrounded by a link which is always a good element to use as it automatically means that our notes become keyboard accessible. If we used the list item for the effect we’d need to set a tabindex property to get the same access.

The CSS to turn this into the yellow squares is simple:

*{
margin:0;
padding:0;
}
body{
font-family:arial,sans-serif;
font-size:100%;
margin:3em;
background:#666;
color:#fff;
}
h2,p{
font-size:100%;
font-weight:normal;
}
ul,li{
list-style:none;
}
ul{
overflow:hidden;
padding:3em;
}
ul li a{
text-decoration:none;
color:#000;
background:#ffc;
display:block;
height:10em;
width:10em;
padding:1em;
}
ul li{
margin:1em;
float:left;
}

We reset things the browser normally gives us like margins and paddings and the list style to get rid of the bullets of the list.

We then give the UL element some padding and set its overflow property to hidden – this makes sure that when we float the list items later on they are contained in the list and the following elements in the document automatically clear the float.

We style the link as a yellow rectangle and float all of the list items to the left. The result is a series of yellow boxes for our list:

Step1: a series of yellow boxes

This works for every browser out there – including IE6. This is also where we end supporting this browser as we should not shoe-horn visual effects supported by modern technology into outdated one.


Step 2: Drop Shadows and Scribbly Font


Now it is time to add a drop shadow to the notes to make them stand out and to use a scribbly, hand-written font as the note font. For this we use the Google Fonts API and the font they provide us with, called “Reenie Beanie”. The easiest way to use this API is to play with the Google font previewer:

The Google font previewer allows you to play with the fonts API and get copy+paste CSS code

Using this, we get a simple line of HTML to include this new font into the page. This is supported by all modern browsers.

<link  href="http://fonts.googleapis.com/css?
family=Reenie+Beanie:regular"
rel="stylesheet"
type="text/css">

We then can set some padding to the headings in the sticky notes, and set the font of the paragraphs to the new font we included. Notice that Reenie Beanie needs to be big to be readable:

ul li h2{
font-size:140%;
font-weight:bold;
padding-bottom:10px;
}
ul li p{
font-family:'Reenie Beanie',arial,sans-serif;
font-size:180%;
}

In order to give the sticky notes a shadow to make them stand out from the page, we need to apply a box-shadow. For this, we must add a line for each of the different browsers we want to support to the style of the links:

ul li a{
text-decoration:none;
color:#000;
background:#ffc;
display:block;
height:10em;
width:10em;
padding:1em;
/* Firefox */
-moz-box-shadow:5px 5px 7px rgba(33,33,33,1);
/* Safari+Chrome */
-webkit-box-shadow: 5px 5px 7px rgba(33,33,33,.7);
/* Opera */
box-shadow: 5px 5px 7px rgba(33,33,33,.7);
}

The syntax is luckily the same for each: offset, spread and colour – in this case a dark grey with an opacity of 70%. Together with the new font our sticky notes now look like this:

Step2: adding new fonts and drop shadows


Step 3: Tilting the Notes


Disclaimer: Both the tilting of the notes and the zooming we’ll add in the next step were already explained in the past, in this article by Zurb, but lacked the support for other browsers, as they weren’t out at the time of writing. So big thanks to them for publishing this trick.

In order to tilt an element you use the transform:rotate property of CSS3, again adding the prefix for each of the browsers:

ul li a{
-webkit-transform:rotate(-6deg);
-o-transform:rotate(-6deg);
-moz-transform:rotate(-6deg);
}

This tilts all the links by six degrees to the left. Now to make the sticky notes appear to be randomly tilted, we can use the nth-child property of CSS3:

ul li:nth-child(even) a{
-o-transform:rotate(4deg);
-webkit-transform:rotate(4deg);
-moz-transform:rotate(4deg);
position:relative;
top:5px;
}
ul li:nth-child(3n) a{
-o-transform:rotate(-3deg);
-webkit-transform:rotate(-3deg);
-moz-transform:rotate(-3deg);
position:relative;
top:-5px;
}
ul li:nth-child(5n) a{
-o-transform:rotate(5deg);
-webkit-transform:rotate(5deg);
-moz-transform:rotate(5deg);
position:relative;
top:-10px;
}

This tilts every second link four degrees to the right, and offsets it a bit by five pixels from the top. Every third link gets tilted by three degrees to the left and pushed up five pixels. And every fifth link gets rotated five degrees to the right and offset ten pixels from the bottom. All in all this gives the impression of random sticky notes:

Step3: seemingly random sticky notes


Step 4: Zooming the Sticky Notes on Hover and Focus


To make a sticky note stand out we use a larger drop shadow and the scale transformation of CSS3. Again, we need to define these for each of the browsers:

ul li a:hover,ul li a:focus{
-moz-box-shadow:10px 10px 7px rgba(0,0,0,.7);
-webkit-box-shadow: 10px 10px 7px rgba(0,0,0,.7);
box-shadow:10px 10px 7px rgba(0,0,0,.7);
-webkit-transform: scale(1.25);
-moz-transform: scale(1.25);
-o-transform: scale(1.25);
position:relative;
z-index:5;
}

We also add a higher z-index to ensure that the enlarged sticky note covers the others. As we apply this on hover and focus,it means that moving the mouse over or tabbing to a link now makes it stand out:

Step4: Zooming the current sticky note


Step 5: Adding Smooth Transitions and Colors


The last step is to make the change from tilted to zoomed smooth and appealing rather than sudden. For this we use the CSS3 transition module in its different browser vendor implementations:

ul li a{
text-decoration:none;
color:#000;
background:#ffc;
display:block;
height:10em;
width:10em;
padding:1em;
-moz-box-shadow:5px 5px 7px rgba(33,33,33,1);
-webkit-box-shadow: 5px 5px 7px rgba(33,33,33,.7);
box-shadow: 5px 5px 7px rgba(33,33,33,.7);
-moz-transition:-moz-transform .15s linear;
-o-transition:-o-transform .15s linear;
-webkit-transition:-webkit-transform .15s linear;
}

In essence this says: if something is to change to this element, do not just switch to that other definition but do it gradually during a quarter of a second. As another extra, let’s add some colour into the mix by making every second sticky note green and every third light blue:

ul li:nth-child(even) a{
-o-transform:rotate(4deg);
-webkit-transform:rotate(4deg);
-moz-transform:rotate(4deg);
position:relative;
top:5px;
background:#cfc;
}
ul li:nth-child(3n) a{
-o-transform:rotate(-3deg);
-webkit-transform:rotate(-3deg);
-moz-transform:rotate(-3deg);
position:relative;
top:-5px;
background:#ccf;
}

In order to see the difference to the last step, you’d need to try the last demo out in a browser.

Step 5:Coloured and smoothly zooming sticky notes


Summary and Download


There you have it – smoothly animating and tilted sticky notes without any use of images or JavaScript – supported by Firefox, Opera, Safari and Chrome and falling back to a set of yellow boxes in older browsers. By clever use of the nth-child selector and CSS transformations and transitions, we saved ourselves some scripting. Further, Google’s Web Font API made it easy to use a custom font. Using both hover and focus for the effect also means that keyboard users can observe the results as well.

Download the sticky notes example as a zip.


About the Author


Christian Heilmann is an international Developer Evangelist who works for the Yahoo Developer Network in the lovely town of London, England. He’s written two books: “Beginning JavaScript with DOM Scripting and AJAX“, and “Web Development Solutions.”
"
read more